DDS All-On-T Full Arch Workflow - Surgical Guide, Temps & Finals
-
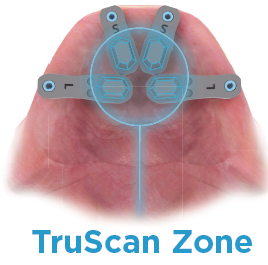
1Collect pre-surgical records (SG)Note: pre-surgery, it is highly recommended to use bone screws in the palate or on the arch for a consistent reference point to align to across all scans in the pre/post surgery records.
- Intraoral scans with existing prosthesis/dentition: Upper, lower & bite
- CBCT scan: Full arch with clear visualization of bone and soft tissue.
- Face scan or facial photos: Smile, retracted, and resting face views
-
2Send all records and instructions to DDL
- All scans and records collected above
- Rx with clear instructions, including:
- Description of # implants being placed and locations
- Implant system, size and reference #
- Information on screws being used
- Cylinders vs. direct to abutments?
- Want a temporary sent with the surgical guide, or planning to convert a denture or print a temporary in-office post-surgery?
- Material shade and pink tissue shade (if applicable)
- Any other special instructions
-
3Approve Surgical Guide PlanningDDL will reach out to you when the implant planning draft is finished and ready for your approval.
-
4Receive Surgical Guide, Perform Surgery
- Perform surgery using Surgical Guide provided by DDL for implant placement
-
5Do you need a temp design for in-office fabrication, or are you fabricating the temp another way?
-
6Collect and send post-surgery records
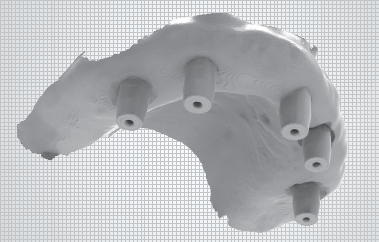
- Tissue scan with HS healing caps

- Scan with All-on-T scan flags on multi-unit abutments. This scan is most accurate when you ONLY scan the hexes, you do not need to scan the entire scan flag (see below)
- Tissue scan with HS healing caps
-
7Receive design back from DDLWe will return your design within 2 hours if you are printing the temporary arch in-office.
-
8Print or fabricate temporary arch in-office
-
9Seat temporary arch
-
10Allow patient to heal for 3-6 months
-
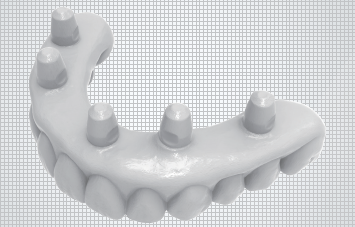
11Collect & Send Records for Final ProsthesisAfter sufficient time for healing, collect and send the following:
- Scans of existing: Upper, lower & bite (with existing prosthesis)
- Tissue scan with HS healing caps
- Scan of prosthesis outside of the mouth with Dual Align scan bodies
- Facial photos: Smile, retracted, and resting face view
- Instructions
- Material choice (monolithic zirconia or zirconia on Ti bar)
- Final material shade and pink tissue shade (if applicable)
- Any special instructions or changes needed
(do we need another ioConnect scan if temp arch fit was good?) -
12Receive and Seat Final Prosthesis
Did this answer your question?
If you still have a question, we’re here to help. Contact us