How To Uncrate (2014-2021 Only)

DifficultyModerate
Time Required1h
  1. 1

    Remove Cardboard Top, All Models

    • Remove screws securing the cardboard lid to the top of the crate, remove the cardboard lid.


  2. 2

    Remove Cardboard Sides, All Models

    • Remove screws securing the cardboard side covers to the sides of the crate, remove the cardboard side covers.


  3. 3

    Remove Top Boards, All Models

    • Remove screws securing cross boards to the top of the crate, remove cross boards from the top of the crate.


  4. 4

    Remove Nut, All Models

    • Remove 17mm nut from the hook securing the sidecar assembly to crate.
    • Carefully drive the hook through the sidecar crate panel to loosen the hook from sidecar assembly.

    sweetprocess.com/video/3zoRS8E.mp4

  5. 5

    Crate Side With Sidecar, All Models

    • Remove screws securing crate side panel with sidecar.
    • Metal brackets will act as a hinge to help safely lower sidecar.
    DO NOT remove the screws from the metal brackets on the left and right bottom corners of the panel.


  6. 6

    Lower Crate Side With Sidecar, All Models

    • Carefully lower the sidecar crate panel to the floor.

    sweetprocess.com/video/jqbahxV.mp4

  7. 7

    Remove Sidecar Frame Clamp, All Models

    • Remove two nuts that secures the sidecar frame clamp to the sidecar crate panel.
    • Remove the clamp and rubber protection.

    sweetprocess.com/video/7x88SWV.mp4

  8. 8

    Remove Sidecar Plastic, All Models

    • Remove plastic from the sidecar.


  9. 9

    Remove Wheels, All Models

    • Remove wheel assemblies from the bottom of the crate.


  10. 10

    Sidecar Brake Caliper, All Models

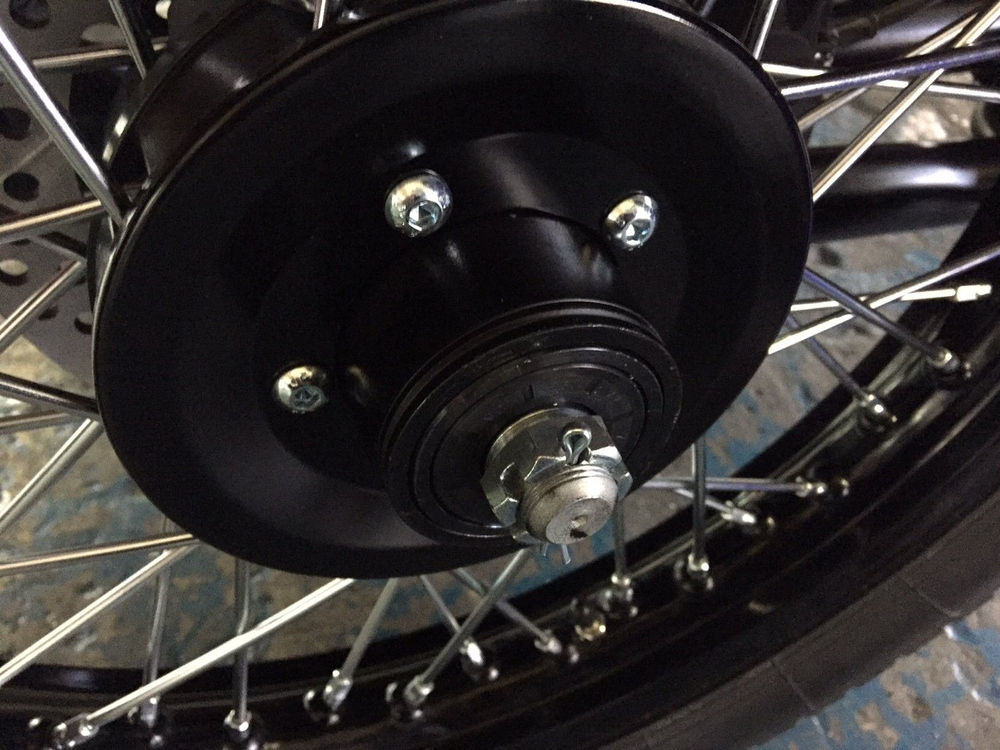
    • Cut zip-tie securing sidecar brake linkage.
    • Remove bolts securing sidecar brake caliper.
    • Remove rubber spacer from between brake pads of the sidecar brake caliper.
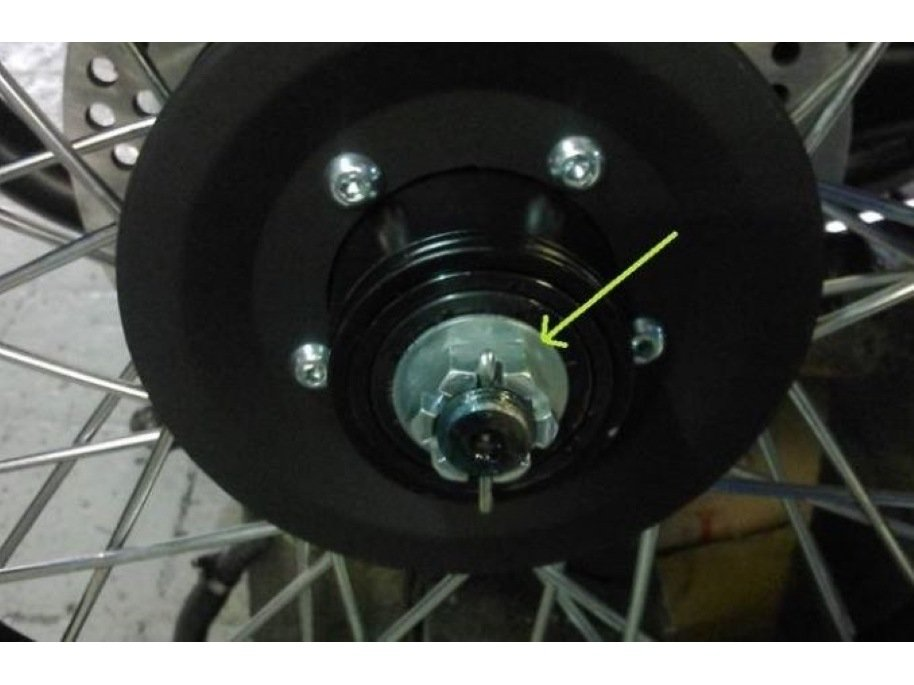
    • The factory has pre-assembled all components and included necessary hardware when required to assure proper alignment between the caliper and rotor.
    • DO NOT discard shims!
    If shims are present when loosening the sidecar brake caliper from the caliper mounting bracket, the shims will need to be re-installed in the exact same location as they were removed.

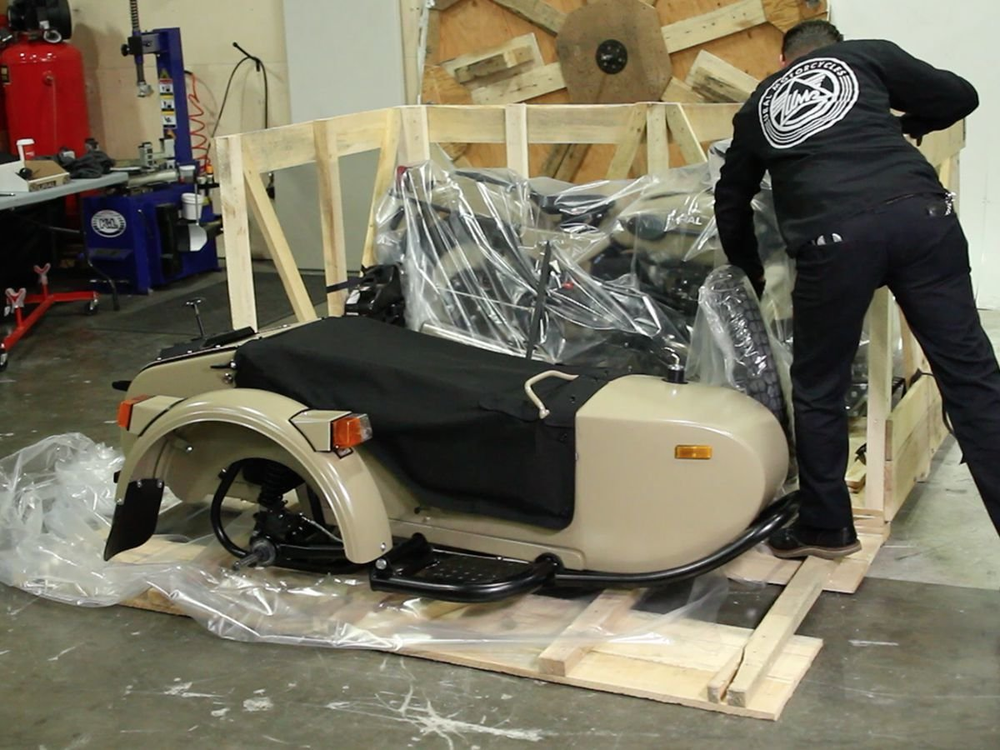
    sweetprocess.com/video/0dBVFG8.mp4

  11. 11

    Sidecar Axle, All Models

    • Remove cotter pin and castle nut from sidecar axle.
    • For 1WD Models
    • Be sure to remove 2 washers for installation in next step.

    sweetprocess.com/video/YRaDivk.mp4

  12. 12

    Install Sidecar Wheel, All Models

    • Lift the sidecar to install sidecar wheel assembly.
    • For 1WD Models
    • Install one (1) washer on each side of wheel before securing castle nut on 1WD disc brake models prior to 04/07/2016.
    • UPDATE: As of 04/07/2016 Starting with VIN# 226139 the factory introduced a new castle nut P/N: IMZ-8.1042-20170 for 1WD models eliminating the need for an outside washer. One (1) single washer is still required on the back of the hub.
    • Re-install castle nut and cotter pin from previous step.
    You may need an assistant to stabilize the sidecar during this step.

    sweetprocess.com/video/QWBpcKA.mp4

  13. 13

    Sidecar Wheel 1WD Model UPDATE

    • As of 04/07/2016 Starting with VIN# 226139 the factory introduced a new castle nut P/N: IMZ-8.1042-20170 for 1WD models. Castle nut is machined to interface the wheel spacer and is used without a washer. This castle nut is only applicable for motorcycles with VIN#'s starting from above mentioned VIN#.

  14. 14

    Sidecar Wheel 2WD Model UPDATE

    • As of 06/22/2018 Starting with VIN# 228778 all 2WD motorcycles have a washer installed under the crown nut of the sidecar wheel axle, P/N# 292917-P27S.

  15. 15

    Sidecar Brake Caliper, All Models

    • Install caliper over rotor.
    • Secure caliper onto caliper bracket.
    If shims were present when loosening the sidecar brake caliper from the caliper mounting bracket, the shims will need to be re-installed in the exact same location as they were removed.

    sweetprocess.com/video/rjoKSLz.mp4

  16. 16

    Remove Sidecar From Work Area, All Models

    • The sidecar assembly can now be removed from the crate onto a sidecar dolly.

    sweetprocess.com/video/v4qYC1N.mp4

  17. 17

    Remove Fluid Canister, Gear-Up Model

    • Remove screws securing the fluid canister and holder.
    • Remove canister and holder from work area.
    • Only our Gear Up model ships with fluid canisters in the factory crate.
    • It is an add-on accessory for all other models and will ship separately from our parts warehouse.

    sweetprocess.com/video/MZP8SRY.mp4

  18. 18

    Remove Rear Wheel Side Panel, All Models

    • Remove screws from the side crate panel near the rear wheel.
    • Clear panel from work area.

    sweetprocess.com/video/m81eCjZ.mp4

  19. 19

    Remove Long Side Panel, All Models

    • Remove screws and metal bracket from the remaining long side panel.
    • Carefully lower to the floor.

    sweetprocess.com/video/y08ksoG.mp4

  20. 20

    Remove Accessories, All Models

    • Remove any accessories attached to the side panel you just lowered.
    • Accessories vary by model.
    • Gear Up crates include (1) rear luggage rack.
    • Patrol and Retro crates include (1) passenger windshield.

    sweetprocess.com/video/OjV4UbR.mp4

  21. 21

    Remove Accessory Parts & Battery, All Models

    • Remove screws securing accessory parts kit and battery to bottom side of the crate.
    • Remove accessory parts kit and battery, stage for assembly to the motorcycle during the Ural set-up procedure.

    sweetprocess.com/video/R0ZMh82.mp4

  22. 22

    Remove Panel, All Models

    • Remove panel from work area.

    sweetprocess.com/video/69qQc69.mp4

  23. 23

    Remove Front Wheel Side Panel, All Models

    • Remove screws from the side crate panel near the front wheel.
    • Clear panel from work area.

    sweetprocess.com/video/e56DSQ2.mp4

  24. 24

    Remove Plastic, All Models

    • Remove plastic bag from motorcycle.

    sweetprocess.com/video/EBQZCPb.mp4

  25. 25

    Remove Front Axle Nut, All Models

    • Remove nut securing the front axle of the motorcycle to the bottom of the crate.

    sweetprocess.com/video/o82rSad.mp4

  26. 26

    Motorcycle Support, All Models

    • Remove nut securing both the front and rear motorcycle side supports to the bottom of the crate.
    You may need an assistant to stabilize the motorcycle during this step. 

    sweetprocess.com/video/GoMdiok.mp4

  27. 27

    Remove Motorcycle Support, All Models

    • Remove the front nut and bolt securing motorcycle side support to the motorcycle frame.
    • Repeat step for back nut and bolt.
    • Reinstall nut and bolt, they will be used later to connect sidecar.
    You may need an assistant to stabilize the motorcycle during this step. 

    sweetprocess.com/video/ABjpipx.mp4

  28. 28

    Lift Motorcycle, All Models

    • Using a lift or hoist raise the front of the motorcycle for installation of the front wheel.

    sweetprocess.com/video/9b87TbV.mp4

  29. 29

    Center Stand, All Models

    • Place the motorcycle on the center stand.

    sweetprocess.com/video/xRkLSOo.mp4

  30. 30

    Front Brake, All Models

    • Remove zip-tie securing hand brake lever on front master cylinder.

    sweetprocess.com/video/m8pOIjZ.mp4

  31. 31

    Front Axle, All Models Excluding Retro/M70

    • Loosen the front axle pinch bolt and retaining nut securing the front axle.

    sweetprocess.com/video/y0dqHoG.mp4

  32. 32

    Front Brake Caliper, All Models Excluding Retro/M70

    • Remove two bolts securing the upper caliper bracket and caliper to the lower axle caliper bracket.
    • Remove axle.
    • Remove the rubber spacer from between the brake pads of the front caliper.

    sweetprocess.com/video/OjMRFbR.mp4

  33. 33

    Front Axle, Retro/M70

    • Loosen the front axle pinch bolts and remove axle.
    • Axle is reverse thread. Note spacers and shim placement if present, reassemble in reverse order as removed.

    sweetprocess.com/video/R0o0S82.mp4

  34. 34

    Front Brake Caliper, Retro/M70

    • Remove two bolts securing the caliper.
    • Remove the rubber spacer from between the brake pads of the front caliper.

    sweetprocess.com/video/69qLu69.mp4

  35. 35

    Front Wheel, All Models Excluding Retro/M70

    • Install front wheel of the motorcycle.
    • Secure the upper caliper bracket and the lower axle caliper bracket before tightening the front axle.
    Make sure the caliper is fitted over the rotor and the lower axle caliper bracket is in place correctly.

    sweetprocess.com/video/e56QHQ2.mp4

  36. 36

    Front Wheel, Retro/M70

    • Install front wheel and axle including all spacers and shims in the same order as removed previously.
    • Tighten axle pinch bolts.
    • Remove the rubber spacer from between the brake pads of the front caliper.
    • Install the caliper over the rotor, reinstall the two 17mm bolts.

    sweetprocess.com/video/EBQoIPb.mp4

  37. 37

    Remove Motorcycle, All Models

    • Remove rear axle strap.
    • Lower the front of motorcycle and detach from lift or hoist.
    • Carefully lower motorcycle from center stand and roll from the bottom side of the crate.
    • Clear work area of in preparation for the Ural set-up procedure.
    • Remove wood crate panels, plastic sheeting, screws and other miscellaneous material’s that may pose a hazard.

    sweetprocess.com/video/o82yHad.mp4