Fundamentals for Digital Preparation
by Stephen T. True D.D.S.
Design and engineering win out over chemistry. A well-designed preparation will outlast a poorly designed one that depends on adhesion from cement.
Design and engineering win out over chemistry. A well-designed preparation will outlast a poorly designed one that depends on adhesion from cement.

-
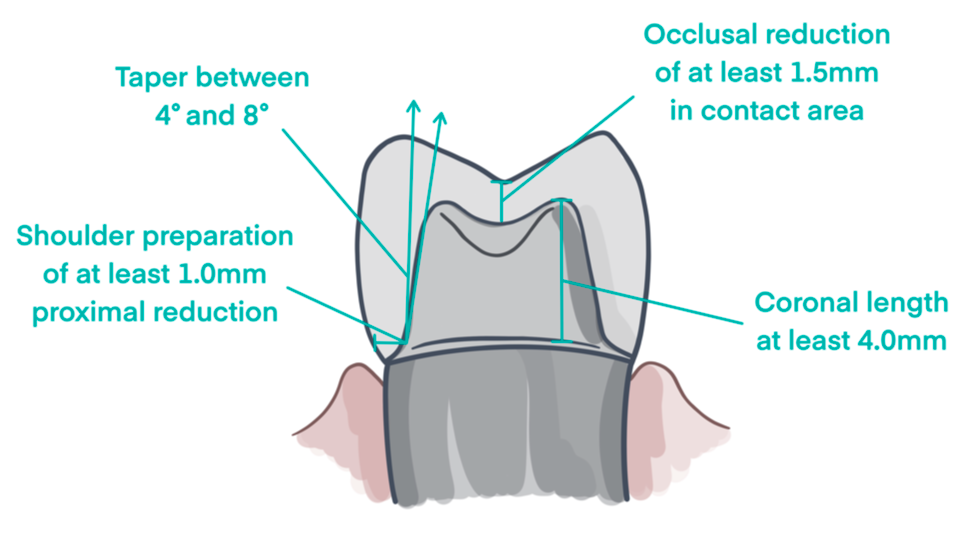
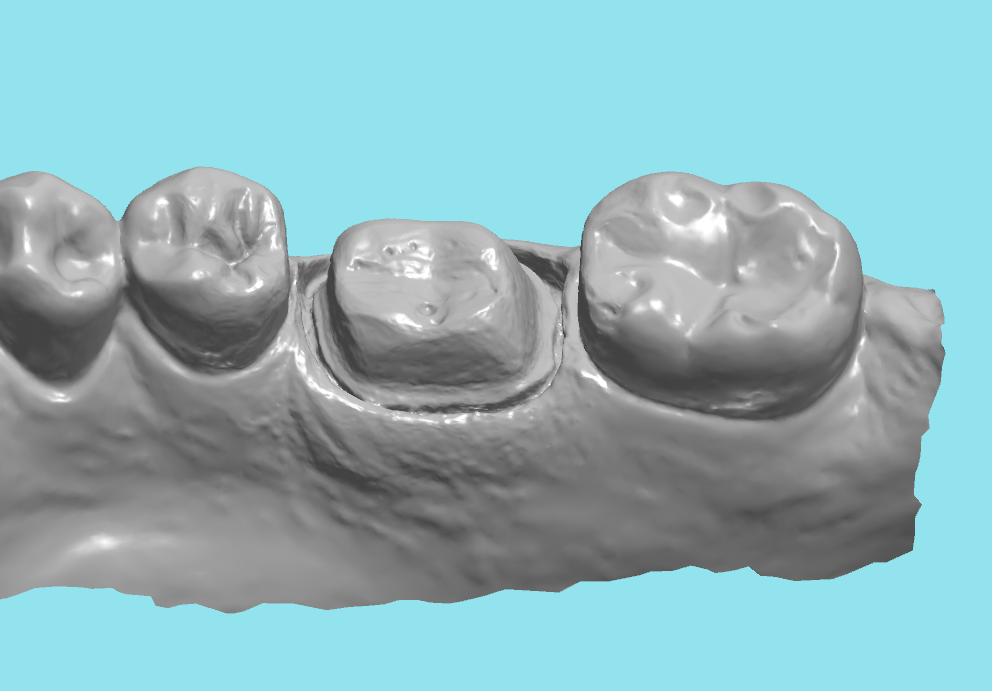
1Start with a well-designed preparation
- Parallel walls
- The goal is to have nearly parallel walls; be careful of undercuts!
- Taper the walls between 4° and 8°.

- Additional retention when needed
- Well-placed grooves and box forms increase retention, especially on short preps.

- Round edges
- Round edges are necessary. Sharp edges on the preparation create design challenges and compromise material strength.

- Reduction
- Taper the occlusal surface - a flat surface requires a thin restoration in the primary grooves. Proper reduction helps maintain adequate thickness, which strengthens the integrity of the restoration.

- Parallel walls
-
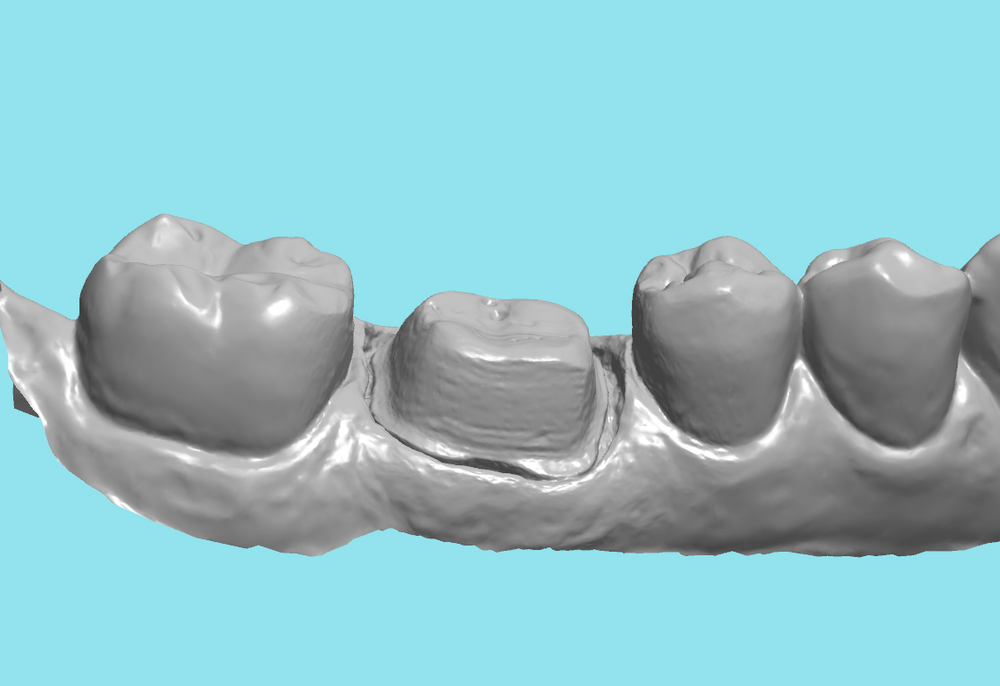
2Evaluate and Adjust Adjacent ContactsEvaluate adjacent contacts for the following and adjust as needed:
- Parallel with the prep and with each other for draw and breadth
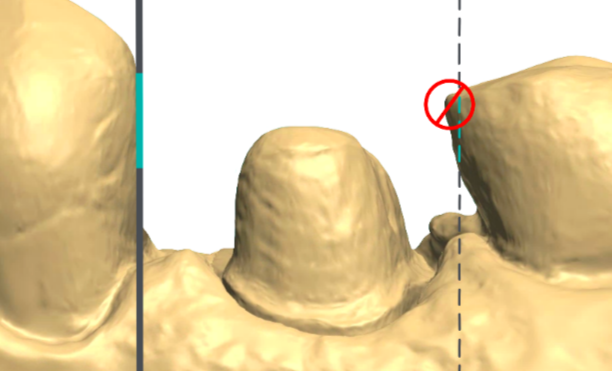
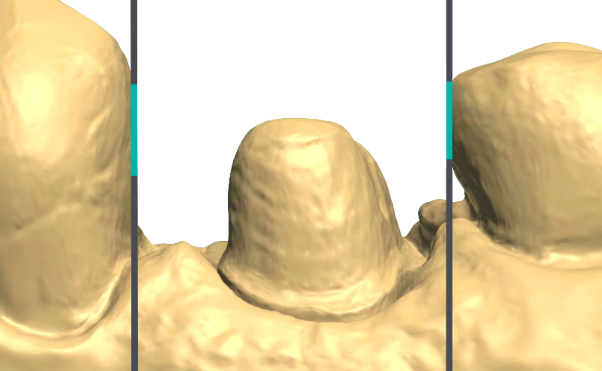
- Broad contacts for ideal restoration(s)
See step 4 of our Normal Case Protocol to see more details on which tools we recommend for contact adjustment. -
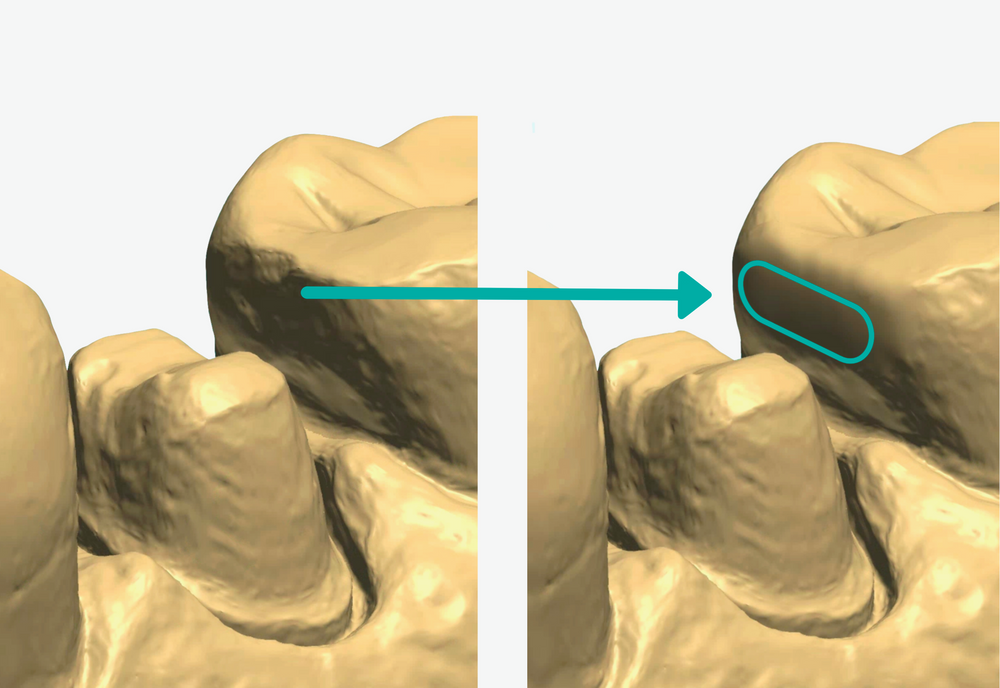
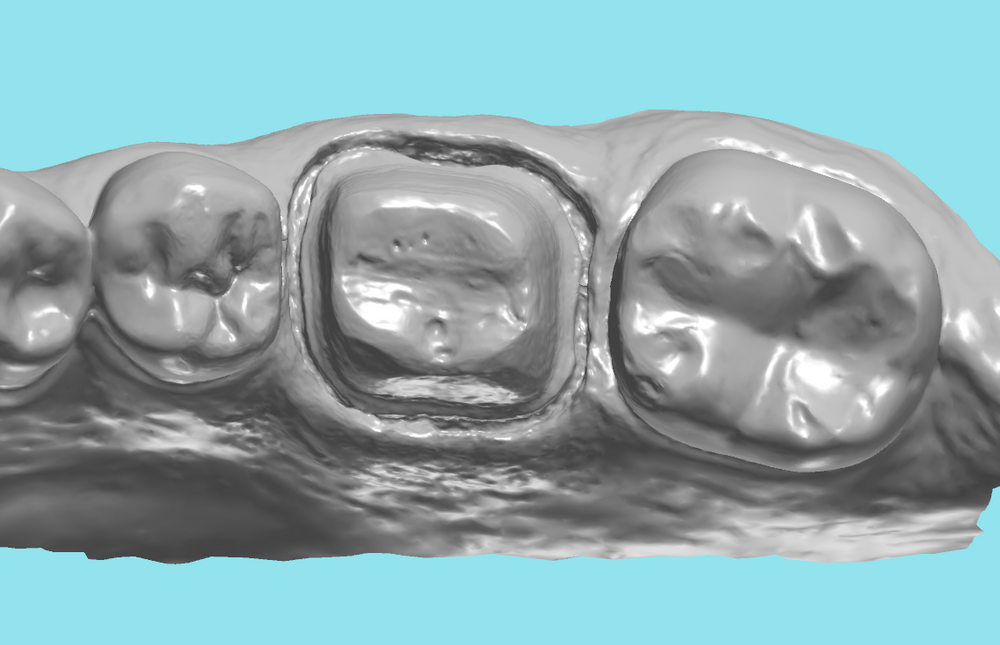
3Prepare for scanning
- Make sure the prep is CDC:
Dry, dry, dry!
Clean (margins)- Remember that tissue and tooth structure look the same to a scanner.
- Double pack the cord and remove the top one before taking the scan.

- Clean the margins with a micro brush.
- Beware of double margins! Double-check before scanning.

-
4Scan
- Be sure to use your scanner manufacturer's recommended scan pattern for the most accurate scan and best results.
-
5Evaluate the scan for margin clarity

Did this answer your question?
If you still have a question, we’re here to help. Contact us