N-Central - Remote Access and MFA Setup Guide for End Users - Authenticator App
Overview, Purpose, & Scope
This document is to guide end-users on how to access their PC remotely for the first time using NCentral.
Link to Autotask Ticket to Create or Edit this Procedure:
ww3.autotask.net/Autotask/AutotaskExtend/Execu...
This document is to guide end-users on how to access their PC remotely for the first time using NCentral.
Link to Autotask Ticket to Create or Edit this Procedure:
ww3.autotask.net/Autotask/AutotaskExtend/Execu...
-
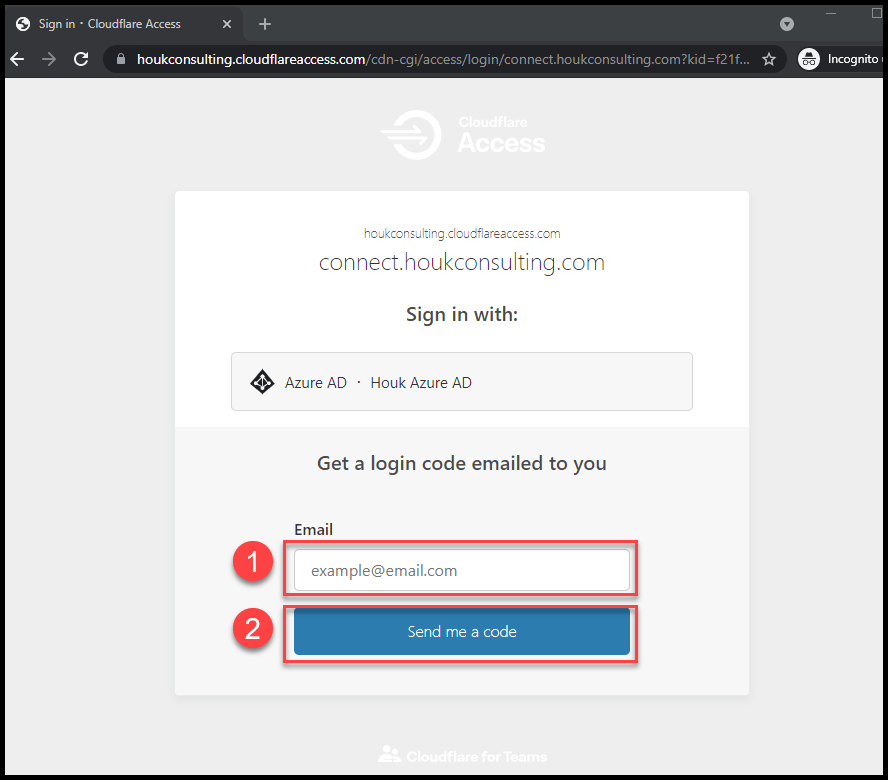
2Obtain a one-time access code.
- Submit your email address to get a one-time code
- Enter your email address.
- Click Send me a code.
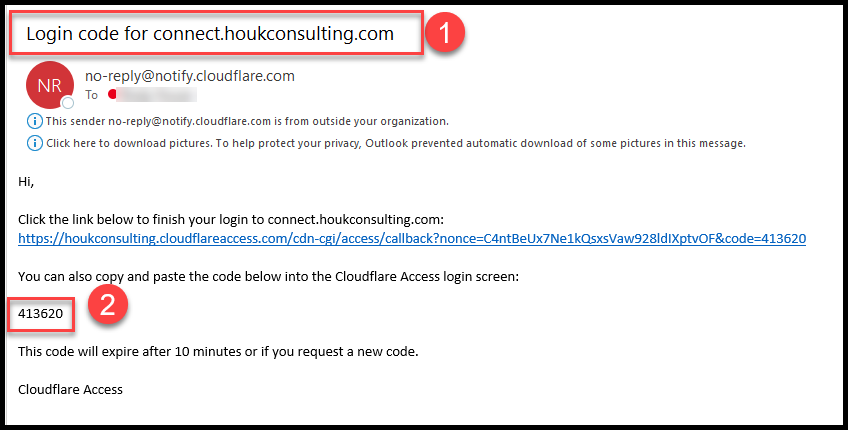
- Locate the one-time code.
- Locate an email named Login code for connect.houkconsulting.com and open the email.
- Locate the 6-digit code.
Note: Check your Junk Mail if you don't see the email in your Inbox.
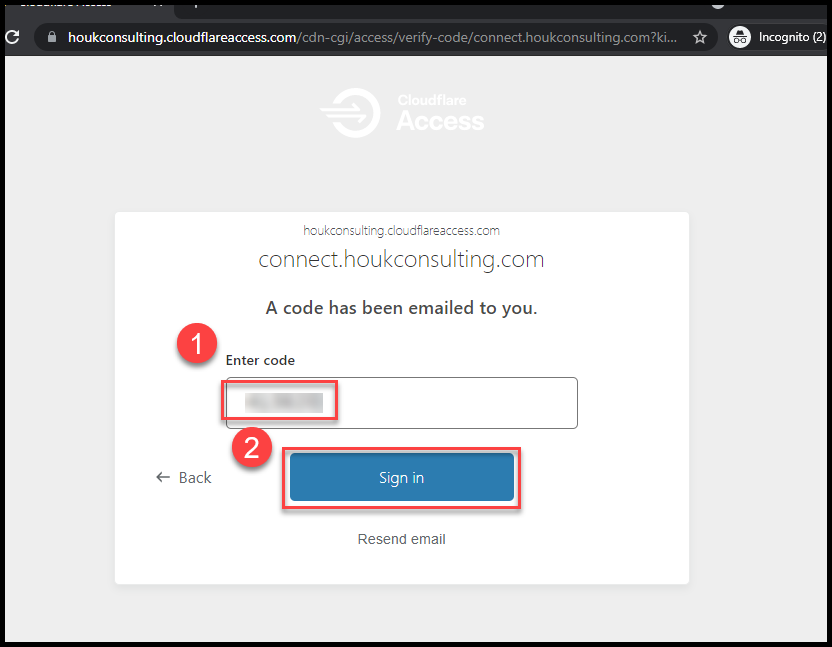
- Submit the one-time code.
- Enter the one-time code from the email into the sign-in prompt.
- Click Sign in.
- Submit your email address to get a one-time code
-
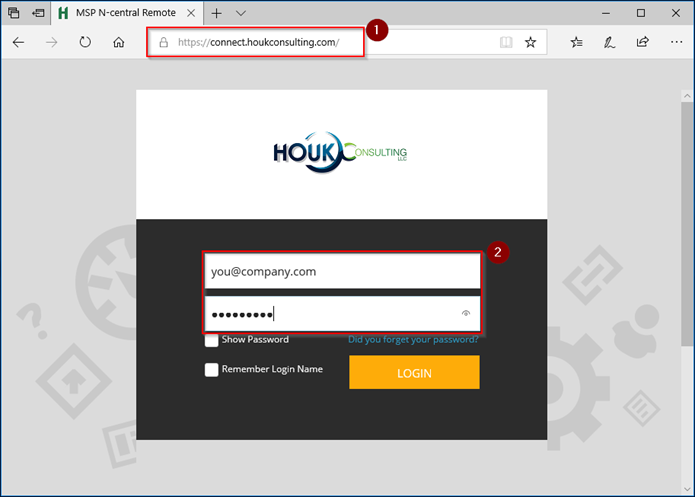
3Type in your email address and the password from the email you received from Next7.This password is different from your computer password. If you are unsure of your password, click the Did you forget your password link and follow the on-screen instructions.
-
4Setup Multifactor Authentication if you have not already
If you already have an app for generating multi-factor codes, you can use that (Examples are Google Authenticator, Duo, 1Password, and Authy). The below instructions are for those who need one for the first time.
- Download the Google Authenticator app from either the App Store or Google Play Store on your cell phone.
- Access either the Apple app store or the Google Play Store, search for, and download the Google Authenticator app.
- Apple App Store icon:
- Google Play Store icon:
- Apple App Store icon:
- Open the application once it has been installed
-
55. In the bottom right corner of Google Authenticator, tap the “+” symbol.
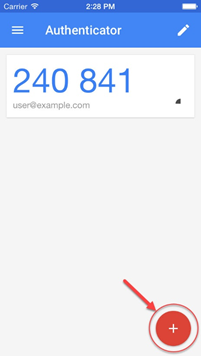
Select "Scan a QR code" if additional options appear.
-
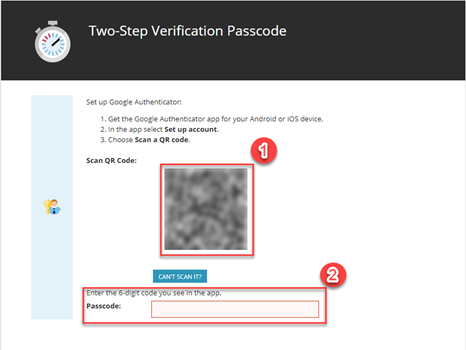
6Scan the QR code displayed on the screenPoint your phone at the QR Code displayed on the screen (1), and then enter the code on your phone in the box (2).
-
7Document backup login codesIf the 2 Factor code was added correctly, a page of recovery codes will show.
Document the backup codes and then click ‘Continue’ at the bottom of the screen.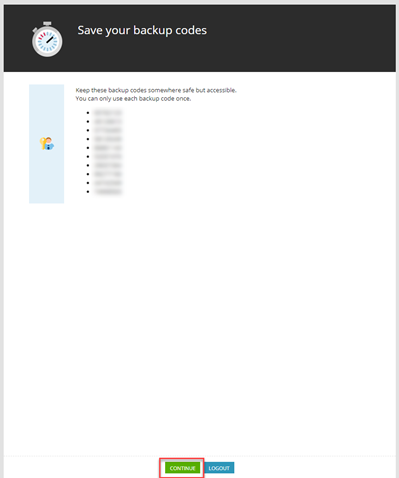
-
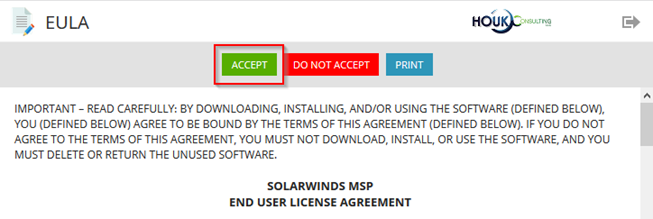
8Accept the EULA the first time logging in by clicking the Accept button.
-
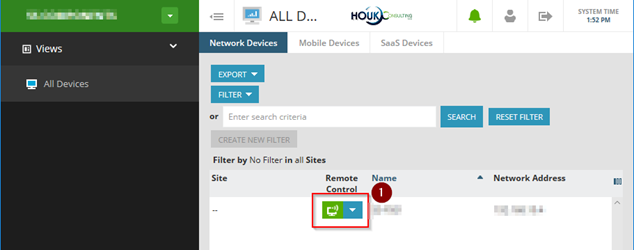
9Click on green icon next to your computer name.
-
10If this is the first time connecting, install the Take Control Viewer
- Click the link for Take Control Viewer (1) to download the installer.
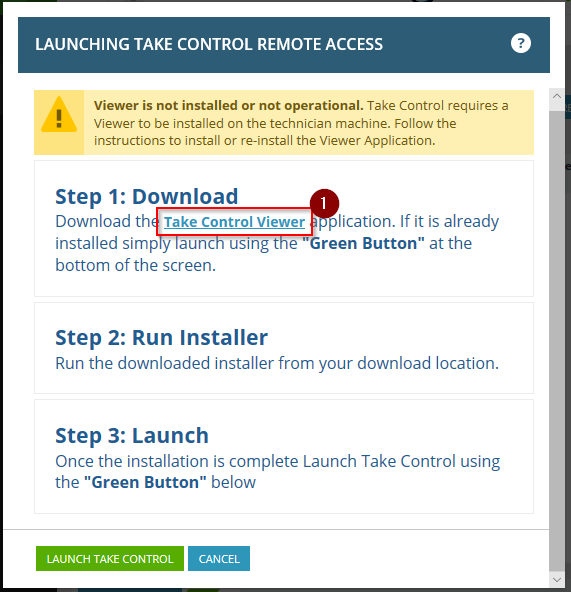
- Run the installer on the download prompt.

- Click OK when the installer completes
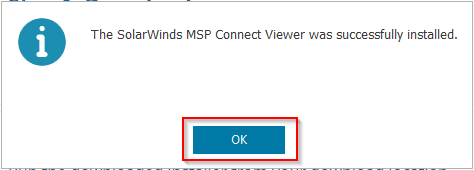
- Click Launch Take Control to open a session to the computer
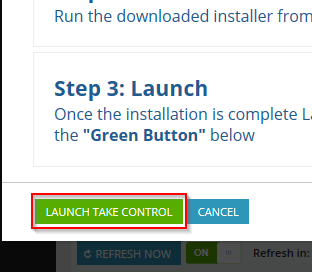
- Click the link for Take Control Viewer (1) to download the installer.
-
11You will now be connected to your work computerNOTE: When you sign into your computer you use the same username/password you use when you are physically sitting in front of the computer in the office. Do not use your email and password provided by Next7 in Step 2.
-
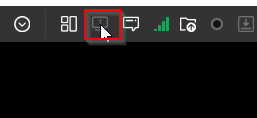
12If you need press Control-Alt-Delete on the remote machine, click Remote Desktop (1) in the top left, then Send CTRL+ALT+DEL (2).

-
13If your computer has multiple monitors, click Monitor icon at the top right to cycle through them.
Did this answer your question?