How to Create a Signature Stamp in Acrobat
The most useful stamp for lawyers who want to be paperless is a signature stamp—that is, one that lets you stamp a copy of your signature on a PDF document. A signature stamp is a custom stamp, so you have to create it. To do so, follow the steps below.
-
1Capture an image of your signatureYou can do this by:
- Scanning your signature into your computer (harder)
- Using your phone to capture your signature (easier)
-
2Find or move the image to your computerYou need to have the image available on the computer that your PDF software is on (i.e., Adobe Acrobat). The image (ideally) needs to be in .PNG format because then it will have a transparent background and look more natural when placed on top of a signature line in a PDF that is being "signed" by using the signature stamp.
-
3Use Slide Deck software to stage signature imageUsing Microsoft PowerPoint or Apple Keynote, place the image of your signature that you captured via scanning or by taking a photo. Put it into a blank slide so that you can screen capture it (and later use to load into Acrobat)
Or you can create a quasi-signature by picking a script font, as shown below. The one at the top (#3) is a font called 'Brush Script MT'.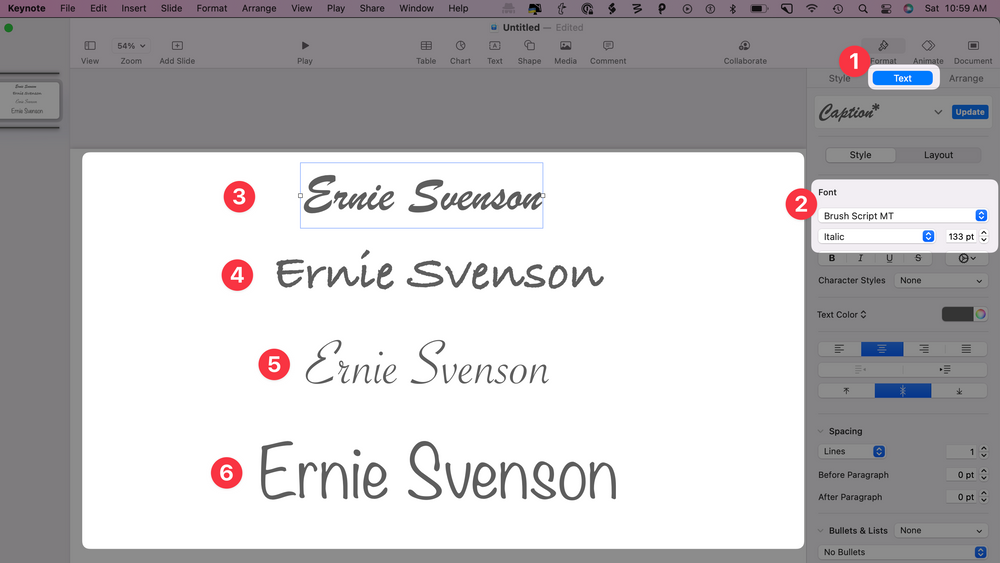
-
4Screencapture the imageWith the image staged in a blank slide in PowerPoint (or Keynote) you're ready to screen capture the image. Whether you use a Mac or PC, the built-in screenshot function will create a .PNG file, which is what you want.
On a Mac👇
With a Mac, the way to do a screenshot is to using this method.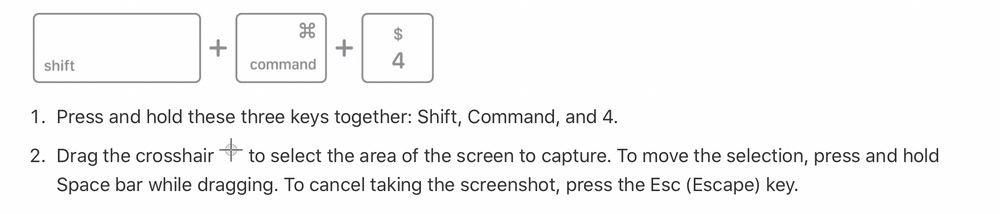
On a PC👇
If you are using a Windows PC, then follow this method. With the Snipping Tool do this👇
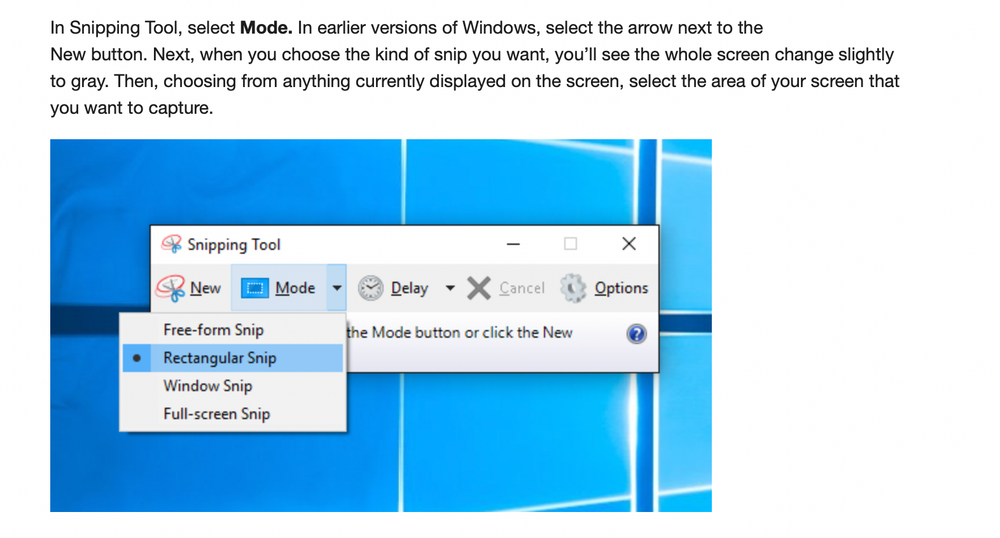
-
5Open PDF Software (Acrobat)Open the PDF software you're going to create the signature in. And this is where the signature will be when you need to use it in the future. That is, you'll have to use whatever software you create the signature stamp in.
-
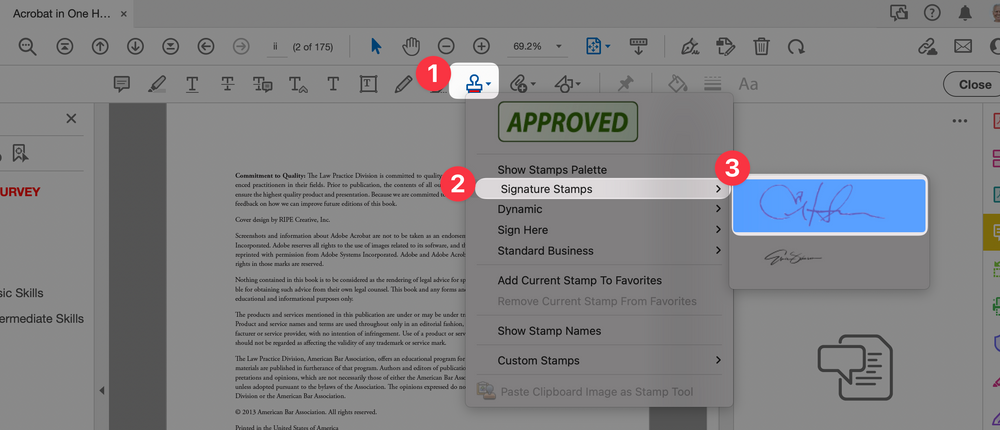
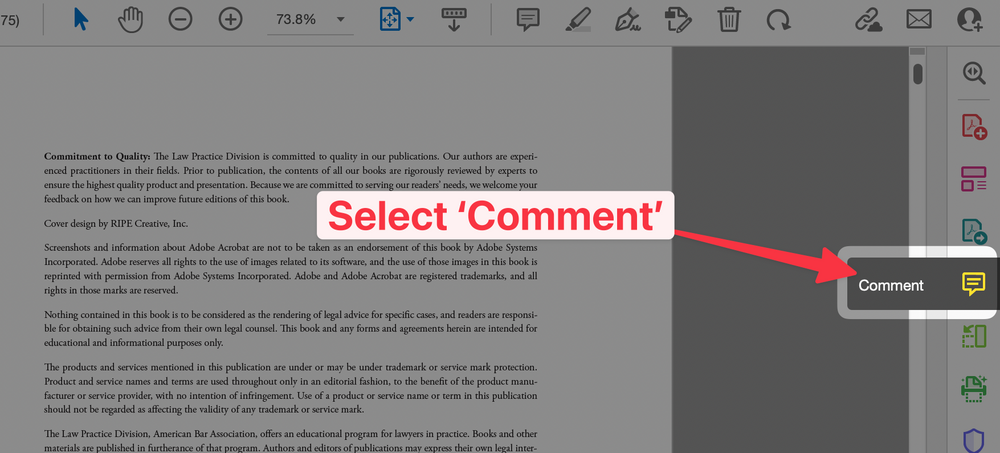
6Select 'Comment'
-
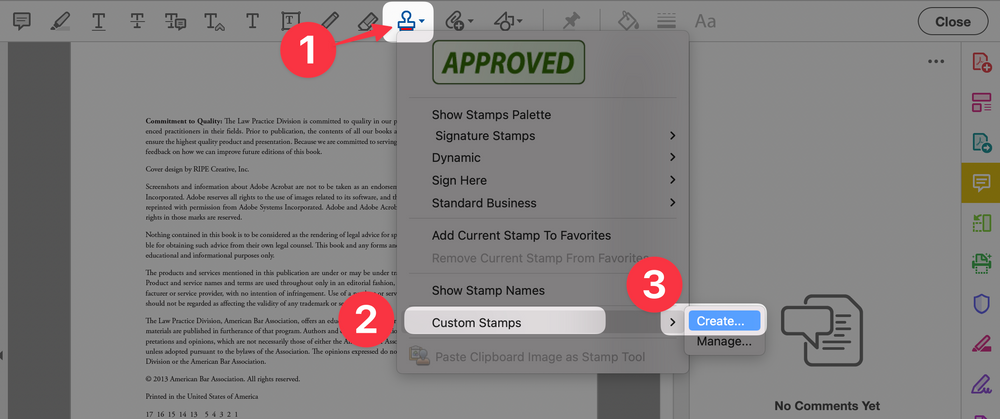
7Select "Create Custom Stamp"
- Select the Stamp icon from the toolbar
- Choose Custom Stamps
- Choose Create...
-
8Select the Image to be usedFrom the dialogue box that pops up...
1. Browse for the image to be used (make sure to use a .PNG file)
 2. Verify image is properly loaded
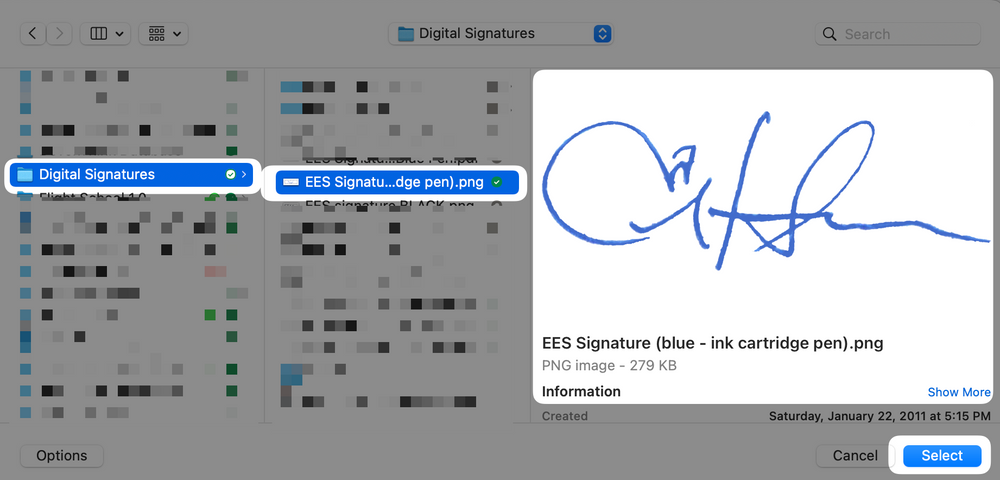 3. Choose Select
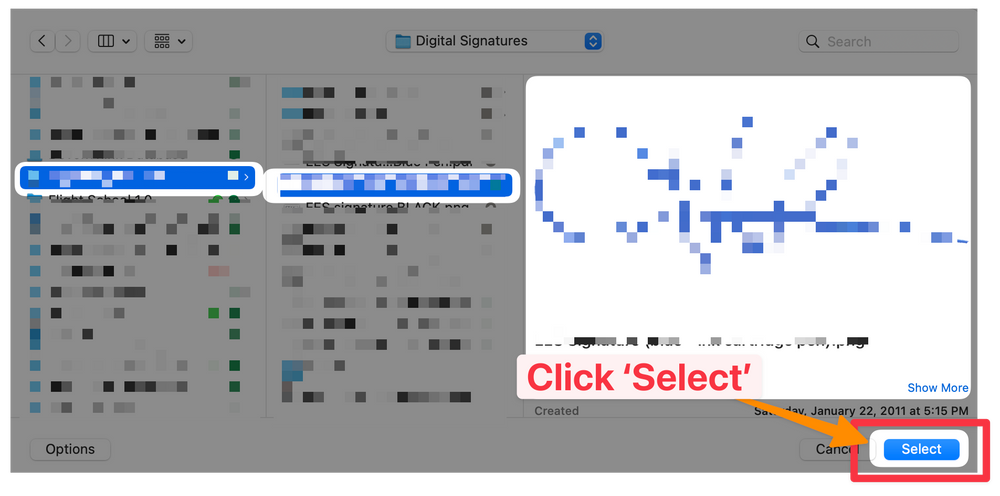
-
9You're now ready to use the signatureTo use the signature, follow this procedure.
:
The first steps will be as follows.👇- Select Stamp Tool (while in the Comments area)
- Pick the folder the stamp is in
- Select the stamp (you can have multiple signature stamps if you want)