Zapier Integration Guide
This guide describes how to integrate SweetProcess with Zapier.
Zapier, a web application tool that allows software and web applications to talk to one another, will help you connect your SweetProcess account to more than 500 applications, such as Slack, Mailchimp, Gmail and Evernote.
Using Zapier can allow you to do something automatically when an event happens inside SweetProcess. For example, if you want to create a new task in SweetProcess every time you an email with a specific subject or from a specific person, instead of entering the task data manually, Zapier will do all the heavy lifting in the background and automatically create it for you.
If you do not have a Zapier account, create one from zapier.com. Zapier offers a basic version of their product, for free.
Currently, we provide:
- trigger task complete;
- trigger task overdue;
- trigger procedure/policy/process approved; and
- action create task
(if you would like to see more please tell us).
As an example let's create a Zap which sends an email to you when a task is completed. We realise that SweetProcess itself already has this feature, but this is quite a simple example to illustrate how Zapier works without requiring any other 3rd party programs.
To understand how to use the "Create Task" action, let's create a Zap which creates a new task when a new email is sent to a specific email address. The email subject will be used as the task name.
If you need advice about integrating your SweetProcess account with Zapier, please contact us at support@sweetprocess.com and our engineers will be happy to help.
Zapier, a web application tool that allows software and web applications to talk to one another, will help you connect your SweetProcess account to more than 500 applications, such as Slack, Mailchimp, Gmail and Evernote.
Using Zapier can allow you to do something automatically when an event happens inside SweetProcess. For example, if you want to create a new task in SweetProcess every time you an email with a specific subject or from a specific person, instead of entering the task data manually, Zapier will do all the heavy lifting in the background and automatically create it for you.
Connect your SweetProcess account to your Zapier account
If you do not have a Zapier account, create one from zapier.com. Zapier offers a basic version of their product, for free.
- Navigate to the SweetProcess API Tokens page and create a new legacy token.
- Copy the newly generated token to use it on Zapier later:

- Navigate to SweetProcess Webhooks page and click on the "Add SweetProcess to Zapier" button

- You will be redirected to Zapier SweetProcess integration page, where you need to click on "Connect SweetProcess..." (if you were already logged in).
SweetProcess Zapier integration is currently in beta.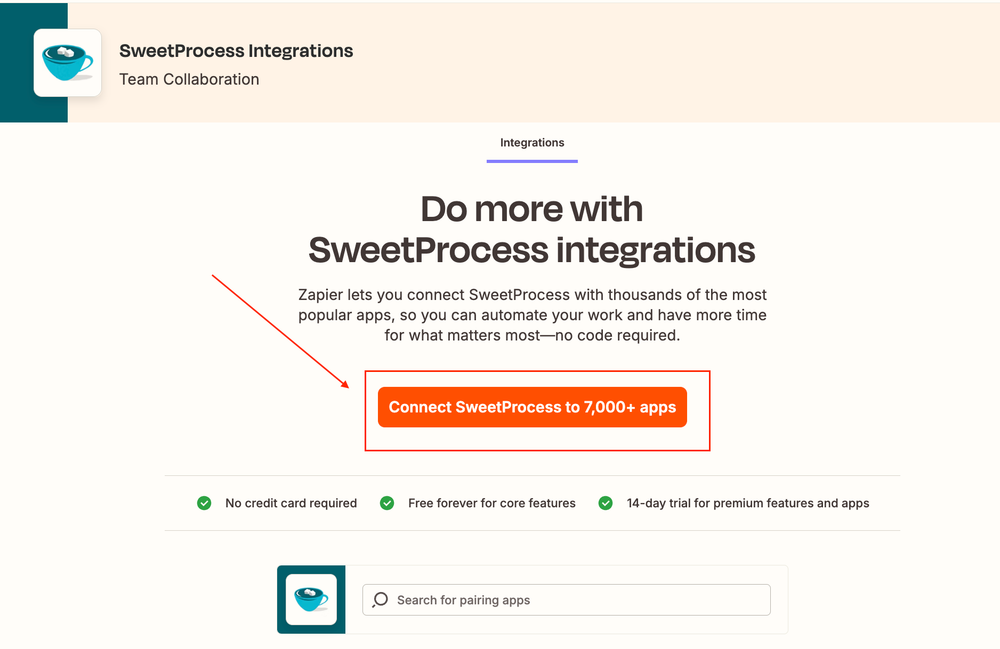
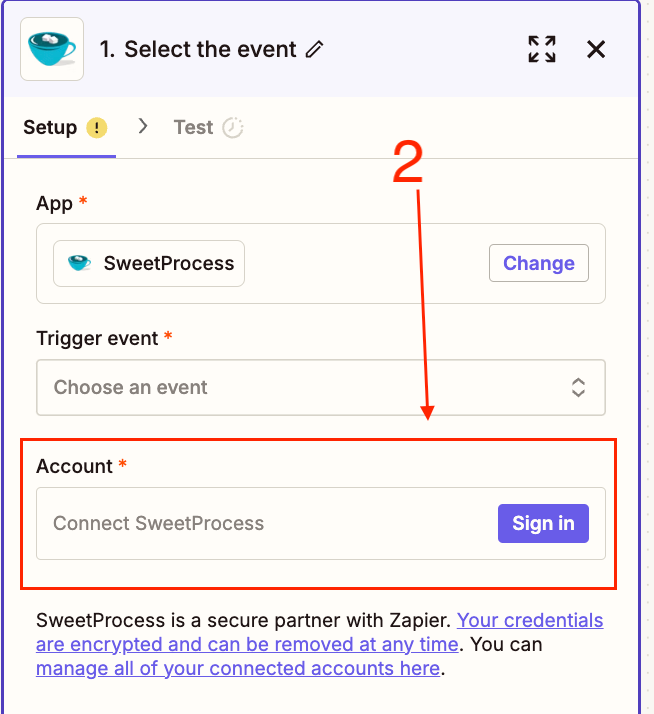
- You will be redirected to the Zapier Zap page to build your zap with SweetProcess integration already selected for you, but you need to setup with your SweetProcess account; so, click the SweetProcess integration button, then click sign in in the account section
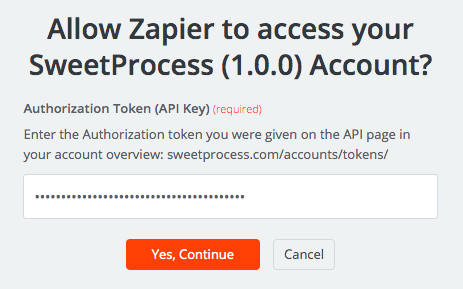
- A window asking for your account authorization token will pop up. Fill the form field with the token you generated in Step 2 and click on "Yes, Continue".
- Now that you have added your authorization token you will see your SweetProcess account connected to Zapier and ready to be used:
What SweetProcess Triggers and Actions are Supported?
Currently, we provide:
- trigger task complete;
- trigger task overdue;
- trigger procedure/policy/process approved; and
- action create task
(if you would like to see more please tell us).
- Triggers
- Task Completed
Will trigger when a task is completed.
Available output fields:Field Name Description Task instance ID The ID of created task Task name Name of created task API task instance URL URL of the created task in SweetProcess API App task instance URL URL of the created task in SweetProcess App Task started at Date and time when the task was started (the first step was checked off) Task scheduled start date time Date and time the task was scheduled to start Task completed at Date and time the task was completed Task due date Date and time the task is due Task template ID The ID of created task template (Task template define common fields for a series of tasks) API task template URL URL of the created task template in SweetProcess API Task assigner ID The ID of the team member who created the task Task assigner name The name of the team member who created the task Task assigner URL The URL of the team member who created the task in SweetProcess API Task assigner email The email of the team member who created the task Task assigned document ID The ID of the task associated document Task assigned document name The name of the task associated document Task assigned document type The type of task associated document (procedure or process) Task assigned to teammates A list of info about the teammates this task was assigned to Task assigned to teams A list of info about the teams this task was assigned to Task assigned to roles A list of info about the roles this task was assigned to - Task overdue
will trigger when the task falls overdue.
Available output fields:
Same as for completed task output fields - Procedure/Policy/Process approved
will trigger when a procedure/policy/process is approved
Available output fields:Field Name Description id the id of the document name document name content the procedure/policy steps (not for process) description procedure/process description (not for policy) private false if the document is public (not for process) created_at when the document was first created modified_at frequently changes. When sweetprocess last checked this document hashid a unique string that refers to this document slug part of the url which resembles the document name edited_at When last approved (or draft published if no approved version) approved_at When last approved - can be blank html_url the url inside the sweetprocess app for this document url the API url for this document current_version info about the current approved version, or draft if no approvals have been made author info about the last person to approve or edit a draft for this document approved_by info about person who approved the current_version original_author info about person who created the document
- Task Completed
- Actions
- Create Task
Create a new SweetProcess task.
Available output fields:
Same as for completed task output fields
- Create Task
Using the Task Completed Hook
As an example let's create a Zap which sends an email to you when a task is completed. We realise that SweetProcess itself already has this feature, but this is quite a simple example to illustrate how Zapier works without requiring any other 3rd party programs.
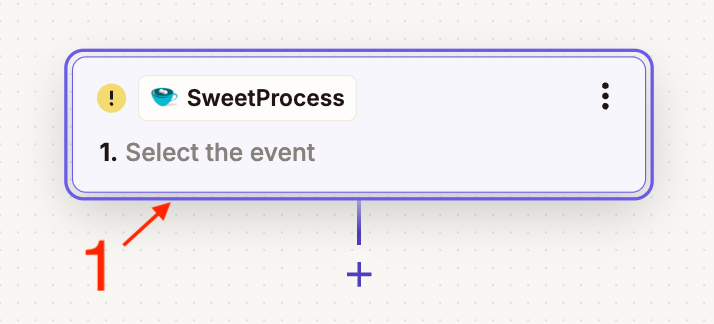
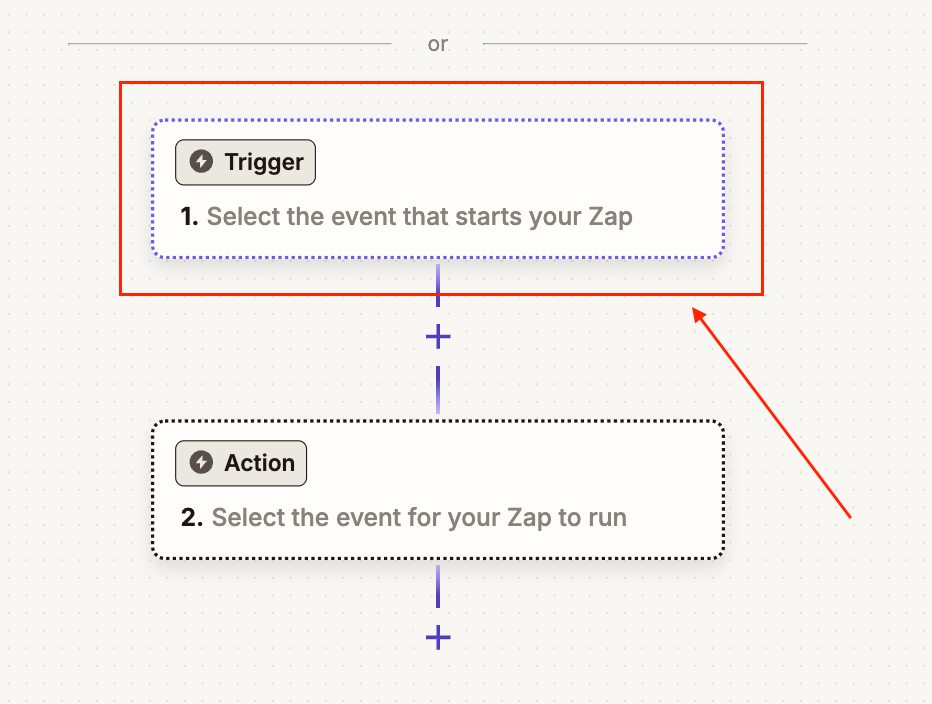
- Open Zapier Zaps page and click on the "Create Zap" button
- Click on the trigger section
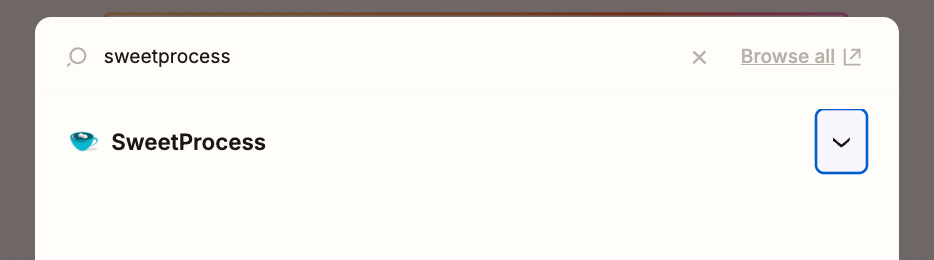
- Search for and select SweetProcess in the Trigger App list:
- In the "Select the event" Popup, Click "Choose an event" select field and Select the "Task Completed (Hook)" and click on "Continue" button:
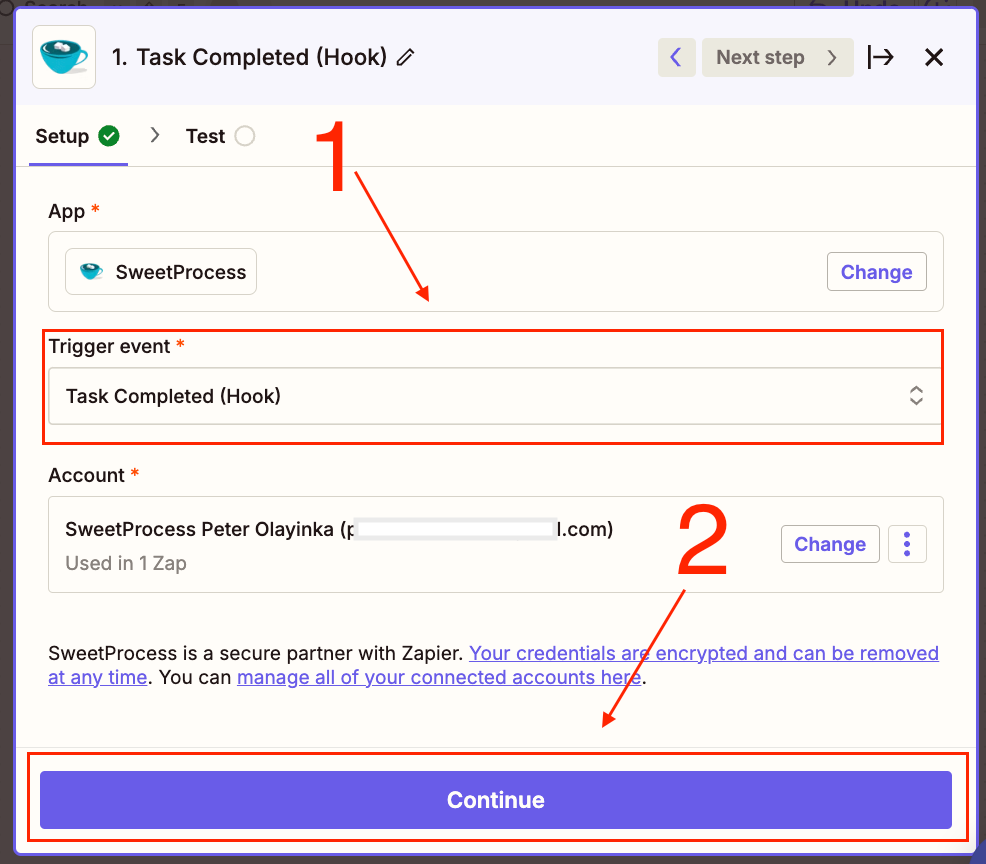
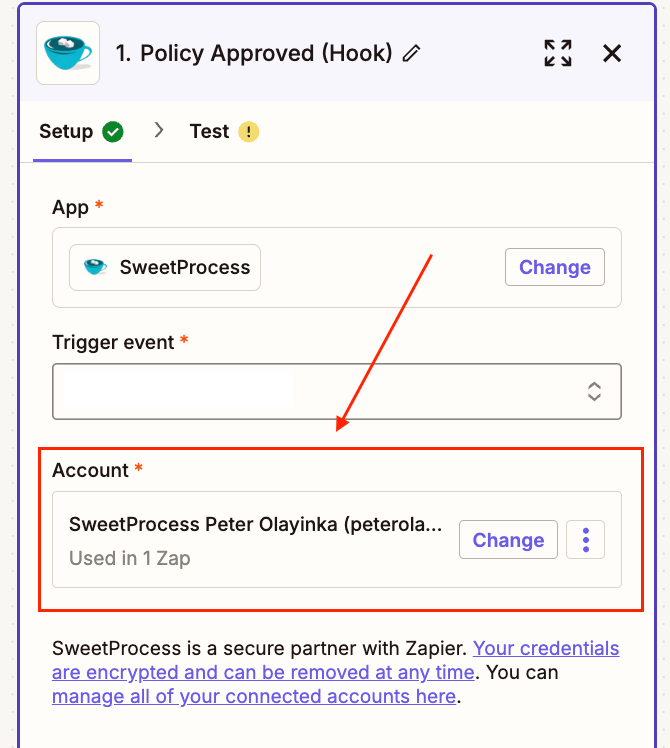
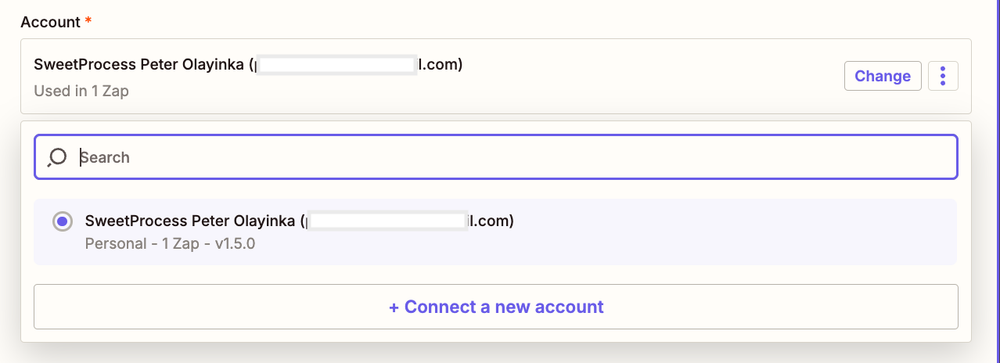
- NOTE: You can also change your account, in case you have multiple SweetProcess account setup in your zapier connections.
- In the "Test your trigger" section, select a sample task to continue. Zapier will use the sample fields values to show you example values in the next steps. Any sample Task can be chosen. Click on "Continue".
NOTE: It might take some time for sample tasks from your SweetProcess account to display, you can click on skip to select a dummy task, if it takes too long to populate.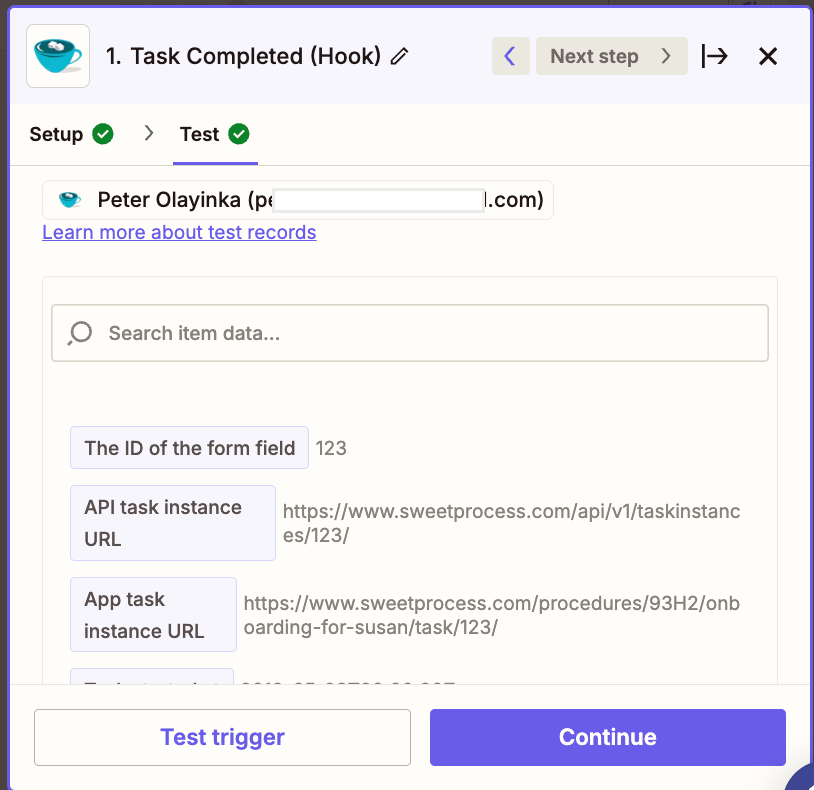 If You have no task displayed, click `Skip Test` you will be shown a dummy task like the one above, then click Continue
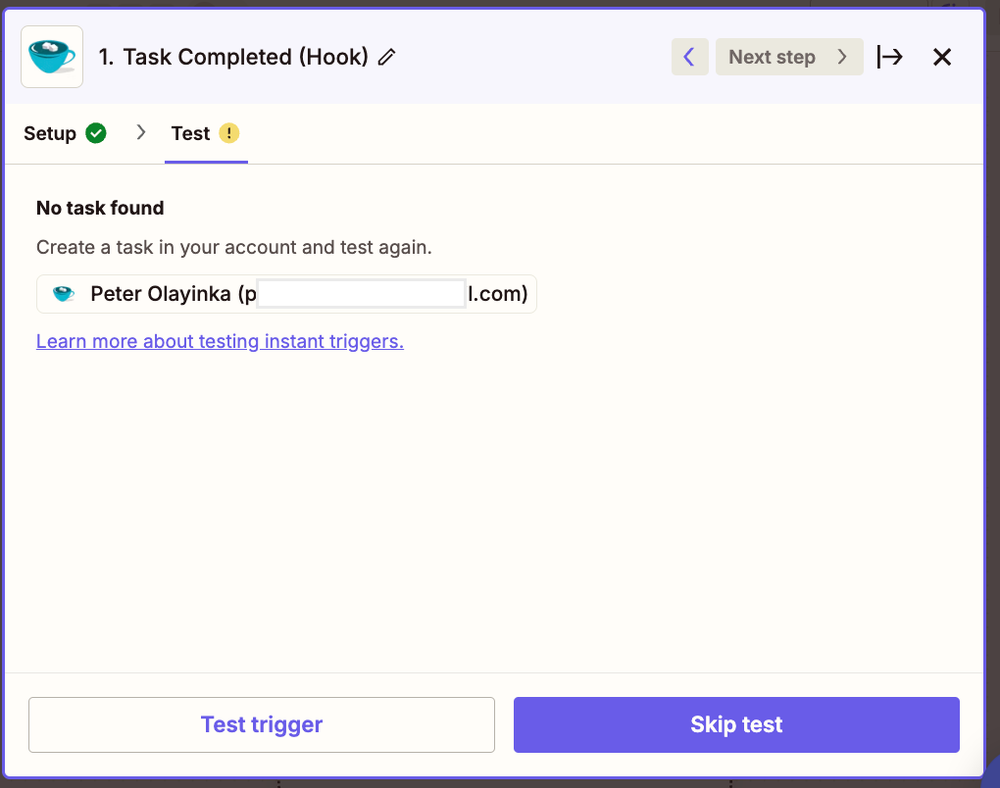
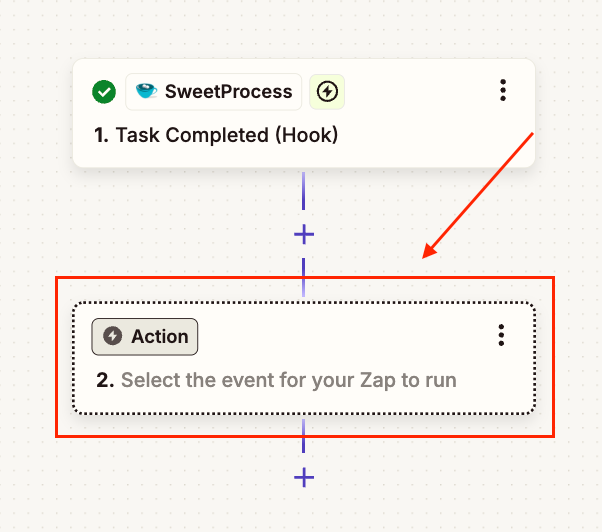
- The trigger is now set up. To create an action - which will be executed on hook trigger - needs to be defined. To create a new action click on the "Action" button:
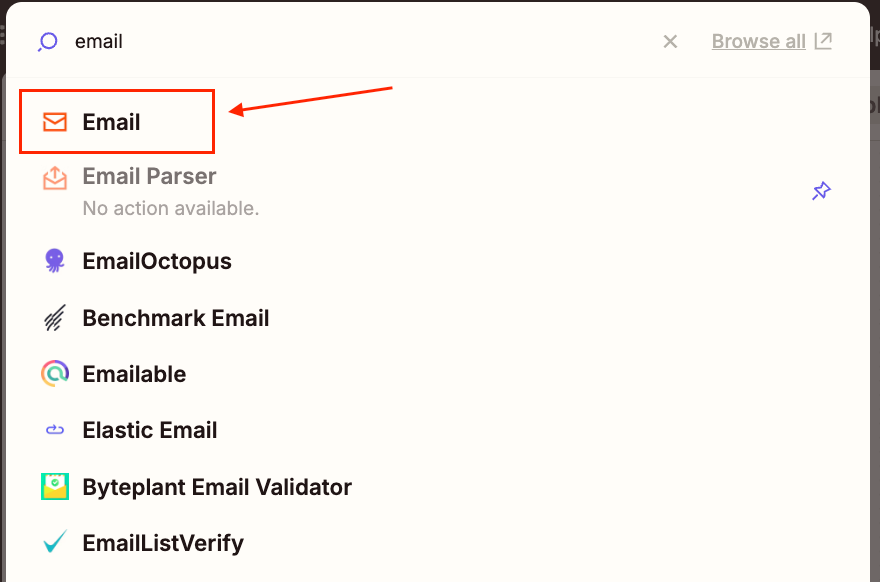
- In this example, we will create an action to send you an email when a task is completed, but you can pick a different action from the thousand of Zapier connected apps. In the "Action - Popup" page, select the "Email" Zapier built-in-app:
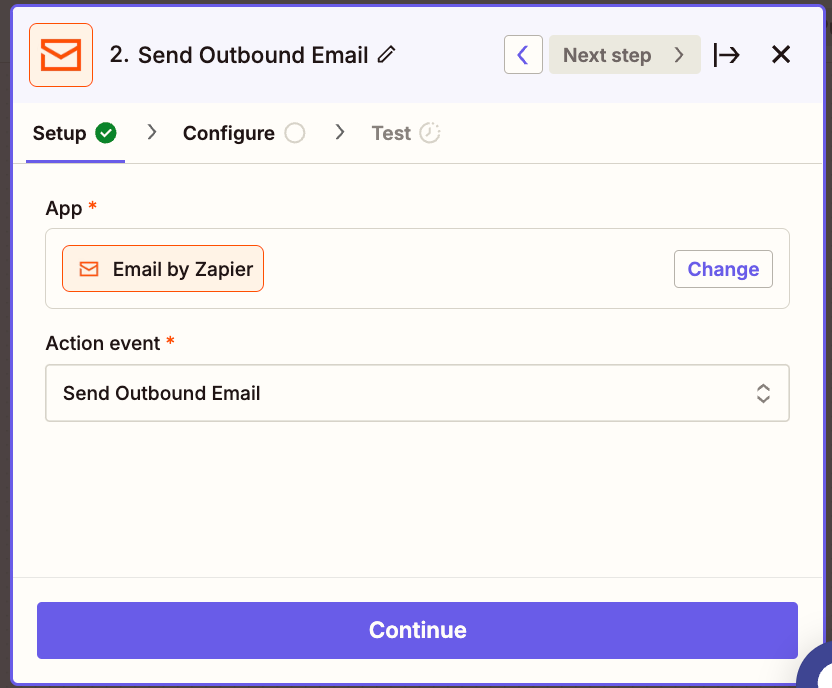
- On the "Choose Action" page choose the "Send Outbound Email" action and click on "Save + Continue":
- In the "Configure" section, fill the email template fields with the task data you want to add to each email.
Clicking on the "Plus" button you will see a list of available task fields - Task Completed Hook output fields - you can use in the email template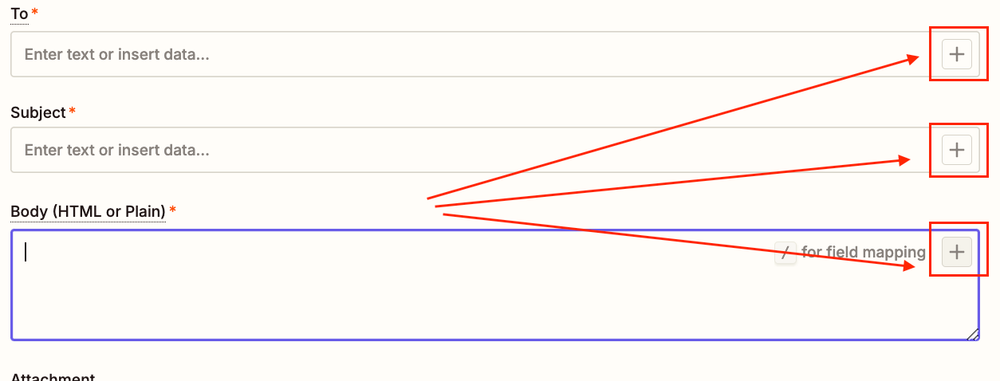 the example values below were taken from the Step 6 sample:
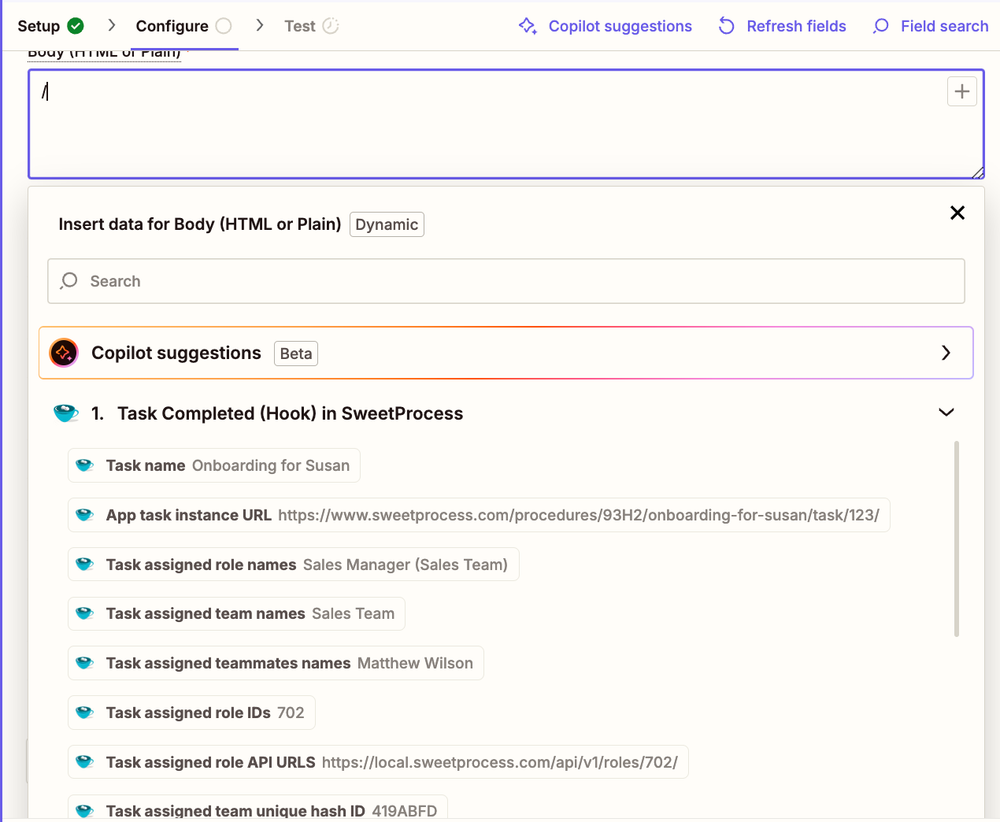 Here is an example of an email template with several dynamic fields:
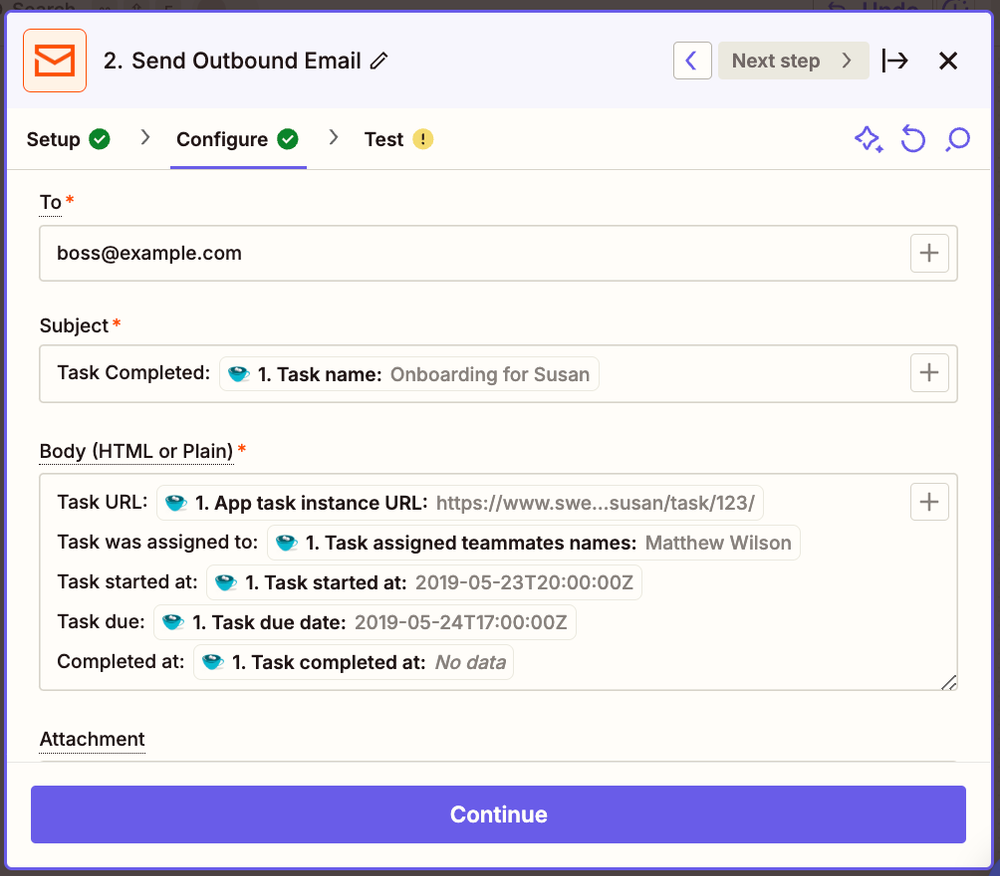 When you are done editing your template, click on "Continue".
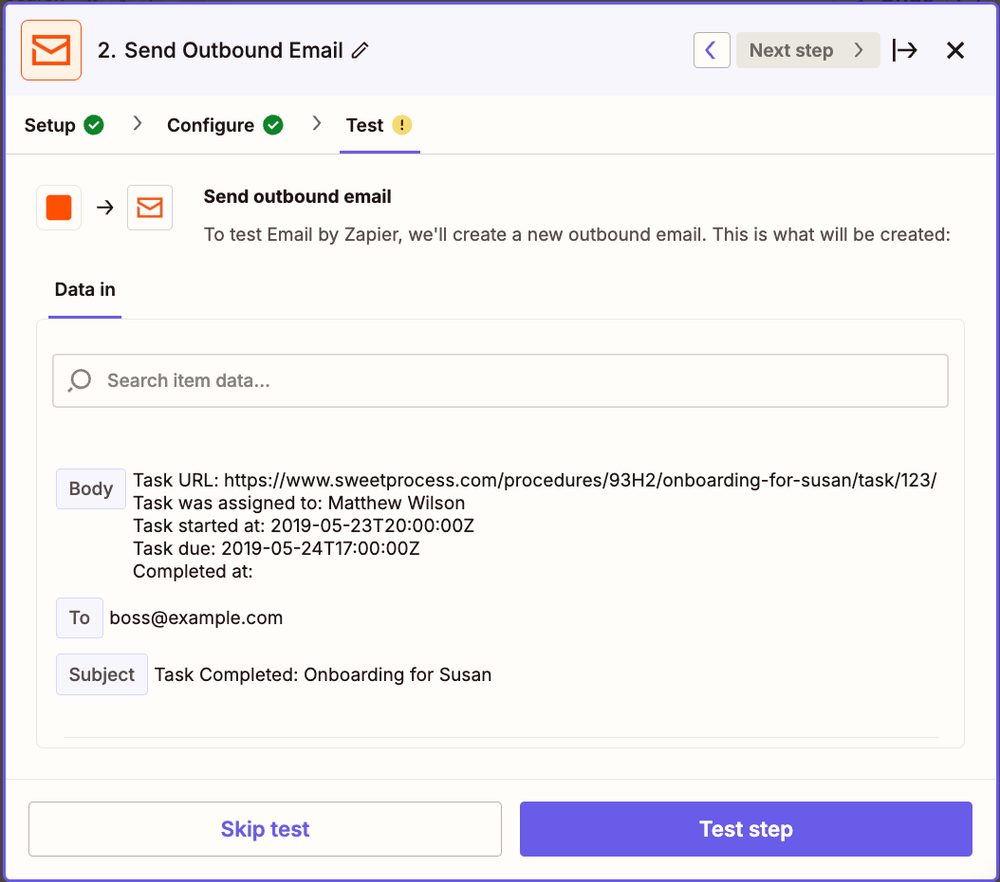
 - In the "Test Tab" section Zapier will show an email example and will allow you to test the integration, click "Test step". Zapier will send an email example to the email address added to the "To" field in the email template. After testing the integration click on "Publish":
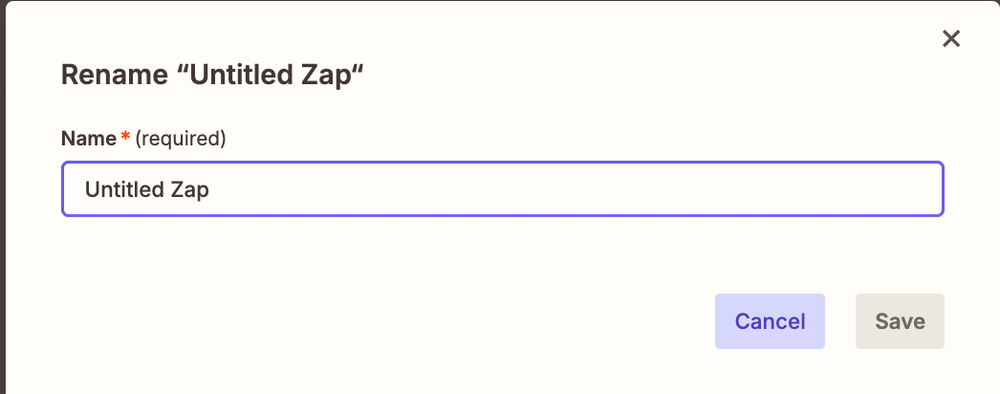
- Finally, give your Zap a name and turn it on:
Using the Create Task Action
To understand how to use the "Create Task" action, let's create a Zap which creates a new task when a new email is sent to a specific email address. The email subject will be used as the task name.
- Open Zapier Zaps page and click on the "Create Zap" button
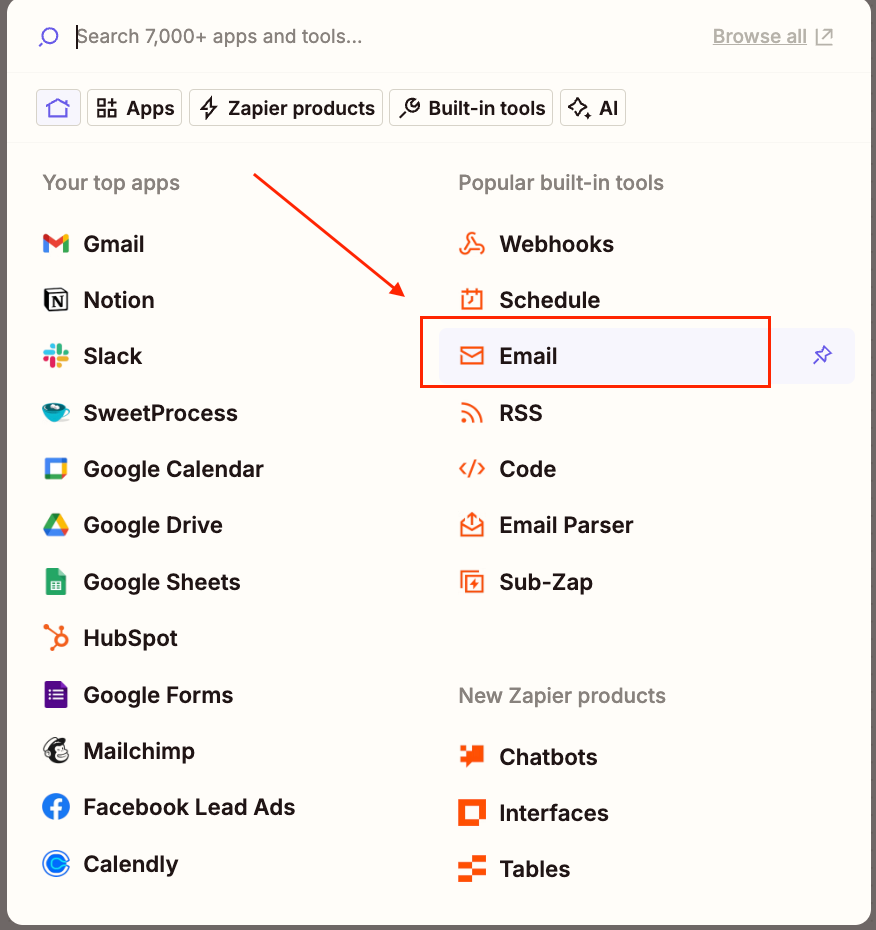
- Click on the "Trigger" button then search and select the "Email" built-in app in the Trigger App list:
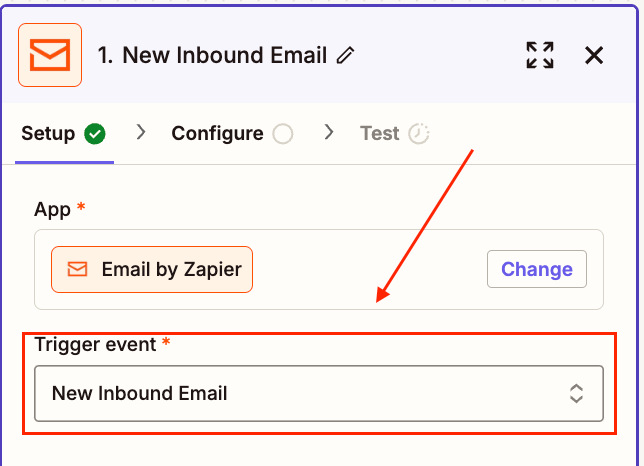
- On the "Trigger Event" section choose the "New Inbound Email" action and click on "Continue":
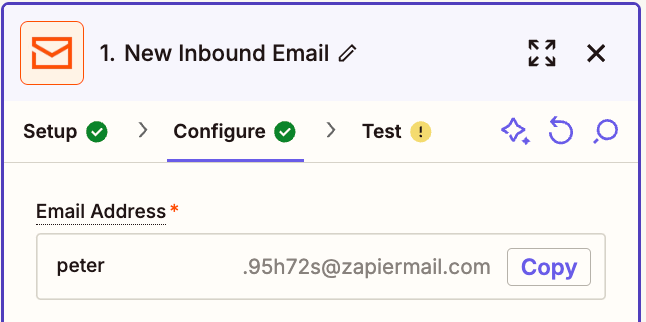
- In the "Configure" section, define the email address which will receive the messages to create new tasks. After that click on "Continue":
- In the "Test" section, Zapier will wait for you to send a real email message to the created email address with sample data.
You can send the email - its subject will be used as an example in action creation - or you can skip that step clicking on "Skip this Step":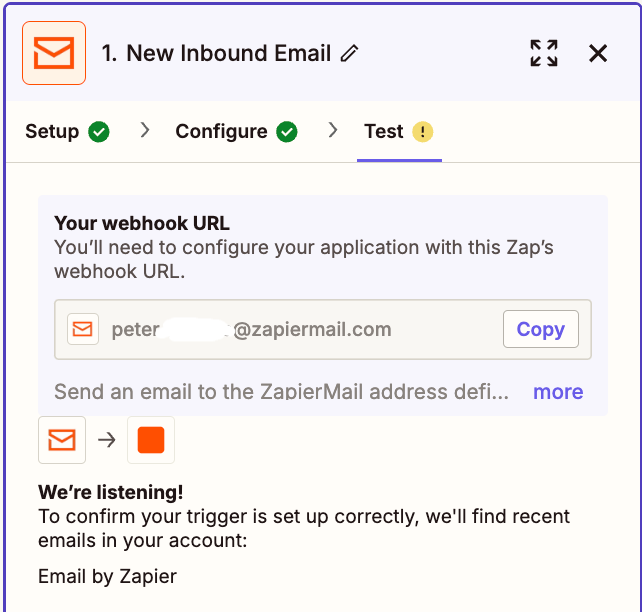
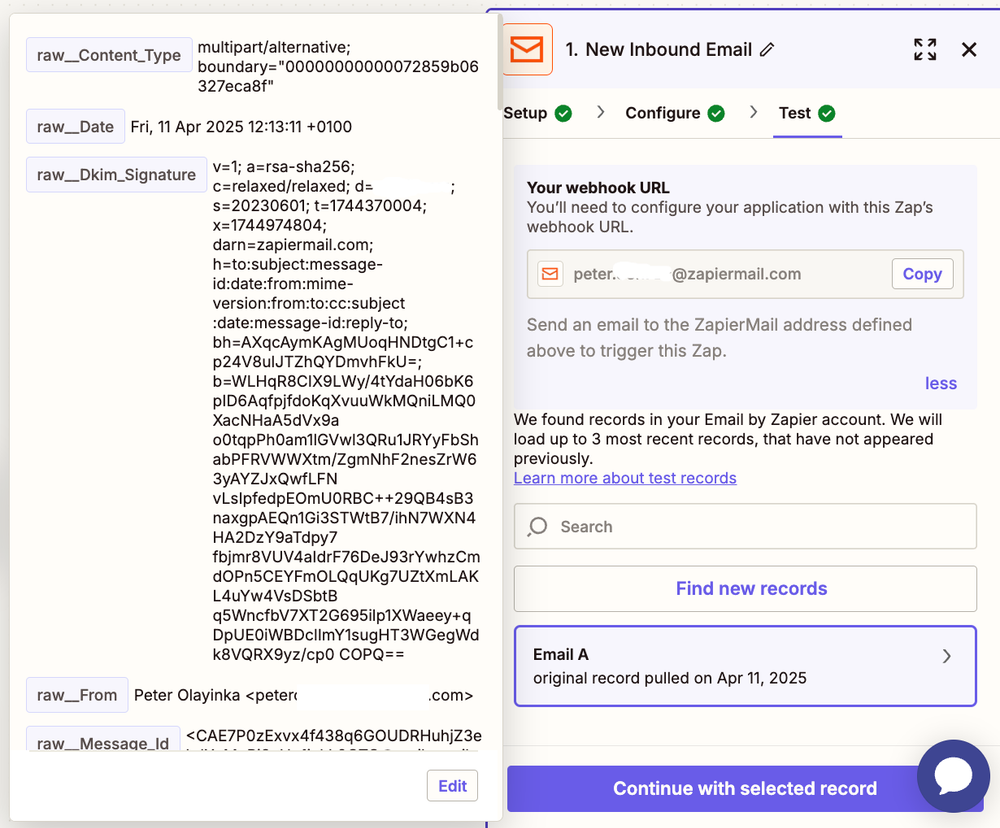
- After sending the sample email, Zapier will show you a list of received emails. Pick one and click on "Continue with selected record":
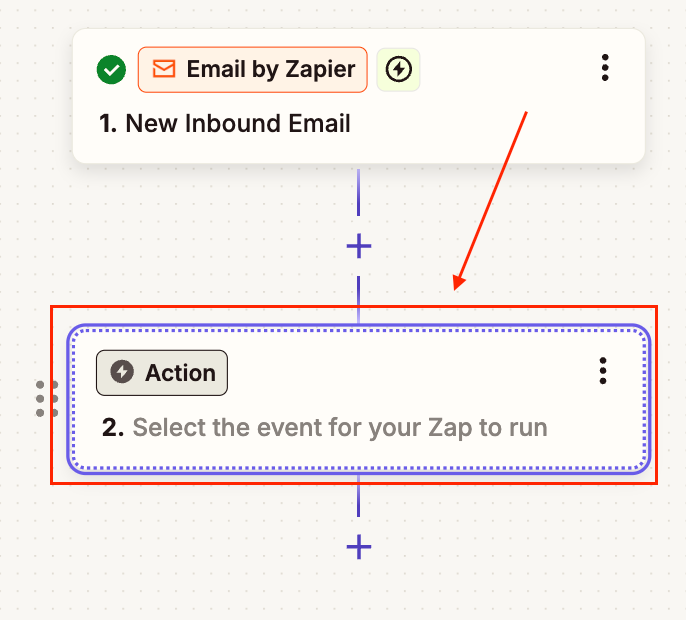
- The trigger is now set up. To create an action - which will be executed on each received email - needs to be defined. To create a new action click on the "Action" button:
- In the "Action - Choose App" section, search for and select SweetProcess in the Trigger App list:

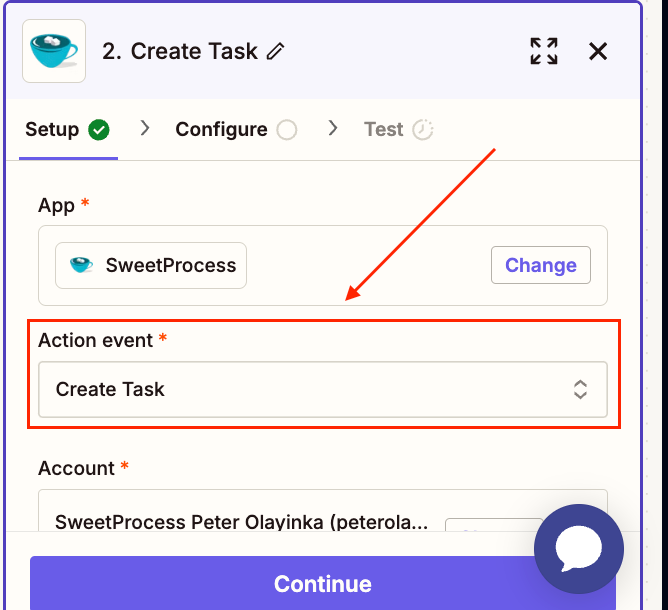
- In the "Action Event" field choose the "Create Task" action and click on "Continue":
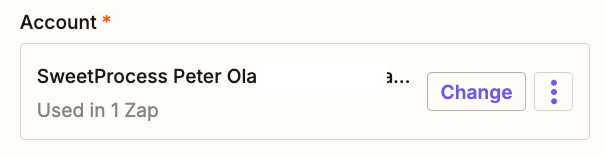
- In the "Account" section, choose your SweetProcess account and click on "Save + Continue":
- In the "Configure" section you will map the email data (subject, body, sender, etc) with the task being created.
In the example below the email subject will be used as task title.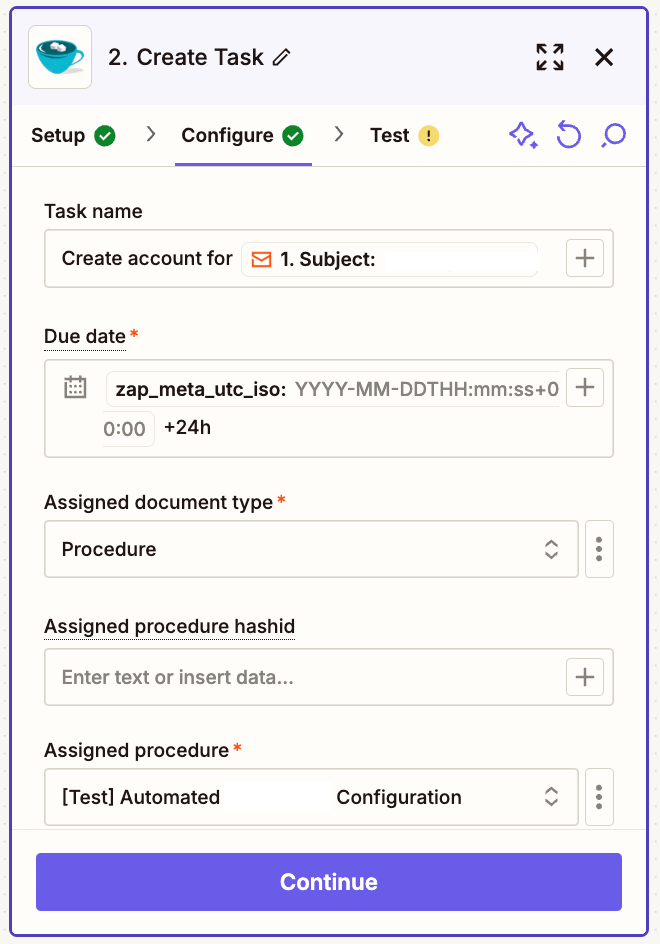 Clicking on the "Enter text or Insert a Field" button at the right will show you a list of available fields from the received email:
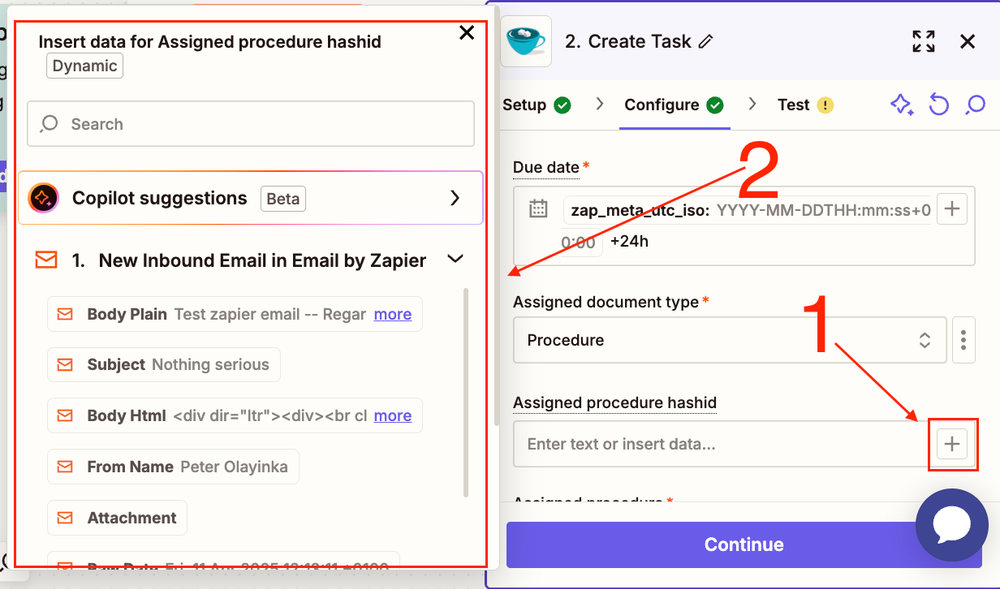 Click on "Continue" after filling the task fields.
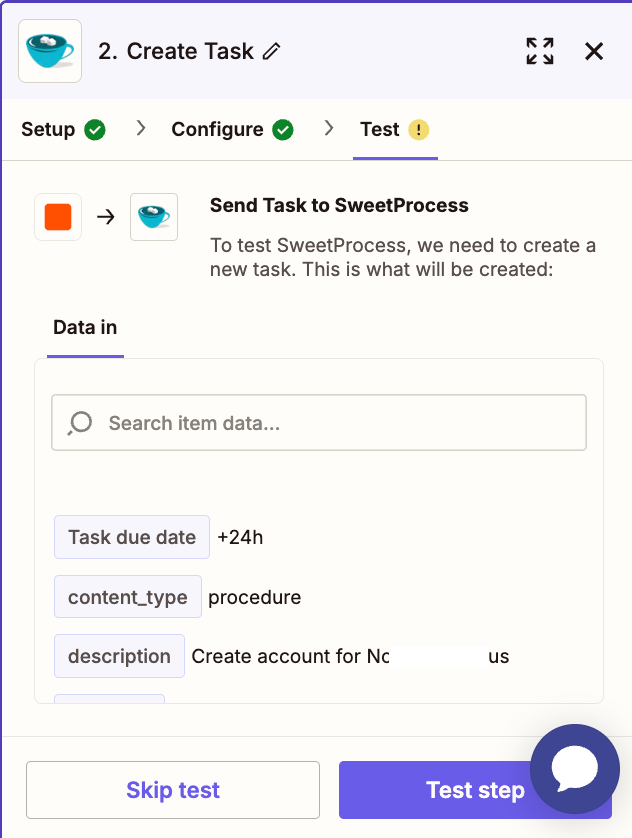
 - In the "Test" section, click on "Test step" to make Zapier create a task using the sample email data provided in Step 5:
 Zapier should create a task in your SweetProcess account and show created task data in the page.That data can be used in subsequent Zap actions if there any.
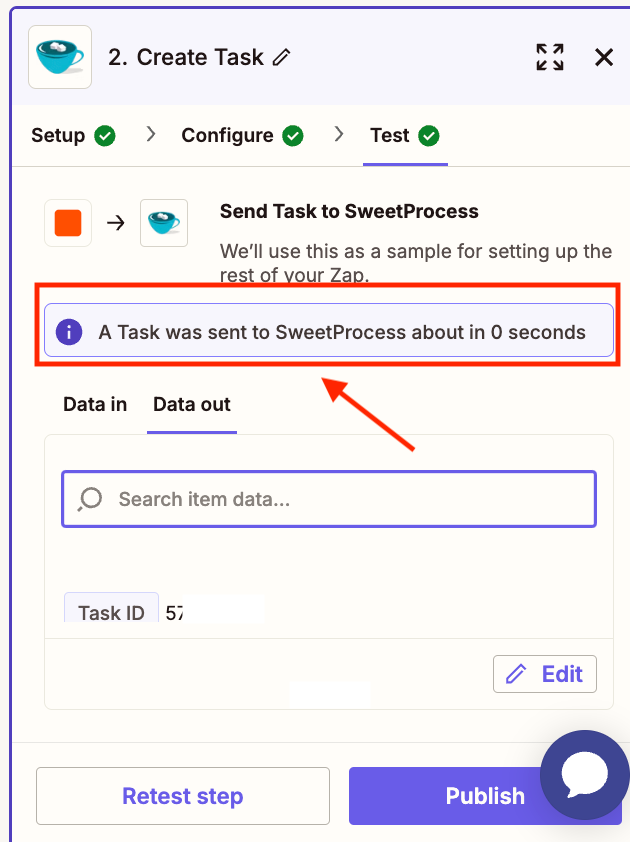 Click on "Publish" to save your Zap.
If you need advice about integrating your SweetProcess account with Zapier, please contact us at support@sweetprocess.com and our engineers will be happy to help.
Did this answer your question?
If you still have a question, we’re here to help. Contact us