Large Case Workflow
-
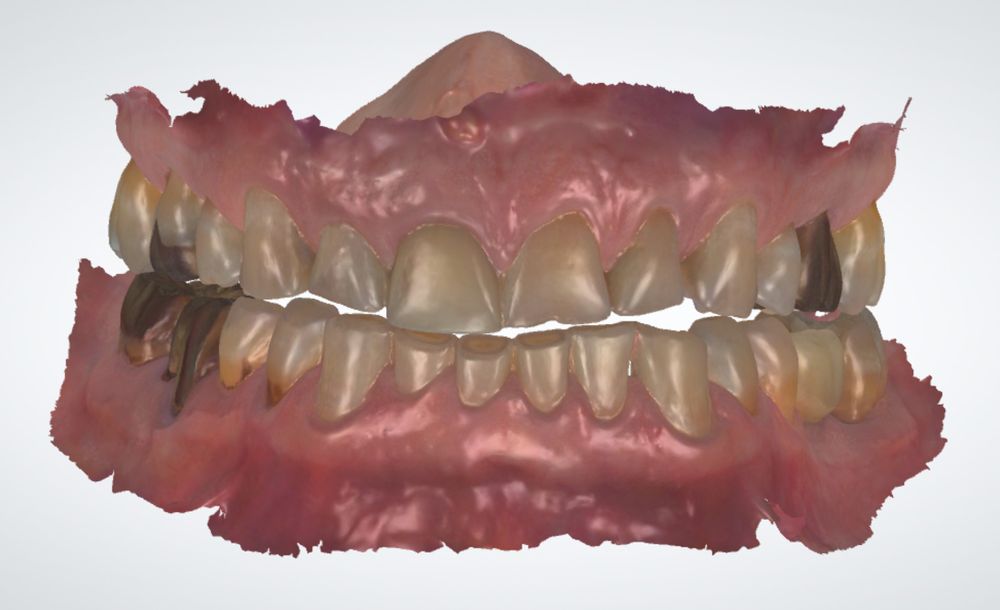
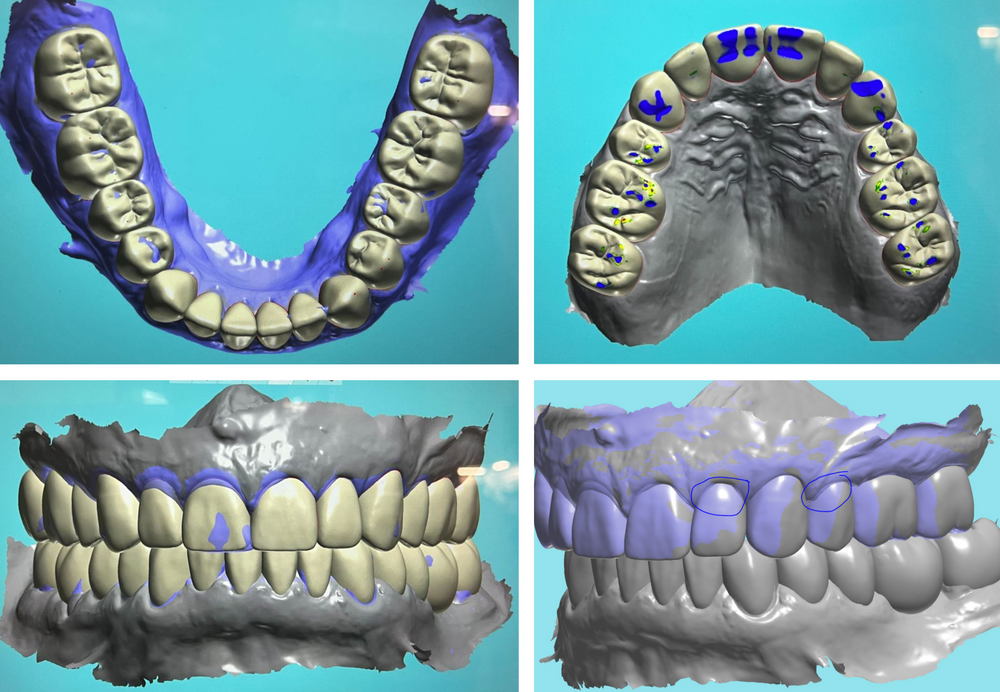
1Diagnostic Design1. Scan upper, lower, bite (deprogram or use leaf gauge to open vertical as needed).
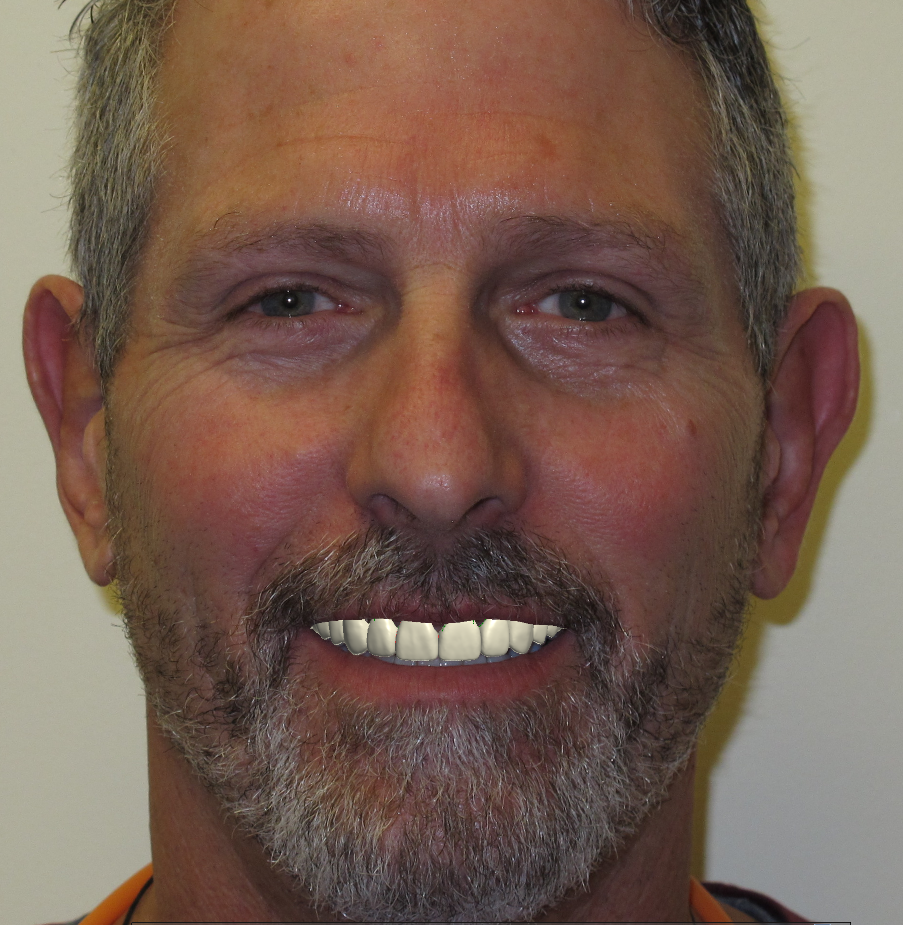
2. Take full face, large smile picture from standing, straight, ideal focal distance (see anterior case protocol).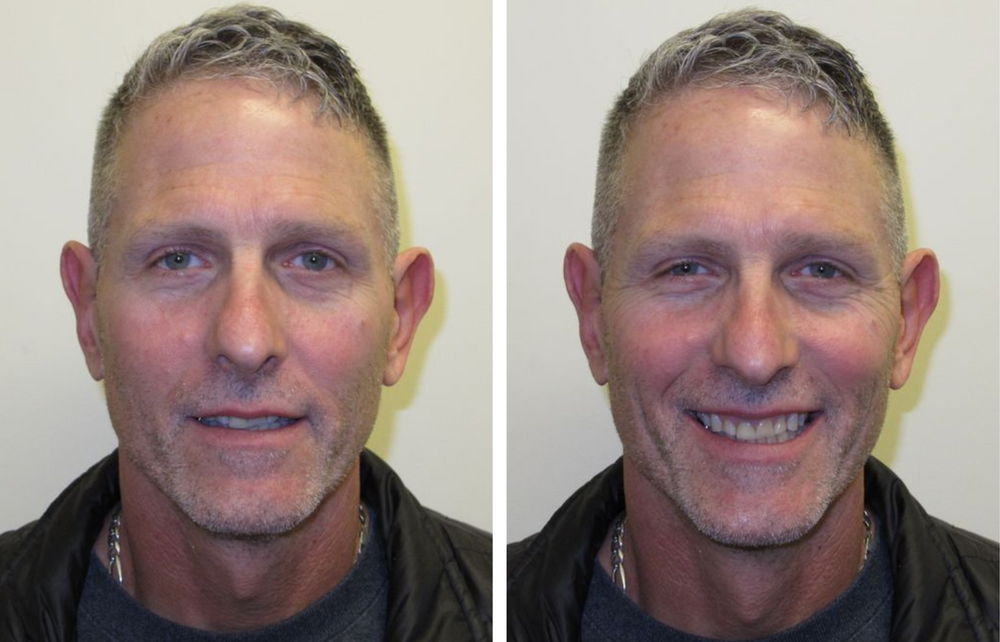
3. Make aesthetic notes about ideal incisal edge position, crown lengthening, opening the bite, occlusal design, and tooth length and shapes.- "Bite in the scans is a CR bite. It is not the vertical dimension we want, its just taken with a Kois deprogrammer so it is CR and open.
I like the incisal edge position of mesial of #9 and or the canine #6. #8 too long and he already has gummy smile so don't want to be lengthening teeth to that level. Also #8 will be extracted and 3 unit bridge placed. I would also like to change gingival architecture using the canines gingival location as the guide. I would like to open VDO, just don't know to what level yet without seeing it articulated.
Also likely resin veneer the lowers. Lets build upper 6 to ideal, then upper occlusal plane and then lowers to match. " - Here are some photographs of the case I reached about for . . . Obviously some have the goofy Kois glasses. You can disregard those if the others are better, but wanted you to have every record I took. I do think the exaggerated (Duchenne) smile in the glasses is better to give you an idea of his gingival display. I sent the scans as well.
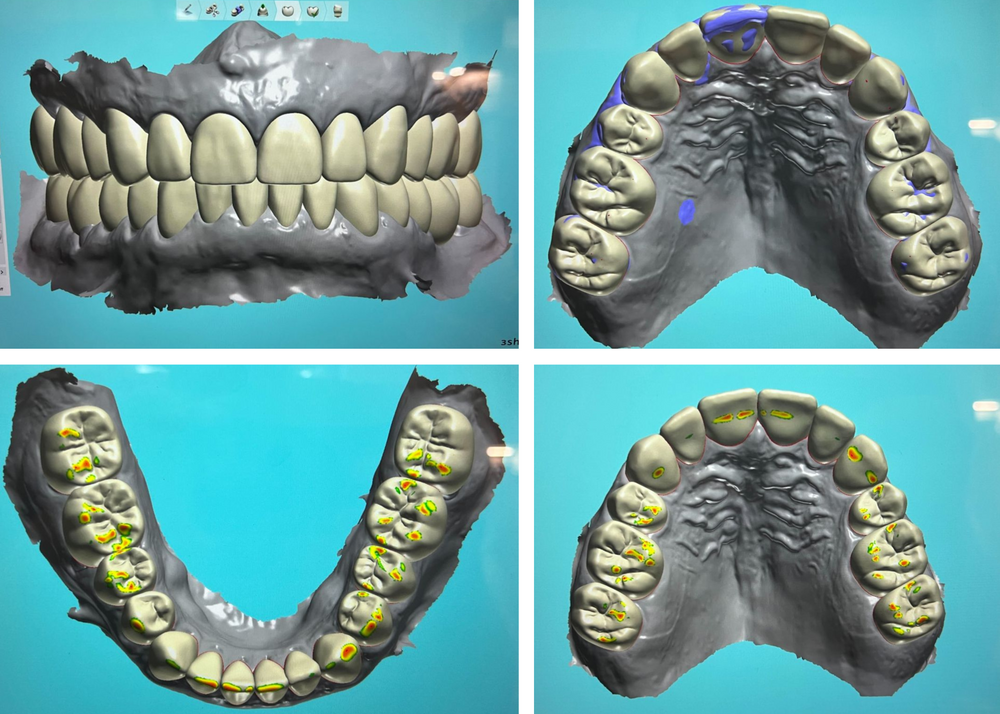
4. Lab makes a design and sends screen shots for input and approval.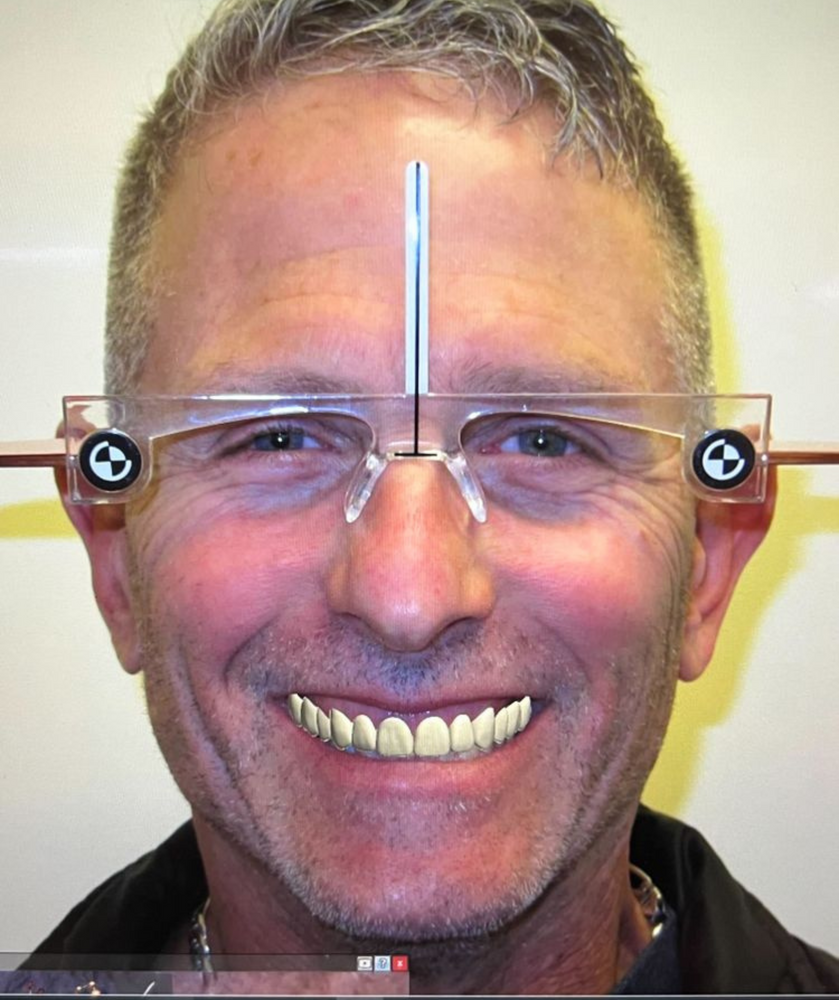
- "Bite in the scans is a CR bite. It is not the vertical dimension we want, its just taken with a Kois deprogrammer so it is CR and open.
-
2Preparations and Prototype1. Make suck down trays or putty matrix from the digital design model(s).
2. Prepare the teeth for the restorations (use the trays to help measure reduction).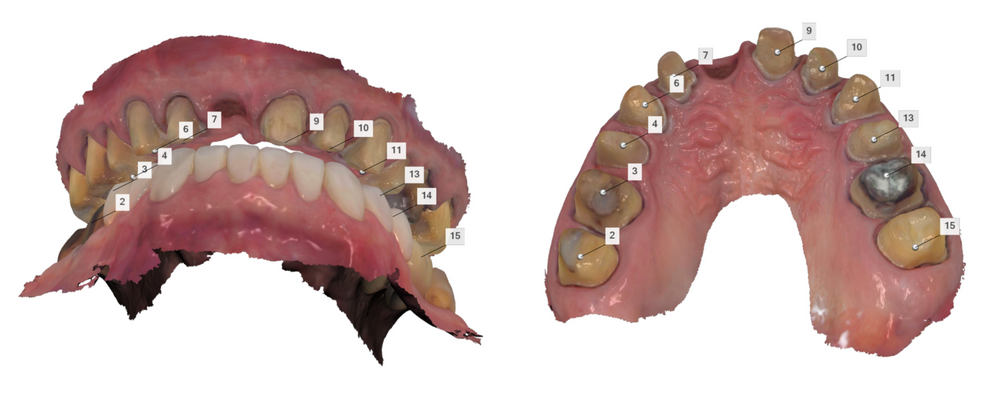
3. Create prototypes from the trays or matrix of the digital design models.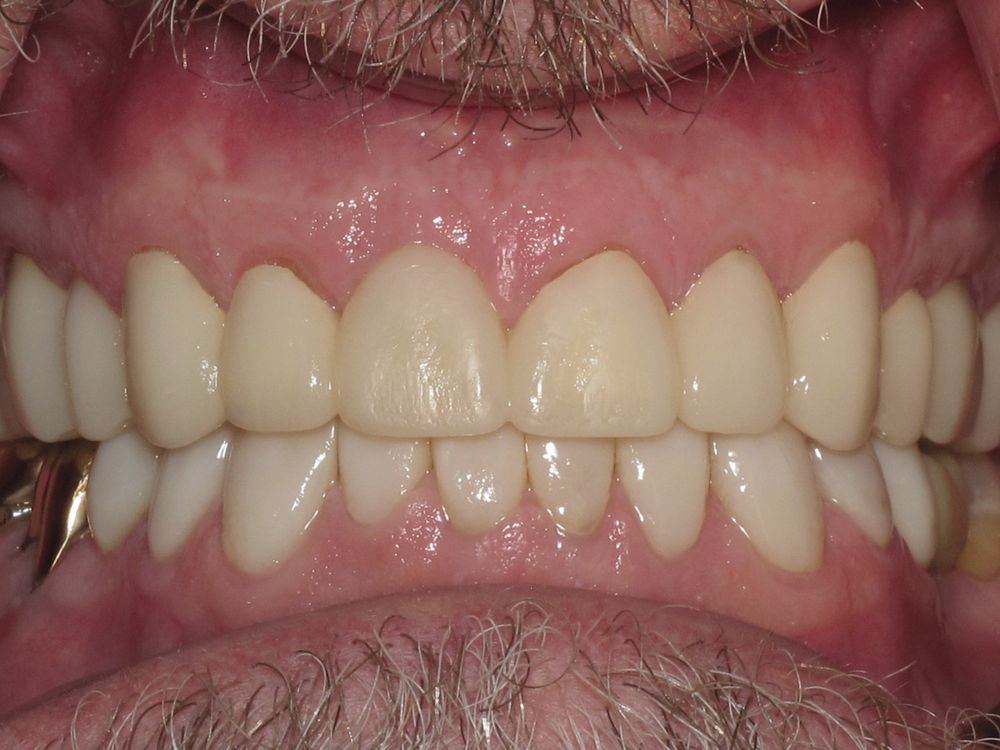
4. Make initial adjustments to function and aesthetics of the prototypes.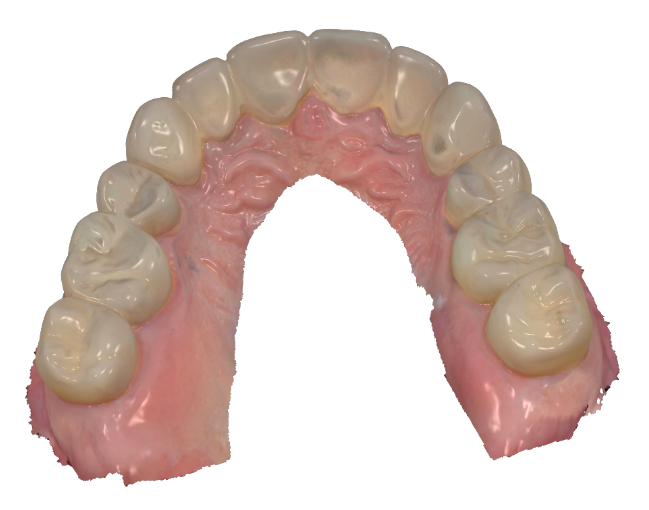
5. Send patient home to heal and wear the protypes for at least one week. -
3Final IO Impressions1. Make any final adjustments to the prototypes.
2. Take pictures of the patient smiling fully with the adjusted prototypes.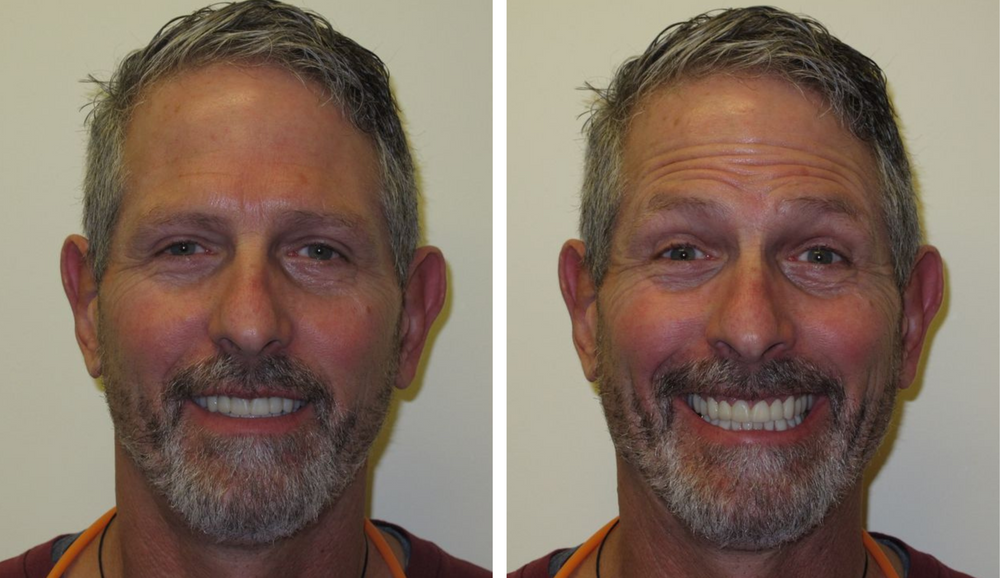
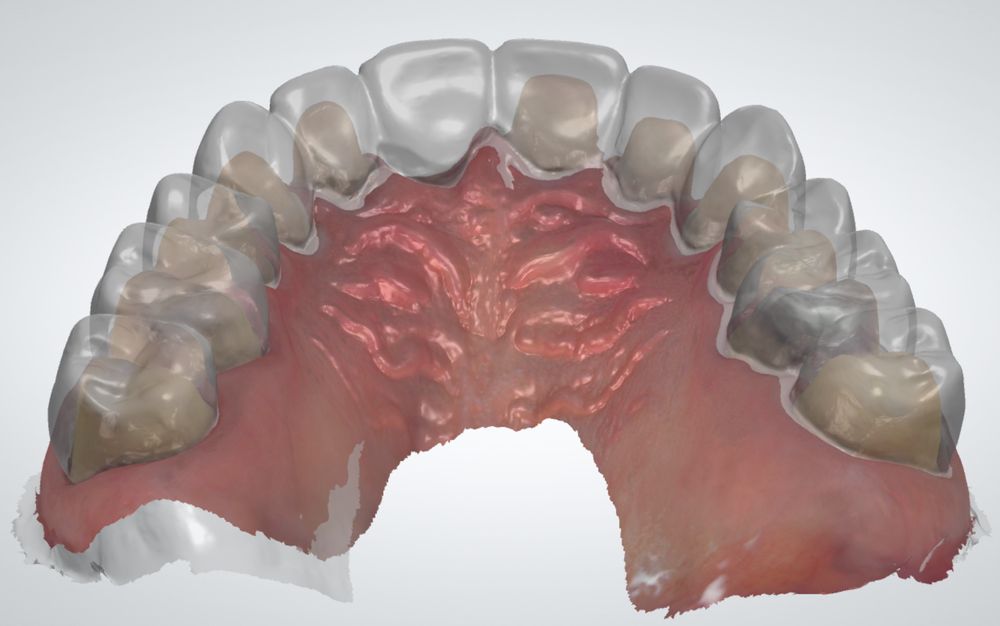
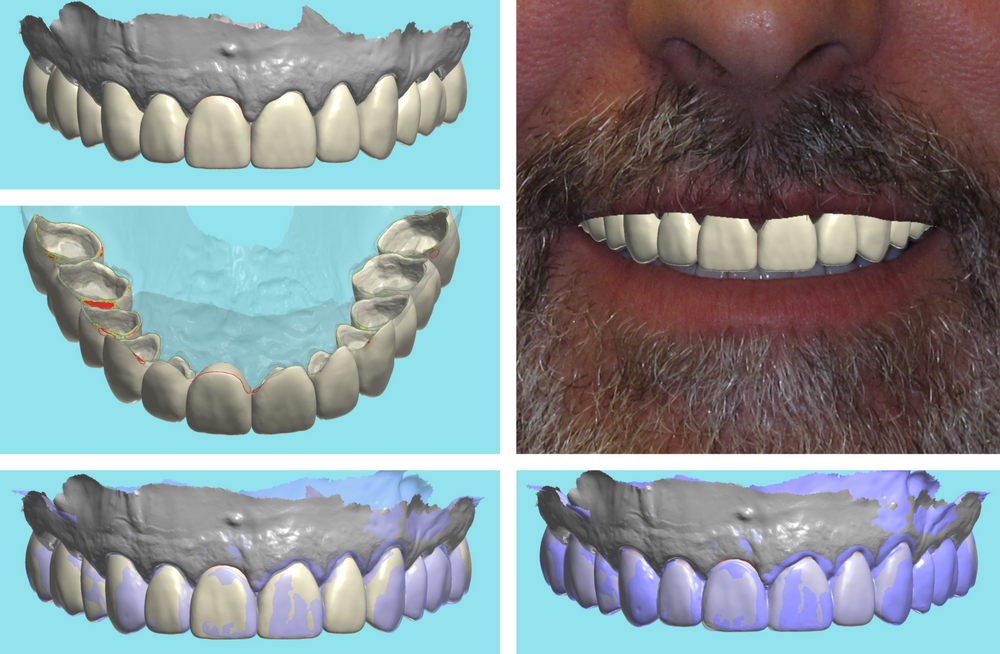
3. Make any aesthetic notes or change requests in writing.- "We did the design on this months ago. He is finished healing and ready to restore. In a separate submission I sent the scans with the provisional on.
Please use that as a guide. I have also emailed photos in his provisional. Message me once you are ready to discuss prior to finalizing. I liked shade 1M1.
He doesn't want to be too white, but I already resin veneered the bottom so we need to be close to that shade (it was SB3 which correlates to 0M3) " - "I know you like vita classic shades to be chosen, so I took the photo with B1 and 1M1. Maybe B1 puck and stained to look like 1M1 (you decide based on photos).
Place some stain so not monochromatic like my lower resin veneers. Some incisal translucency would be great. I am thinking of Argen as the material. Let me know your thoughts.
**Please be sure that the ovate pontic puts pressure on the tissue (lightly on facial, but firmly everywhere else. Almost always, I struggle to get that on cases and it is crucial on this for appearance." - "He shows all the gums when he smiles so we can't have a space and shadow! Lets discuss this when you message. I would like the bite as always on this case.
Which means: Bilateral equal intensity contacts on all posteriors (#19 in implant so please leave that tooth slightly out of occlusion), and up to canines.
I would like all incisors to be slightly out of occlusion. Think they lightly touch in provisional. I would like them barely out of occlusion.
Use provisional as a guide for finals, just pretty up the embrasures and anatomy to make them look more natural."
4. Finalize the shade selection with pictures of shade tabs and natural teeth if any are still visible.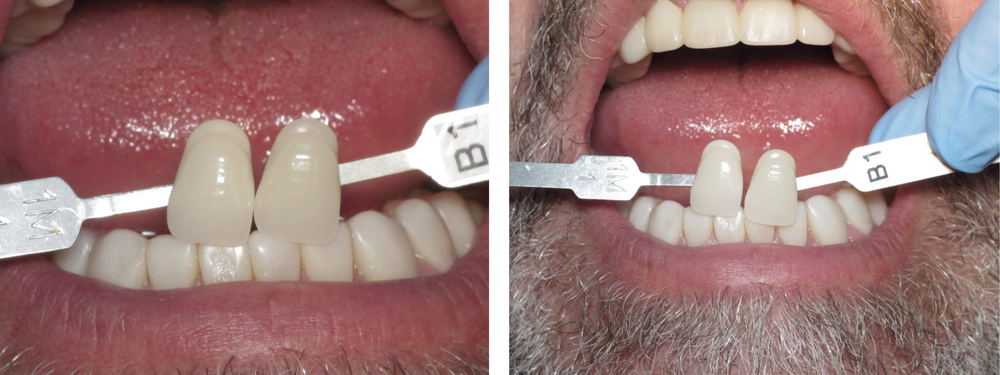
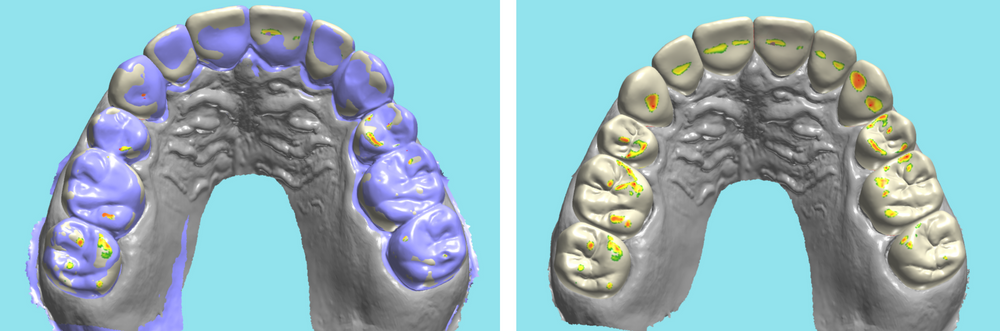
5. Scan the prototypes: upper, lower, bite--lock the aspects of the scan that should not change in the prep scan.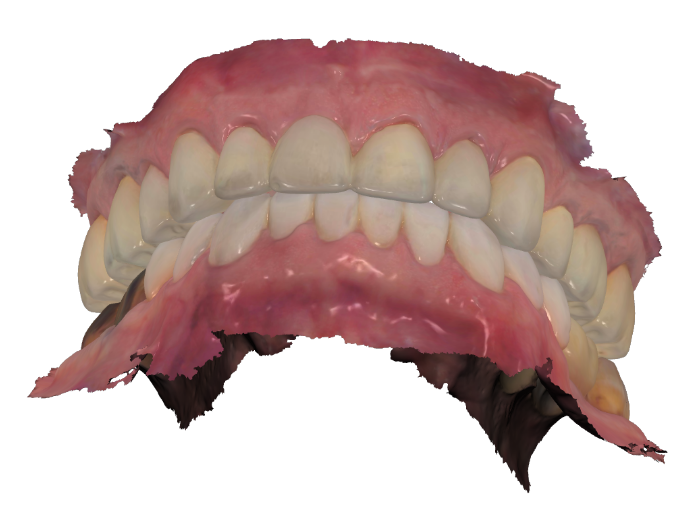
6. Remove prototypes, clean all the preps carefully, pack cord, dry, clean, and scan all the preps in one scan with well exposed margins.
7. Verify that the prep scan and prototype scan align accurately so that the bite and functional record are correct.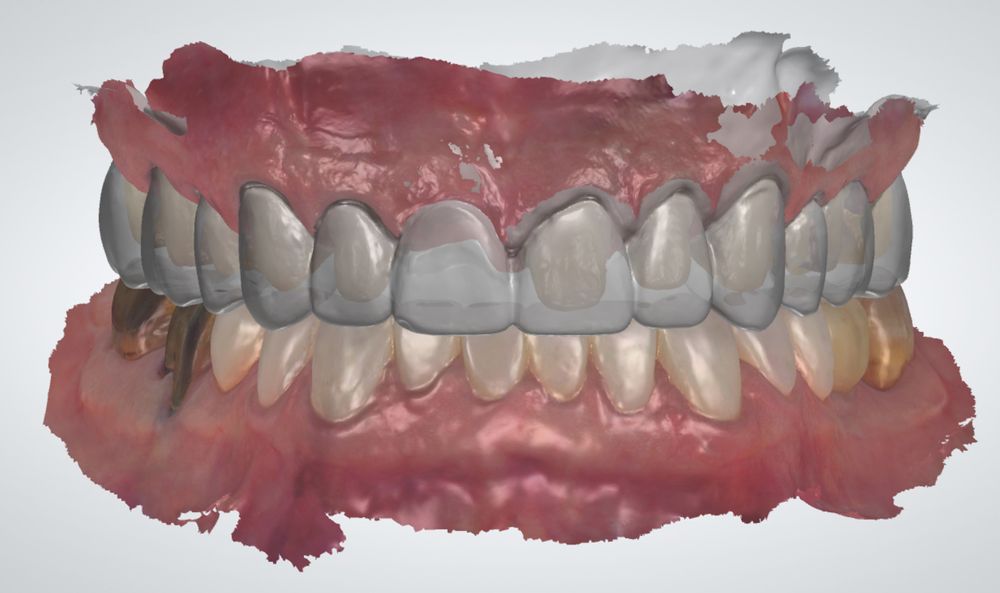
8. Send case with pictures and records to the lab. - "We did the design on this months ago. He is finished healing and ready to restore. In a separate submission I sent the scans with the provisional on.
-
4Final Design
-
5Finished Case

Did this answer your question?
If you still have a question, we’re here to help. Contact us