Autotask - Co-managed Helpdesk Setup for End-Users
This procedure describes how to set up and configure your new co-managed helpdesk account.
-
1Create Account
- You will receive an account verification email once your Autotask account is created. Please click the link to finish creating your account.
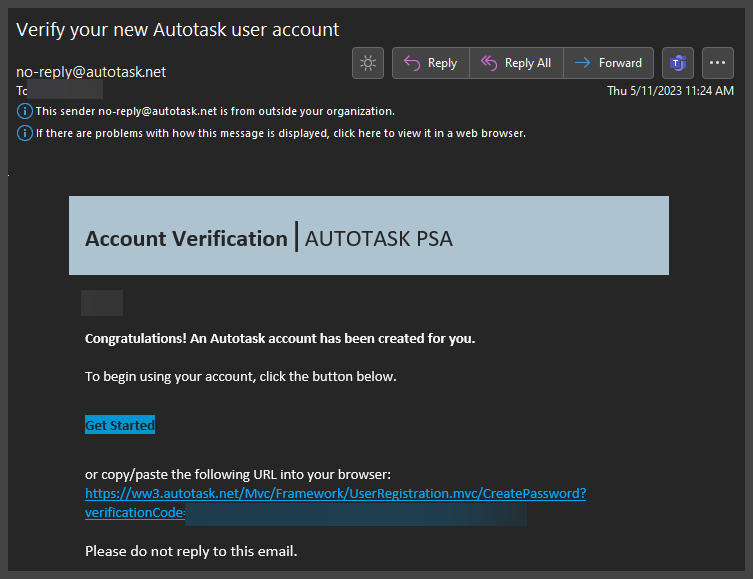
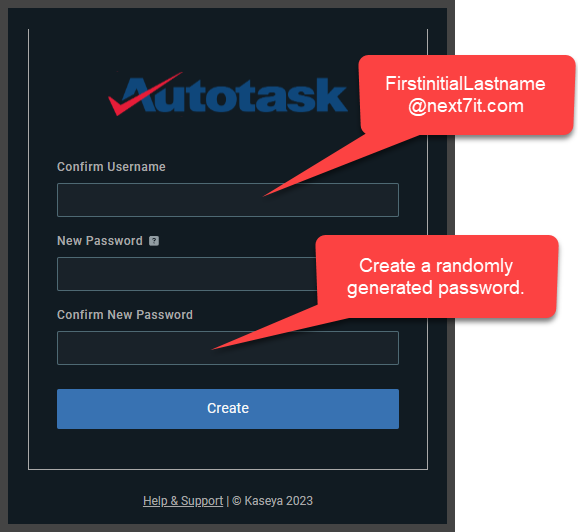
- It will prompt you to confirm your username and to create a password. Your username is FirstinitialLastname@next7it.com. Please use a password manager to generate a random password.
- You will receive an account verification email once your Autotask account is created. Please click the link to finish creating your account.
-
3Edit your Preferences
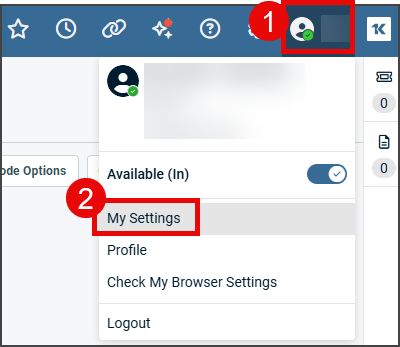
- In the top right corner, click your name and click My Settings.
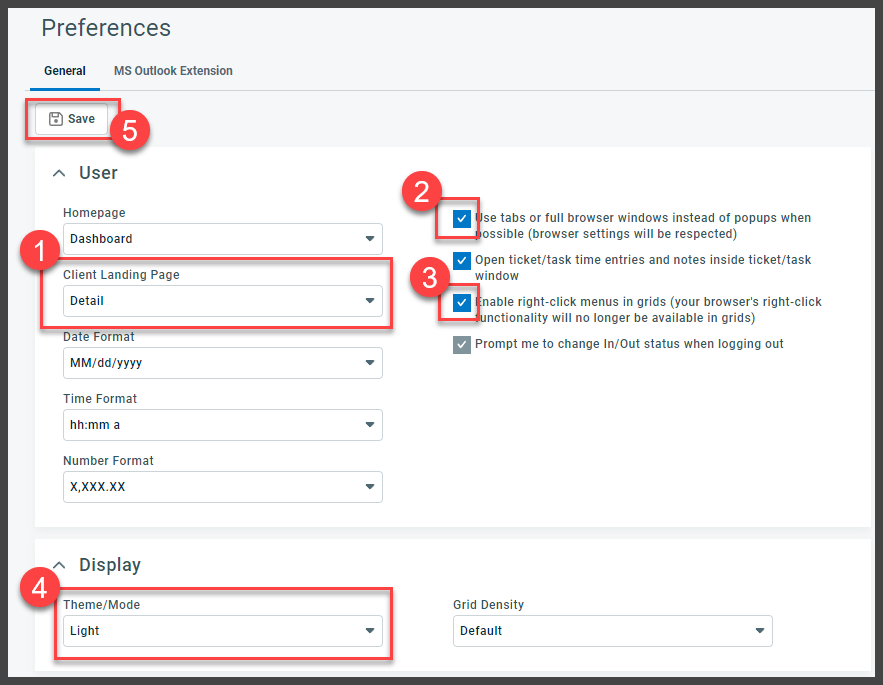
- We recommend the following settings:
- Under User, set client landing page default to Detail.
- Click Use tabs or full browser windows instead of popups when possible
- Click Enable right-click menu in grids checkbox.
- Under Display, set your theme to dark or light, depending on your preference.
- Click Save
- In the top right corner, click your name and click My Settings.
-
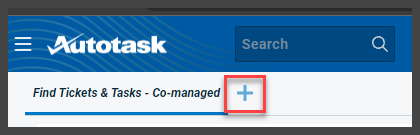
4Setup DashboardsWe've created a custom dashboard called Find Tickets & Tasks - Co-managed with widgets we think you might find helpful. You can create additional dashboards by clicking the + sign on the dashboard screen:
You can start with a blank tab and build it from scratch, or make a copy of a system tab and then customize it.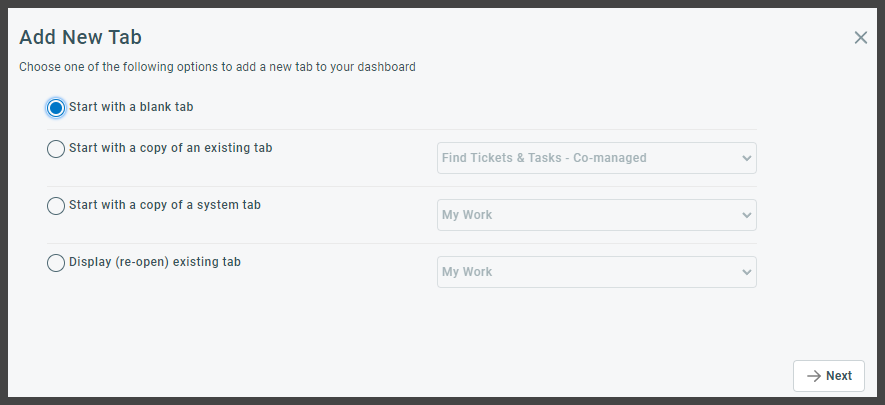
-
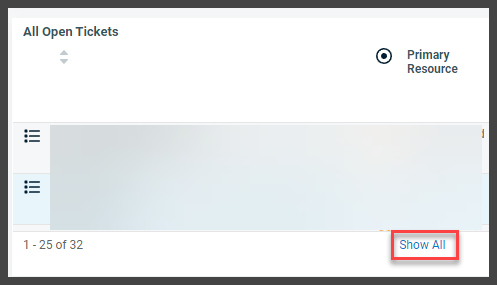
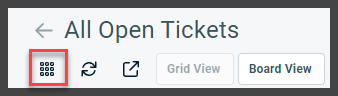
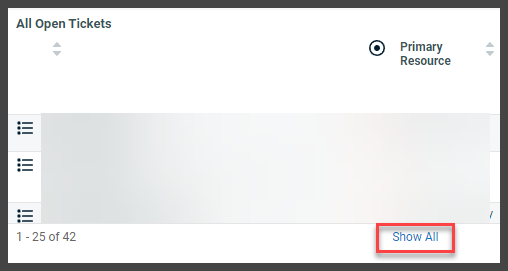
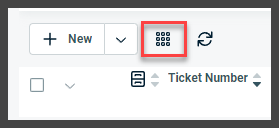
5Setup Columns when Viewing Dashboard TicketsWhen you click the Show Alloption on a dashboard widget, we can customize the column that display so the most relevant information is available.
- On a Dashboard Widget, click Show All.
- Click the blocks icon to modify the columns:
- We recommend the following columns in this order:
- Priority Icon
- Client (or Client Name)
- Title (or Ticket Title)
- Contact
- Resources
- Status
- Estimated Hours
- Total Hours Worked
- Due
- Service Call Scheduled
- Age (in days)
- Created
- Asset
- Asset Reference Name
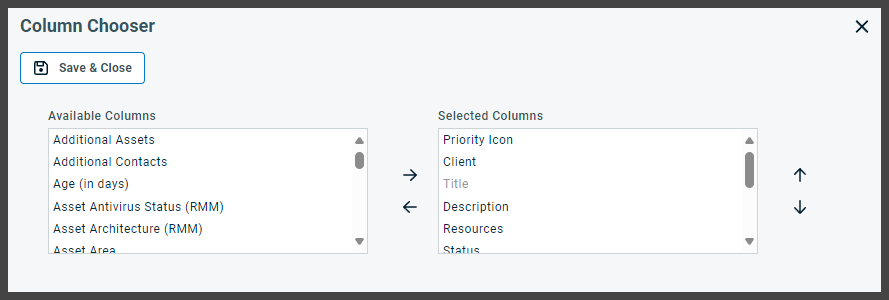
- On a Dashboard Widget, click Show All.
-
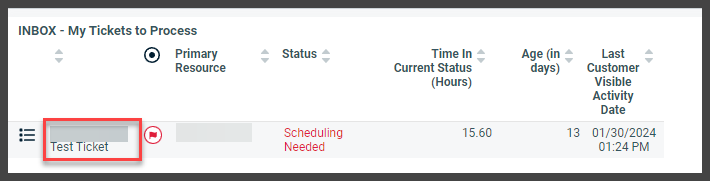
6Using the Find Tickets DashboardThe Find Tickets dashboard is meant to help you find:
- Tickets to Process (INBOX)
These are tickets where the status has changed to something that is awaiting your action, including New, Assigned, Scheduling Needed, Overdue Service Call, Waiting Internal Review, In Progress, Feedback Received, Client No Response, Vendor No Response, Ticket Reopened. - Tasks to Process (INBOX)
The same as above, just for project tasks instead of tickets. - Unassigned Tickets
Tickets that have been created but are not currently assigned to anyone. This is generally something that should be reviewed regularly. - Tickets by Resource
Lists ticket counts by person. - Ticket Waiting on Us
Lists tickets that are waiting for a response by a particular person. This is helpful to see if someone is backlogged. - Tickets by Company
List of tickets by company. - All Open Tickets
- My Tickets Waiting Customer or Vendor
These are tickets you are expecting a response from so you can track them.
- Tickets to Process (INBOX)
-
7Using BoardsYou can use boards to group tickets into various buckets on a drag and drop grid.
- On a Dashboard Widget, click Show All.
- Click Board View

- Select the board option you want:
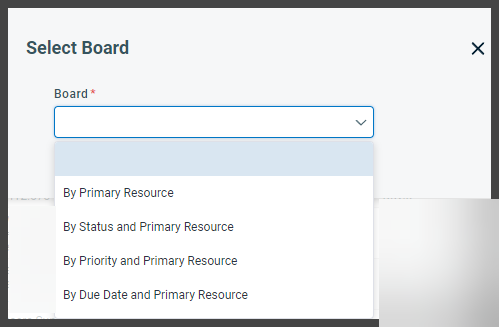
- Drag and drop if desired
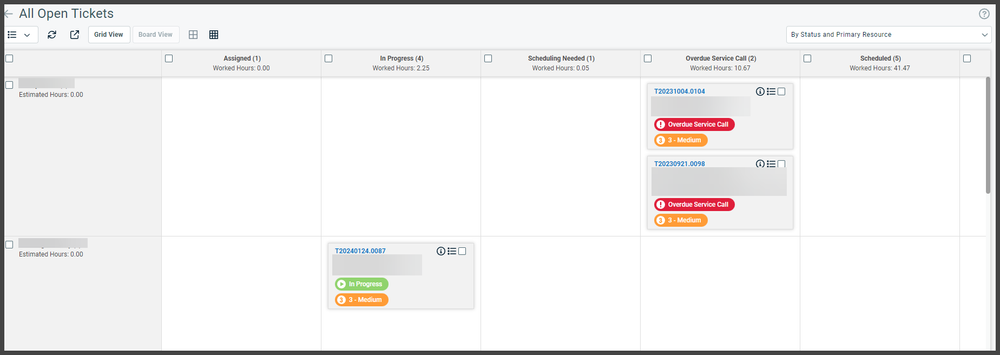
- On a Dashboard Widget, click Show All.
-
8Finding and Opening a Ticket using the Dashboard
- Click on any ticket in the dashboard to open it up.
- You can also click the Show All link at the bottom of the dashboard widget to view the full list of tickets.
- Click on any ticket in the dashboard to open it up.
-
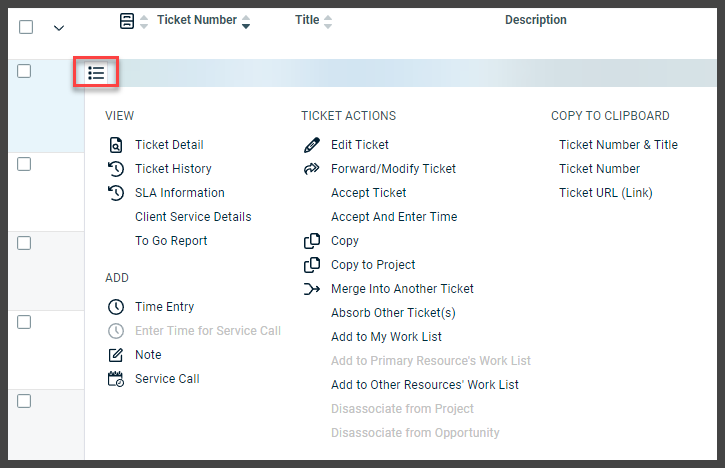
9Action MenuYou can take different actions on a ticket by using the right-click or menu icon for the ticket.
-
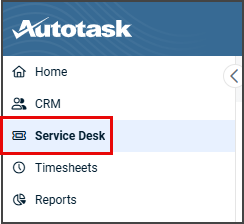
10Search for Tickets
- In the Menu, click Service Desk and then click Tickets.

- Many filters are available here. Enter your criteria and click Search.
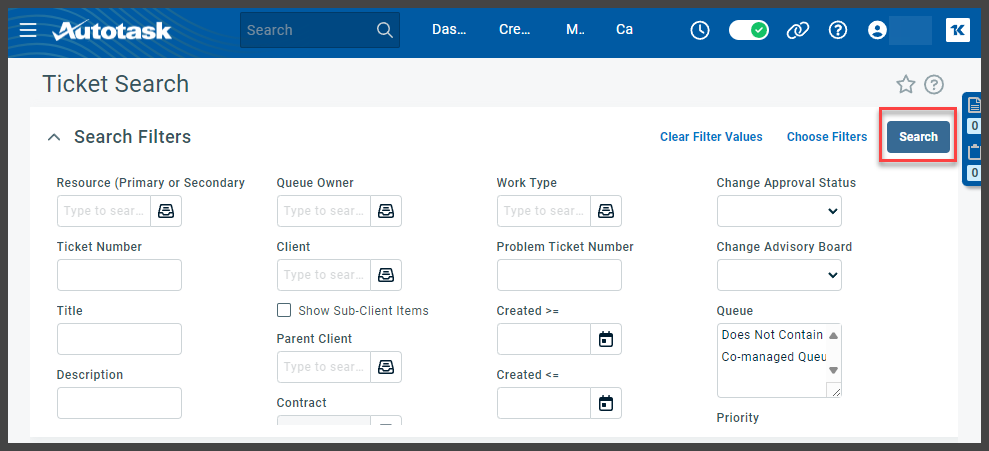
- There are more filters available by clicking the Choose Filters link in the top right.
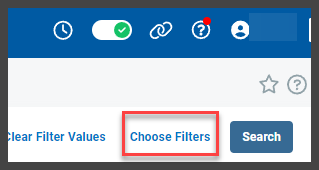
- There are more filters available by clicking the Choose Filters link in the top right.
- In the results of the search, show or hide display columns by clicking the boxes icon.
- In the Menu, click Service Desk and then click Tickets.
-
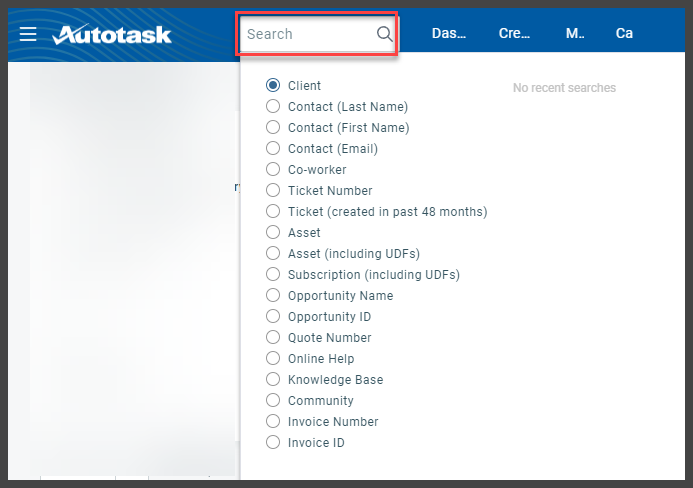
11General SearchThe general search bar allow you to quickly search for various types of items in Autotask.
-
12Ticket Work ListThe ticket work list provides a quick way to access the tickets you want to keep track of. The work list is on the right-hand bar of Autotask pages.
Click the bar to expand it: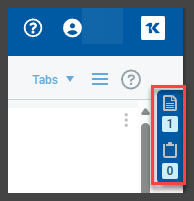
Here is what each option does: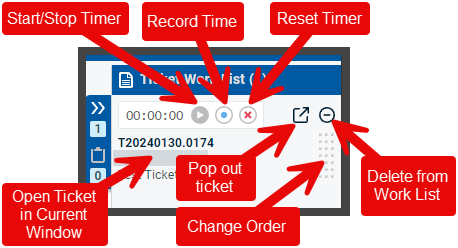
-
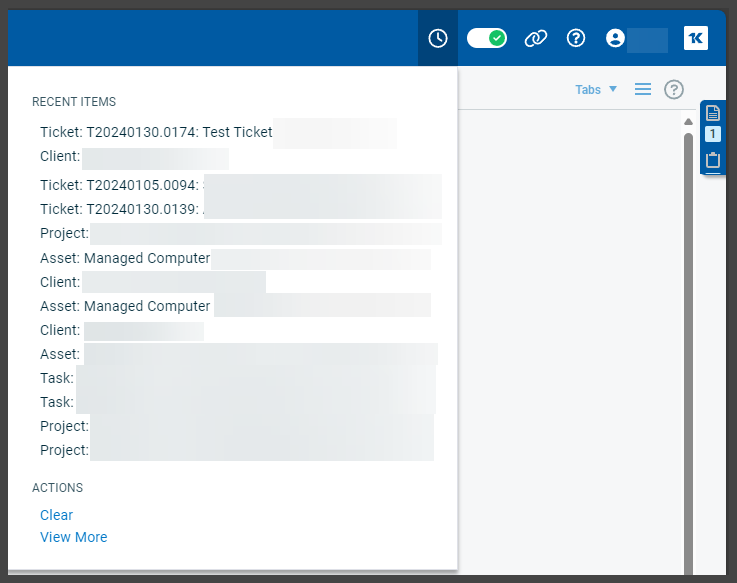
13Recent ItemsHover over the clock icon to see a list of recently accessed items so you can quickly find that item again.
-
14Understanding Ticket StatusesThe following ticket statuses are preconfigured in the account:
Status Explanation New Tickets that have not been processed. This is the default for all newly created tickets. Assigned Tickets that have been assigned to an individual are automatically changed to Assigned. Once work has been done, it should be moved to another status. In Progress The ticket is actively being worked on. Scheduled The ticket has been reviewed, and the user has been made aware that it will be worked at a date in the future. Waiting Internal Review Used when a ticket is waiting on review from someone on your team. Waiting Materials The ticket requires some piece of hardware or software, and the order for it has been place. We are awaiting its arrival. Waiting Customer We are awaiting some type of response from the user before additional work can be performed. Waiting Vendor Ticket is being worked on with a 3rd party vendor, and we are awaiting some sort of response from them. An example would be support from a software vendor for a Line of Business application. Vendor No Response A ticket that was set to Waiting Customer but has no response after eight business days is set to this for internal review.
Client No Response A ticket that was set to Waiting Customer but has no response after eight business days is automatically set to this for internal review. Feedback Received When a user sends a reply of some sort to the support mailbox, and a ticket note is appended to an existing ticket, the ticket status will automatically change to “Feedback Received”. This helps track tickets that have received responses to questions that we have asked them. Ticket Reopened If a note is added by a user or N-Central after a ticket has been marked complete, it is placed into this status to differentiate it from notes added by users on tickets that have not yet been completed (which go to Client Feedback Received). Auto-Resolved Alerts that come from the RMM N-Central may create tickets, but then subsequently, N-Central finds that the problem resolved itself (for example – server reboot takes longer than expected, but comes back up eventually). Auto-Complete in 2 Days Setting the ticket to auto-complete in 2 days is useful when the work is complete, and you have not been able to confirm with the user. Send them an email and voicemail to let them know that you think it is complete, then set the ticket to auto-complete in 2 days. This gives them an opportunity to respond, but if they don’t, it closes the ticket. Complete All work has been completed. The user has confirmed the issue is resolved to their satisfaction. -
15Details on a TicketWhen you open or create a ticket in Autotask, these options are available:
Item Explanation Client Select the company this ticket is for. Contact This is the user who requested this work. Status See details on statuses above. Priority Undetermined New tickets that have not been triaged for priority. 0 - Critical Outage level incident or something severe enough to extensively impact productivity 1 - High The issue is extremely important, but the scope is more limited than critical. 2 - Medium High Higher than normal. 3 - Medium Normal priority. 4 - Medium Low Lower than normal. 5 - Low When convenient. Send Contact Email Notifications If you don't want the contact to be notified, select no. Defaults to yes. Additional Contacts If other users should be on this ticket and potentially made aware of updates. Queue Co-managed queue is the only option by default. Primary Resource The tech who owns this ticket for resolution. Secondary Resources Other techs who may want to stay up to date on this ticket. Any note or time entry by anyone other than themselves will send an email update to all other primary or secondary resources on the ticket. Issue Type Broad category of what the ticket is about. Sub-Issue Type More specific category. Location If the company has multiple locations, which is this one at? Due Date When do you expect this to be completed? Estimated Hours How long the work is expected to take in total. Project If the ticket is associated to a project, it will be listed here. Can only be associated by opening up the project and modifying associated tickets there. Asset Which asset is this related to. For end users, this is typically their laptop or desktop. Additional Assets Any other assets that may be related. For example, if multiple switches are having a problem. Planned Replacement Date This is the date tracked by Next7 for when this piece of equipment is budgeted for replacement.
-
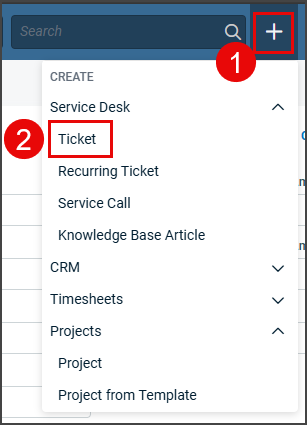
16Creating a Ticket
- Hover over the plus sign and click Ticket.
- You can also create tickets by opening the company and clicking the tickets tab > New.
- When you are searching for tickets, there is a New button.
Most tickets are considered Service Requests. There are four other types:
Alert - A ticket generated by a monitoring service.
Change Request: a ticket to approve a change request.
Problem: If an outage creates more than one ticket, consider changing one ticket to a problem that you will work out of, and then associating all of the other tickets as incidents. That way, users who report the problem can be notified of updates and it's easier to track them all internally.
Incident: Associated to a problem ticket. - Hover over the plus sign and click Ticket.
-
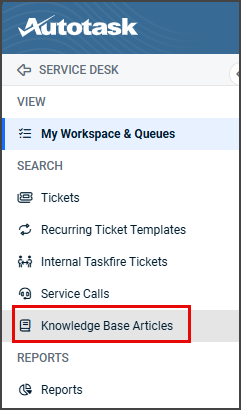
17Access KnowledgebaseIf you would like to document specific fixes or other information, you can view and edit the knowledgebase by going to Menu > Service Desk > Knowledge Base Articles.
 You can create a new article by clicking New. You can associate the article to various tickets or assets in the Related Items section.
-
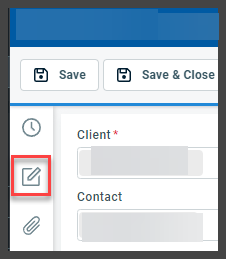
18Adding a Ticket NoteWe recommend treating notes like emails to the end user. Instead of opening up a new email, open a new note, and then tick the box to notify the user.
- Create a new note with any of these options:
- When you have a ticket open, use the icon on the top left to add a note.
- In a list of tickets, using the context menu you can add a note:
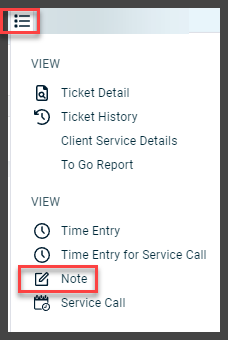
- When you have a ticket open, use the icon on the top left to add a note.
- Details on the note
- Title: Optional
- Description: Body of your message.
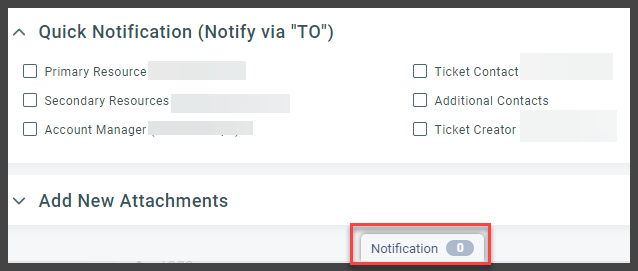
- Quick Notification: If you want to notify the contact of this new note, tick the box next to Ticket Contact. If you want the additional contacts notified, also click the Additional Contacts box.
- There are additional options for primary resources as well.
- To notify anyone by typing in their name, click the Notification button
- Create a new note with any of these options:
-
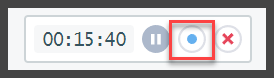
19Adding a Ticket Time EntryTime entries can be used for documenting actual work and the time it takes. By simply opening up the ticket, a timer will start running to make it easy to record your time.
- Create a new time entry with any of these options:
- Using the icon in the top left corner of the ticket.
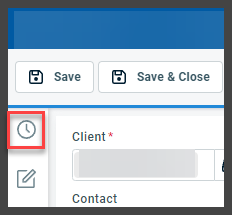
- Using the record icon next to the timer in the ticket.
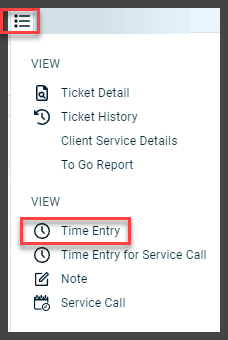
- In a list of tickets, using the context menu to click Time Entry.
- Using the icon in the top left corner of the ticket.
- Details on time entry
- Date, Start Time, End Time, and Time Worked will automatically calculate based on the time you opened up the ticket and had it running.
- Summary Notes: High level details of what was done with the ticket. We use this as something legible to the end user.
- Internal Notes: Details about what was done to troubleshoot the problem including screenshots, logs of actions taken, and links to resources.
- Quick Notification: Similar to notes section above.
- Create a new time entry with any of these options:
-
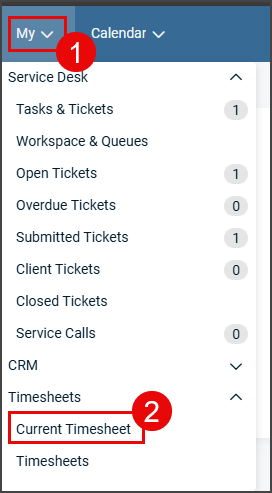
20Viewing Your TimesheetThe timesheet is a summary of all work done within a given week.Hover over My and click Current Timesheet
-
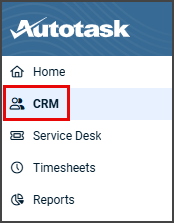
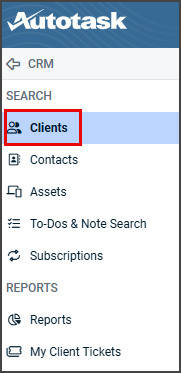
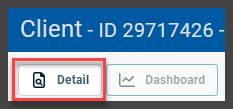
21Open your company
- Hover the Menu > Click CRM > Clients
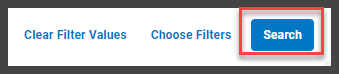
- Click Search
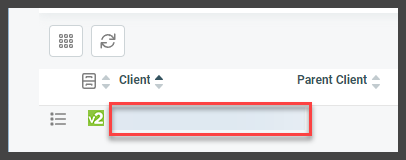
- Click your company name
- There are two different views: Dashboard View and Detail View. We find the detail view more helpful. Click that option. It will remember this setting the next time you open the client.
- You can see a group of useful tabs:
- Activity - Lists recent work.
- Tickets - List of tickets. Can filter for complete or incomplete tickets.
- Assets
- Contacts
- Notes
- Projects
- Locations

- Hover the Menu > Click CRM > Clients
-
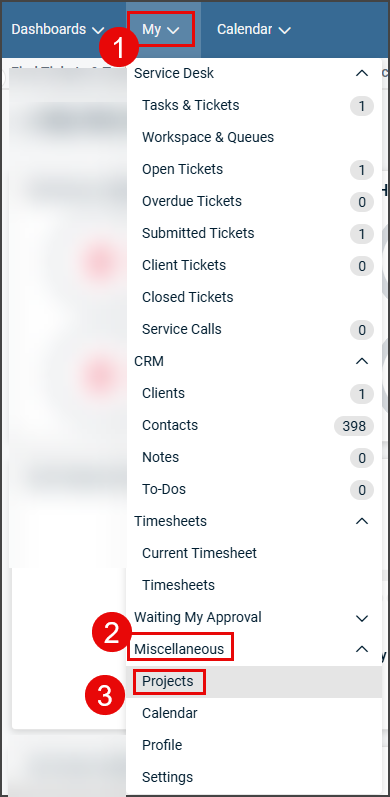
22Access ProjectsYou can view your projects by clicking My > Miscellaneous > Projects
You can create a new project by clicking the + sign > Projects > Project: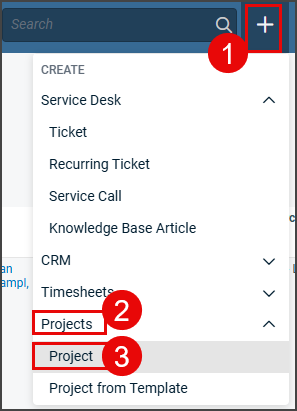
-
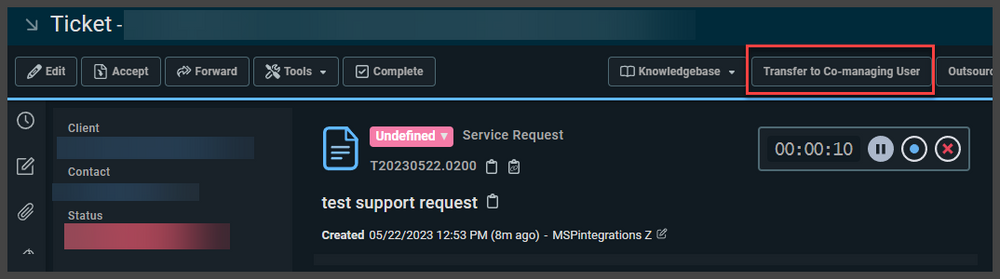
23Ask for Help on a Ticket from Next7 ITTo ask for help on a ticket:
- Open the ticket in Autotask.
- Click Transfer to Service Provider
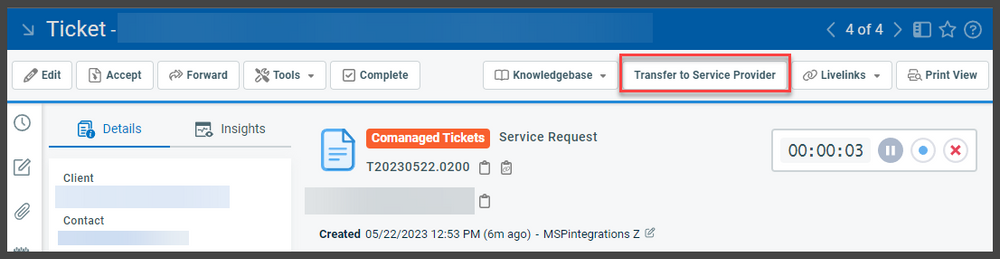
- Wait about 15 seconds for the workflow rule to execute and reassign the ticket. When you refresh the ticket, it will show that the ticket is being worked on by Next7 IT and that the queue and status were changed:
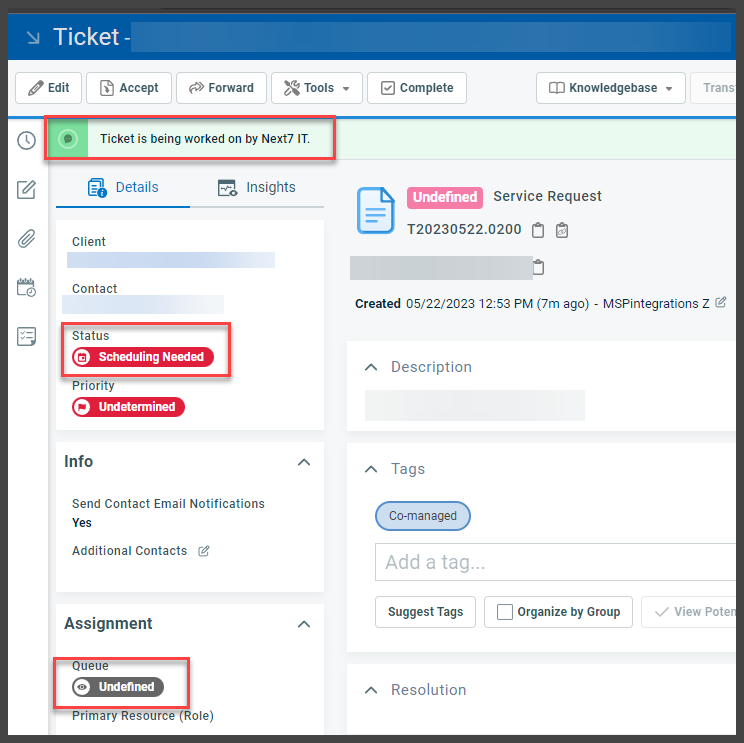
- Similarly, a ticket assigned to be worked on by Next7 IT can be transferred back to your company with a similar link by Next7.
-
24Understanding NotificationsVarious actions in Autotask will generate email notifications. They are summarized here:
Item Explanation Ticket Assignment When you have been set as the Primary Resource on a ticket. Time Entry Added Assigned resources will get an update when a time entry is added. Ticket Note Added Assigned resources will get an update when a note is added. Ticket Transferred from Next7 to Client Primary co-managed user is notified. Ticket Compete Ticket contact will get an email letting them know the ticket has been completed. -
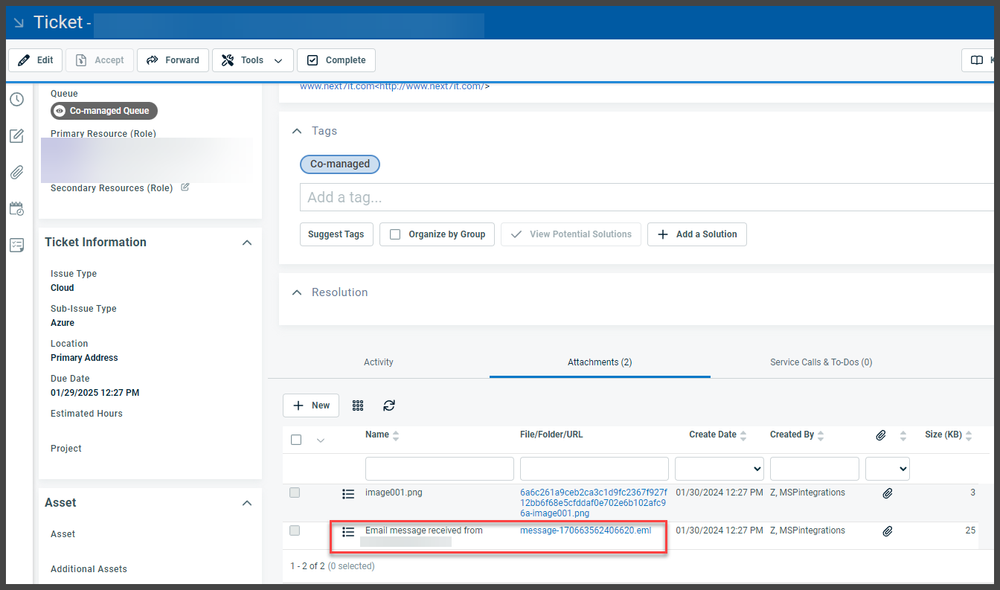
25AttachmentsThe original email is attached to all tickets. Open the ticket, and on the Attachment tab, find the .eml file to download and view if needed.
-
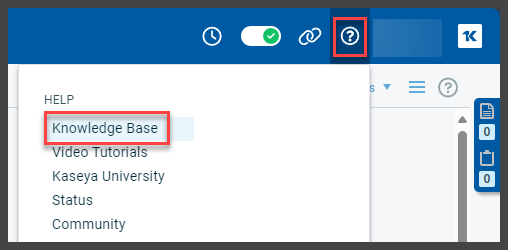
26Additional HelpAutotask has an extensive knowledge base available. Hover the question mark icon and then click Knowledge Base.
Did this answer your question?