Autotask - How to Use TaskFire for Ticket Management
Taskfire provides the ability for clients to create and manage their own tickets. If a ticket needs to be escalated at any point, it can be transferred to Next7 for additional work. Similarly, if a ticket is created by Next7, it can be transferred to the client for further work to be done.
Taskfire can be accessed using the client portal. Users that have Taskfire enabled will have additional options.
Taskfire can be accessed using the client portal. Users that have Taskfire enabled will have additional options.
-
1Creating TicketsTickets can be created by clicking the New Ticket link in the top right corner of the page, or from the Tickets, New Ticket menu.

Select the request type you want, which determines where the support request will go.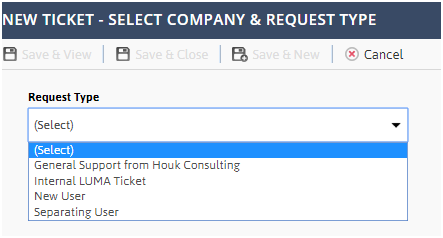
The next screen will be different depending on which option you select. For example, a new user request type will have form items relevant to the information needed to add a new user.
For Tickets that your company will work on:- Title = Title of the request.
- Contact = The person we are doing the work for on this ticket.
- Internal Resource = The person on your internal team assigned to do the work.
- Taskfire Queue = Way to organize work by queue. By default there is only a “General Queue.” See the Manage Queues section below for information about creating additional Queues.
- Taskfire Status = The status of the internal ticket from your perspective.
- Service Provider Status = The status of the ticket from Next7’s perspective.
- Taskfire Priority = Your internal team’s priority.
- Service Provider Priority = Next7’s priority.
- Asset = The computer or device this ticket is about. You can select from the entire list of assets sing the drawer icon or filter by the Contact on the ticket using the person icon.

- Scheduled Date = Date in which the next action on the ticket will take place.
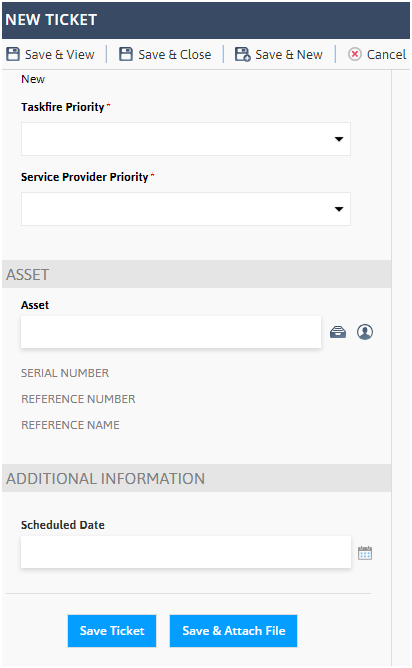 Fill out the form and click Save.
-
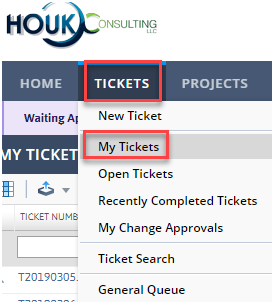
2Finding TicketsTickets in which you are assigned as the internal client resource on can be found by hovering over Tickets, then clicking My Tickets.
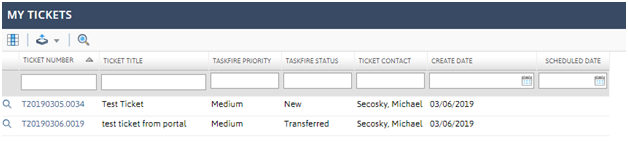 You can view all the tickets in your internal queue by clicking Tickets, General Queue
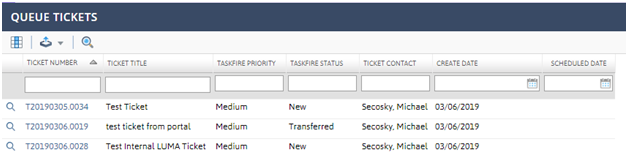 Tickets that are in this queue could be assigned to Next7, or they could be assigned internally. You can tell this by looking at the Taskfire Status column. A status of Transferred indicates it’s been sent to Next7.
-
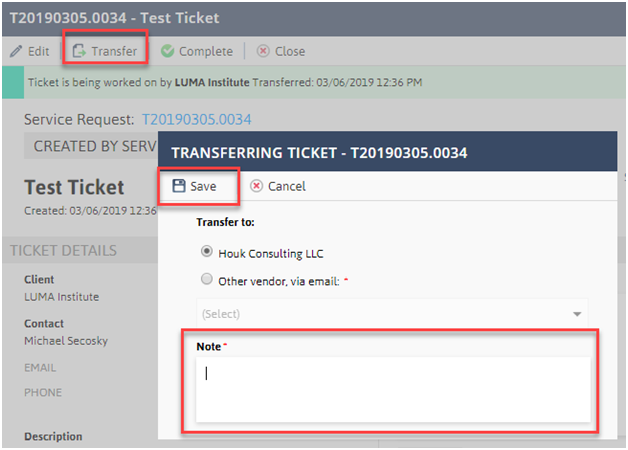
3Transferring TicketsTickets can be transferred back and forth between the client team and Next7.
To transfer a ticket to Next7:- Open the ticket you want to transfer.
- Click the Transfer button at the top.
- Enter a Note and click Save.
-
4Manage Request TypesRequest types control the options present when a ticket is submitted. The first step in creating a new ticket is to select the Request Type.
Access by hovering over Manage then clicking Request Types.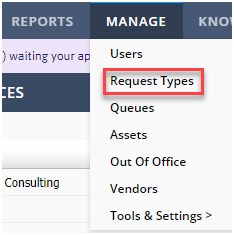
Click the pencil next to the request type to edit, or click New Request Type to create a new one.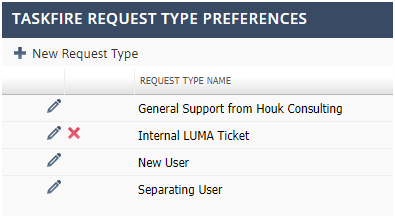
The options on this screen are as follows:- Request Type Name = Name of the request type. This will show up on the dropdown list when a user creates a new ticket.
- Asset = If the asset field is shown or not.
- Background Questions – Custom questions to ask the person adding the ticket to collect information from them. This information gets added to the ticket description.
- Taskfire Queue – Select the queue that this request type goes into.
- Internal Resource – Select who will automatically be assigned this ticket, or select Unassigned if this shouldn’t be selected automatically.
- When this request is Auto-transferred who receives it – Leave as Next7
- Auto-Transfer this Type – Determines if the ticket automatically goes to Next7, stays internal, or only goes to Next7 outside of specified hours.
- Allow Out of Office for this Request Type - Sends tickets that normally would stay internal to Next7 if the internal resource assigned sets their status as Out of Office.
-
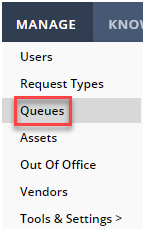
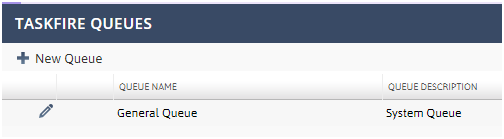
5Manage QueuesYou can add or remove internal queues to categorize your work. This can be done by hovering over the Manage link then clicking Queues.
-
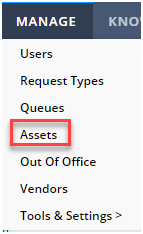
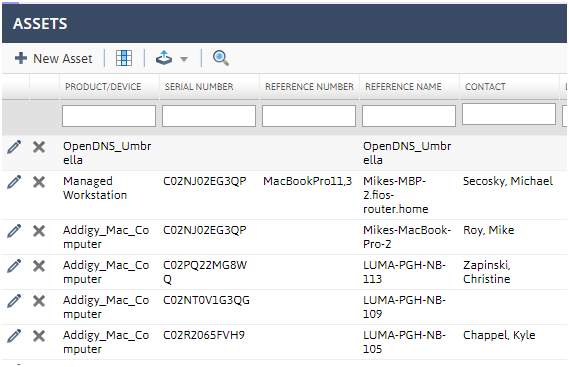
6AssetsAssets can be seen by hovering over the Manage link and then clicking Assets.
-
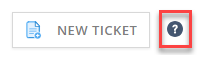
7Getting Additional HelpMore help can be found using the help section within the client portal. Click the question mark in the top right corner.
Did this answer your question?