Setting Preferences in Acrobat
You need to have your Acrobat software set up so you can quickly access the tools you use most often. You should also have the interface customized
to show the tools and views that you prefer. Granted, setting preferences can seem tedious. But it’s important if you want things to work smoothly and
to avoid frustration.
to show the tools and views that you prefer. Granted, setting preferences can seem tedious. But it’s important if you want things to work smoothly and
to avoid frustration.
-
1Access Preferences PaneHow you access the preferences is slightly different, depending on whether you're using a PC or a Mac. On a PC, select Edit > Preferences. On a Mac, select Adobe > Preferences. The keyboard shortcut for accessing the preferences on a PC is CTRL + K, and on a Mac it's CMD + , (comma).
-
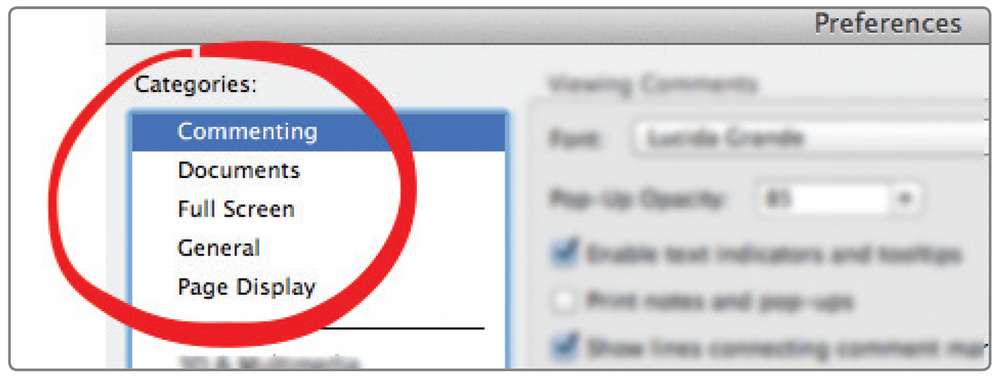
2The Categories Pane --> CommentingOnce you select the preferences option, you will see the Categories list below, which are Commenting options. Spend some time clicking on each of the five terms circled in red and see what options are available to you.
-
3Set Commenting OptionsThe Commenting category has default options that are set the way most lawyers will want to have them, with one exception. Almost every lawyer who uses the highlighter tool (discussed in XXXXXXX) will want to have the highlighted text automatically copied into the comment text that goes with it.
So, check the box that says Copy selected text into Highlight, Cross-Out, and Underline comment pop-ups. Doing so will cause Acrobat to automatically copy text that you highlight into the comments box.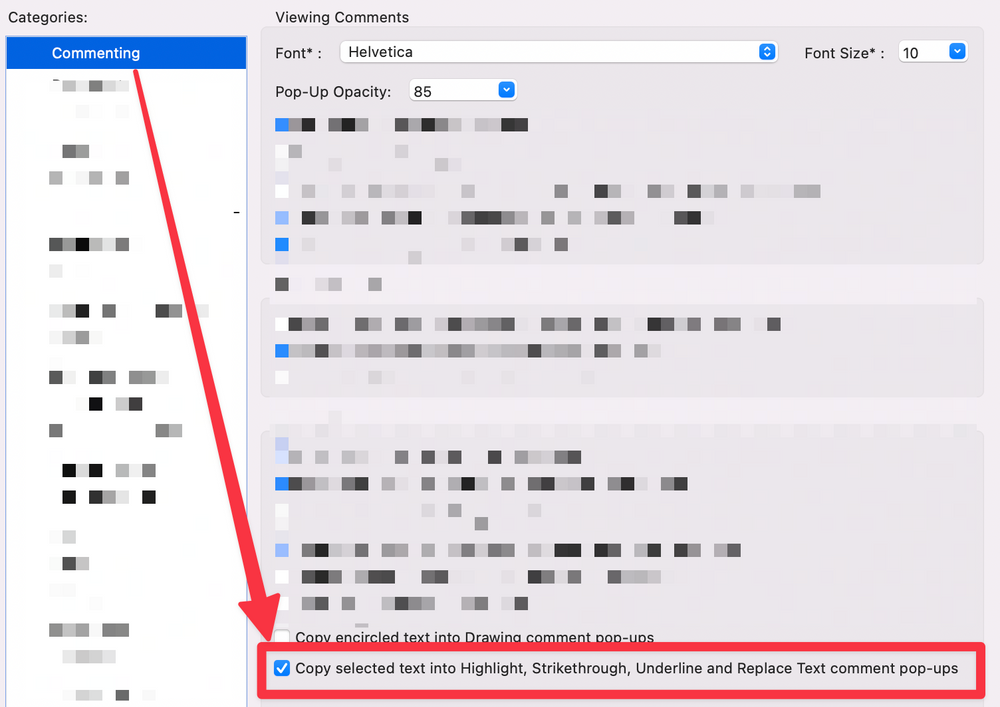 Most of the time, you'll want to do this, and it is easy to remove quickly in situations where you want to put in your text comment.
-
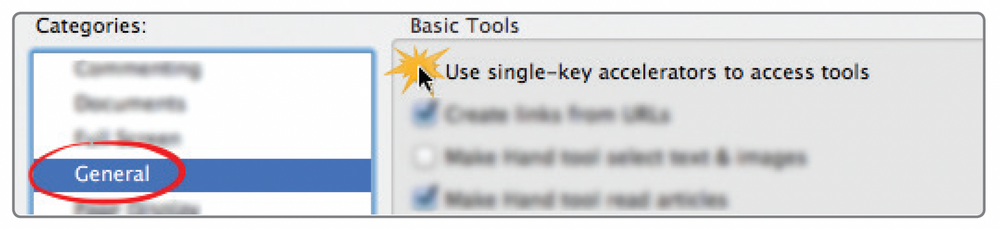
4Enable Single-Key AcceleratorsUnder the General sidebar, you might want to activate the first option, called Use single-key accelerators to access tools, as shown below.