Giving your knowledge base a custom branded subdomain
This means customers will be able to access our knowledge base at help.example.com rather than the unbranded
sweetprocess.com/kbs/example-knowledgebase/
To complete this you'll need:
- Administrative access to your DNS provider's portal (Amazon Route53 will be used in this guide);
- A subdomain that you'd like for customers to access your knowledge base on
-
1Add the custom branded domain to your knowledge baseFirst let's head over to your knowledge base and add the custom branded subdomain there.

Enter the subdomain that you'd like.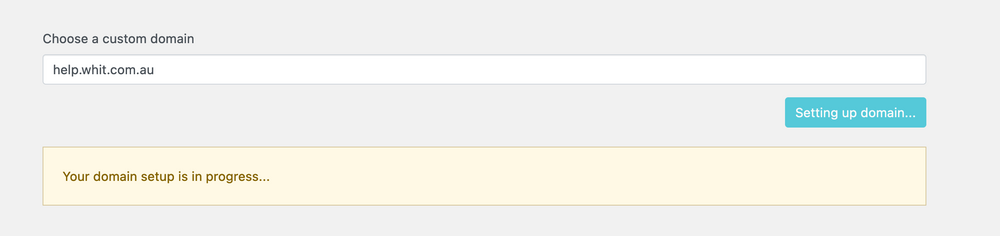
-
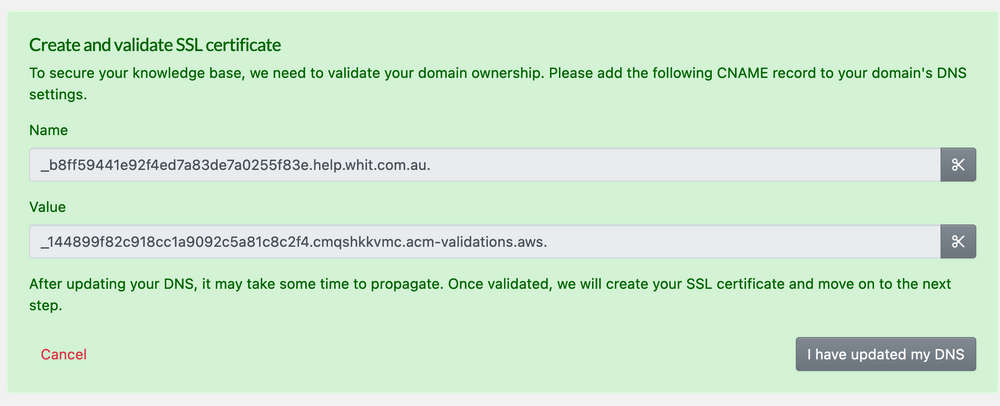
2Prove ownership of your subdomainWe will create an SSL certificate for your subdomain to secure traffic, but in order to do so you'll need to prove ownership of your subdomain. We use a CNAME verification system which means you'll need to create another subdomain with a specific value.
-
3Adding the verification CNAME record
1. Visit us-east-1.console.aws.amazon.com/route53/v2/hostedzones and find the zone that you'll be editing.
2. Click 'Create record set' to add a new record.
3. Enter the verification name for the CNAME record (e.g., '23423423.help'), leave the type as 'CNAME'.
4. In the 'Value' field, enter the verification URL (e.g., '_234234234234.acm-validations.com').
5. Click 'Create' to add the record to the hosted zone.
6. Click "I have updated my DNS" We then begin checking your DNS records in the background waiting for them to be updated.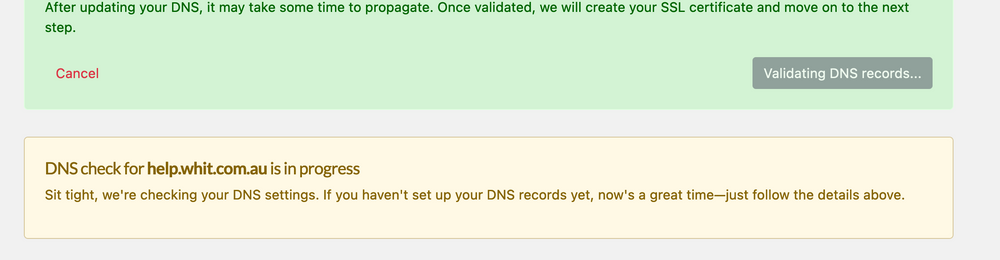
-
4My Domain was successfully verified
-
5Check the CNAME that you entered is correctWhen given a CNAME to verify we'll show the full name for example:
_abcdef1234567890abcdef1234567890.kb.example.com
But most providers only need the first portion:_abcdef1234567890abcdef1234567890.kb
to enter into the CNAME field. Your provider may automatically add the example.com on the end for you. This is the case with GoDaddy, Amazon Route53, Cloudflare, NameCheap, Google domains and many others. -
6Send customers to your knowledge base
1. Head back to the hosted zone and prepare to add a new CNAME record
2. Add a CNAME record for your knowledge base as shown in the 'Name' field.
3. In the 'CNAME Value' or 'Alias' field, enter your knowledge base URL (e.g., 'd32432.cloudfront.net').
4. Save the changes to update the DNS records.
5. Click "I have updated my DNS again"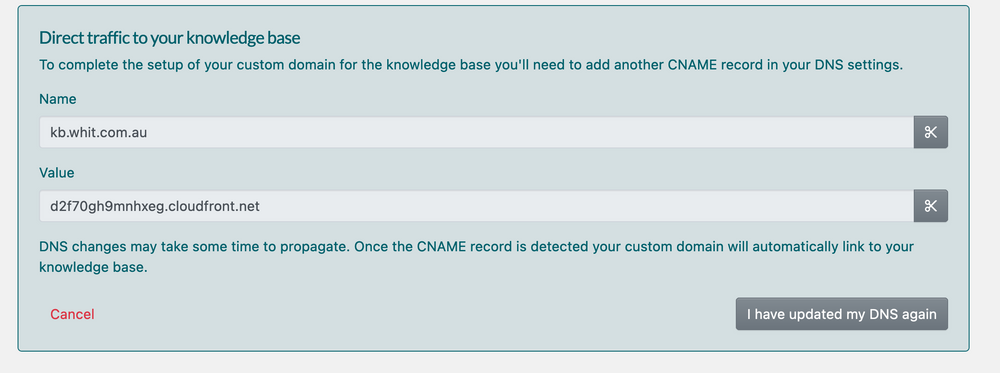
-
7Finished you may access your knowledge base

Once things are all OK on our end, we'll give you the green tick. You should be able to access your knowledge base via the subdomain that you've selected once the changes propagate through the DNS system. Depending on how that happens, it can be from 5 minutes to 24 hours. -
8Troubleshooting Guide: Verify your CNAME settings
To ensure your CNAME record has been configured properly, you can take advantage of online verification tools. These tools enable you to confirm that the CNAME record for your domain is set up correctly at your domain registrar. You can use the following resources:
DNSChecker - CNAME Record Checker - Enter your CNAME record to check its propagation and verify its configuration.
NSLookup.io - DNS Records Lookup - This tool allows you to query the DNS records of your domain, including CNAME records, to ensure they are correctly established.
Simply input the entire CNAME entry into either of these tools. If the configuration is correct, you should see the value that has been specified with your domain registrar.
-
9Instructions for setting CNAMEs on common domain registrars
For guidance on setting up a CNAME record with GoDaddy.com, please refer to their provided documentation. You can access detailed instructions by visiting the following link:
GoDaddy Help - Adding a CNAME Record
This resource offers a step-by-step tutorial to help you add a CNAME record to your domain via GoDaddy's domain management interface.
To find instructions on creating resource record sets in Amazon Route 53, including CNAME records, you can visit the following link:
AWS Documentation - Creating Resource Record Sets
This page offers detailed guidance on adding and managing DNS records within the Amazon Route 53 service.
For steps on creating DNS records, such as CNAMEs within Cloudflare, please see the developer documentation provided at the link below:
Cloudflare Developer Docs - How to Create DNS Records
This documentation details the process of adding different types of DNS records through the Cloudflare dashboard.
- For instructions on how to update CNAME records if you're using the services of Domain.com, you can consult their help article. The relevant information is available at this link:
Domain.com Help - DNS Management: How to Update CNAME Aliases
This resource provides a walkthrough on managing and updating your CNAME aliases through Domain.com's DNS management interface. - To learn about creating a CNAME record for your domain with Namecheap.com, please refer to their support knowledgebase. The article that covers this topic can be found at the following URL:
Namecheap Knowledgebase - How to Create a CNAME Record for Your Domain
This guide provides detailed instructions on how to add a CNAME record through Namecheap's domain management dashboard. You can find assistance for setting up DNS records, including CNAME records, for Google Workspace services at the following link:
Google Workspace Admin Help - DNS Records
This help center topic provides information and support articles geared toward managing DNS configurations for Google Workspace domains.
If you're looking to add a CNAME record with Shopify.com, you'll find the necessary steps in the documentation provided at the following link:
Shopify Help Center - Editing DNS Settings
This guide will assist you in modifying your DNS settings to include a CNAME record using Shopify's domain management tools.
For assistance with setting up a CNAME record when you are using Dynadot.com as your domain registrar, please see their instructional guide at the link below:
Dynadot Help - How to Create a CNAME Record
This guide outlines the process for creating a CNAME record within the Dynadot platform, offering step-by-step directions through their control panel.
For directions on modifying DNS records, including MX, CNAME, and A records, with HostGator.com, you can review the guidance available at this link:
HostGator Support - How to Change DNS Zones (MX, CNAME, and A Records)
This resource provides comprehensive instructions for adjusting your DNS records through HostGator's hosting dashboard.
For assistance with managing CNAME records on the Hostinger.com platform, please visit the support article available at the following link:
Hostinger Support - How to Manage CNAME Records
This article provides a detailed guide on how to add, modify, and delete CNAME records using Hostinger's domain management tools.
-
10End