Integrating Okta with SweetProcess for Automatic User and Team Provisioning (SCIM 2.0)
This guide will walk you through the steps to set up synchronization between Okta and SweetProcess using the System for Cross-domain Identity Management (SCIM) protocol. SCIM simplifies user and team management by automating the provisioning and de-provisioning process, ensuring user information is consistently up-to-date across both platforms.
Team Synchronization: In Okta terms, teams are equivalent to groups, and Okta enables synchronization of these users and groups through SCIM. SweetProcess provides the entire SCIM capability at no extra cost.
Prerequisites
1. You must have administrative access in Okta;2. Access to your SweetProcess system for generating API tokens.
-
1Creating an API tokenBefore setting up synchronization, you need to create an API token which will be used to authenticate the SCIM requests. The API token is used as a Bearer token in the Authorization header to authenticate SCIM requests from Okta to SweetProcess.
- Navigate to the API Tokens page sweetprocess.com/accounts/tokens/
- Create a new API token with the scope 'scim', give it a purpose to remind yourself about why you created it.
- Note down the generated token as you will need it for setting up the integration in Okta.
-
2Creating a SCIM App Integration in OktaHere's how you can create a custom SCIM app in Okta to enable user and group provisioning:
- Log into Okta as an administrator.
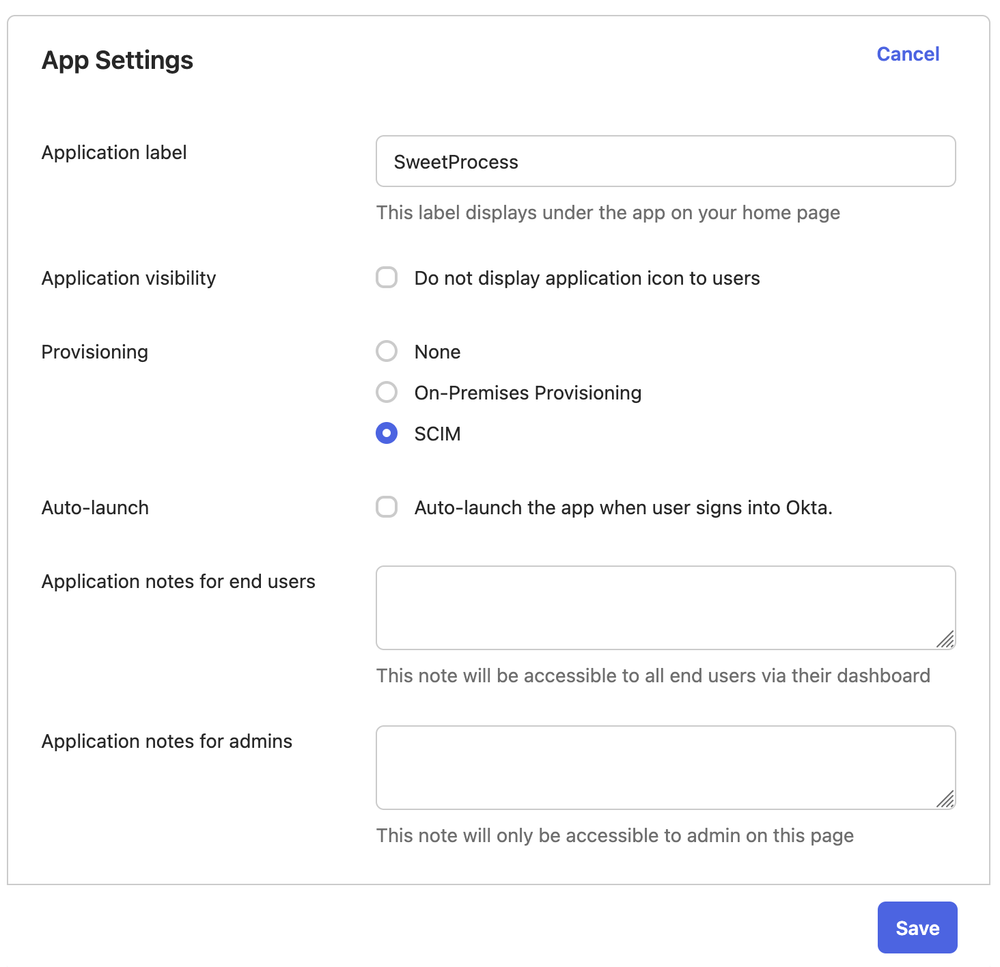
- Navigate to 'Applications' and edit your existing SweetProcess SAML integration
- Under General, select 'SCIM' as the provisioning type.
- Save
-
3Configuring the SCIM integration
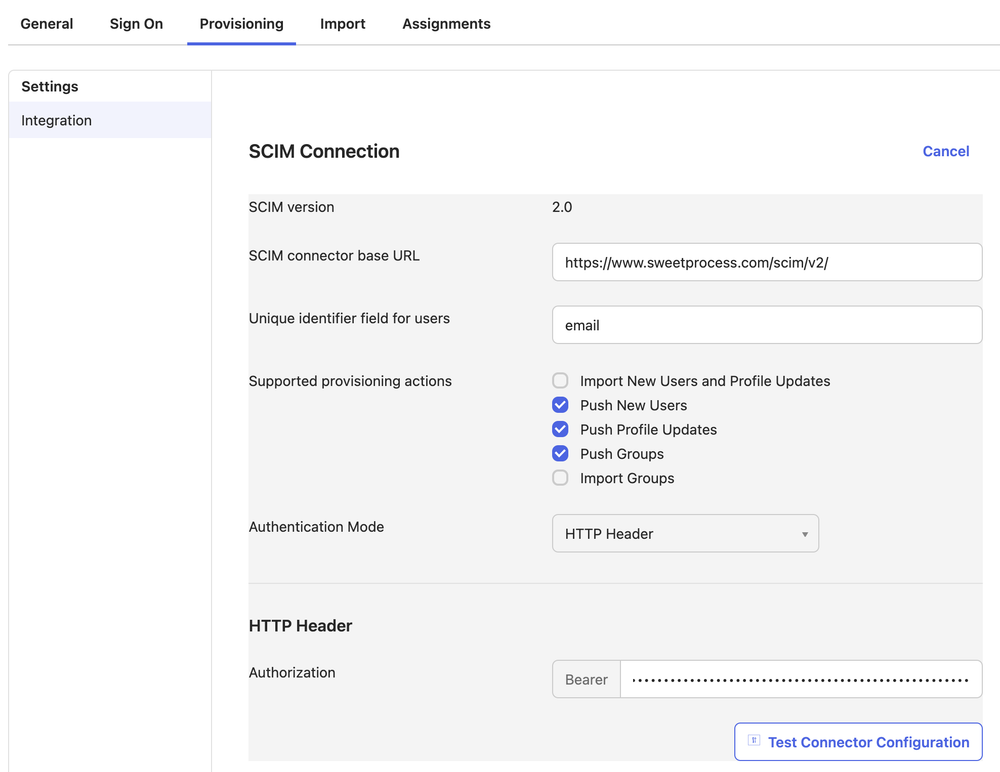
- Navigate to the 'Provisioning' tab and click on SCIM connaction 'Edit'.
- Enter your SCIM endpoint (sweetprocess.com/scim/v2/)
- Enter 'email' as the unique identifier field
- Select all the 'Push' provisioning actions
- Select HTTP Header authentication Mode
- Enter the API token that you noted down in step 1
- Test the integration to ensure connectivity.
-
4Testing and Activating the AppOnce your SCIM app is set up, you can test and activate it:
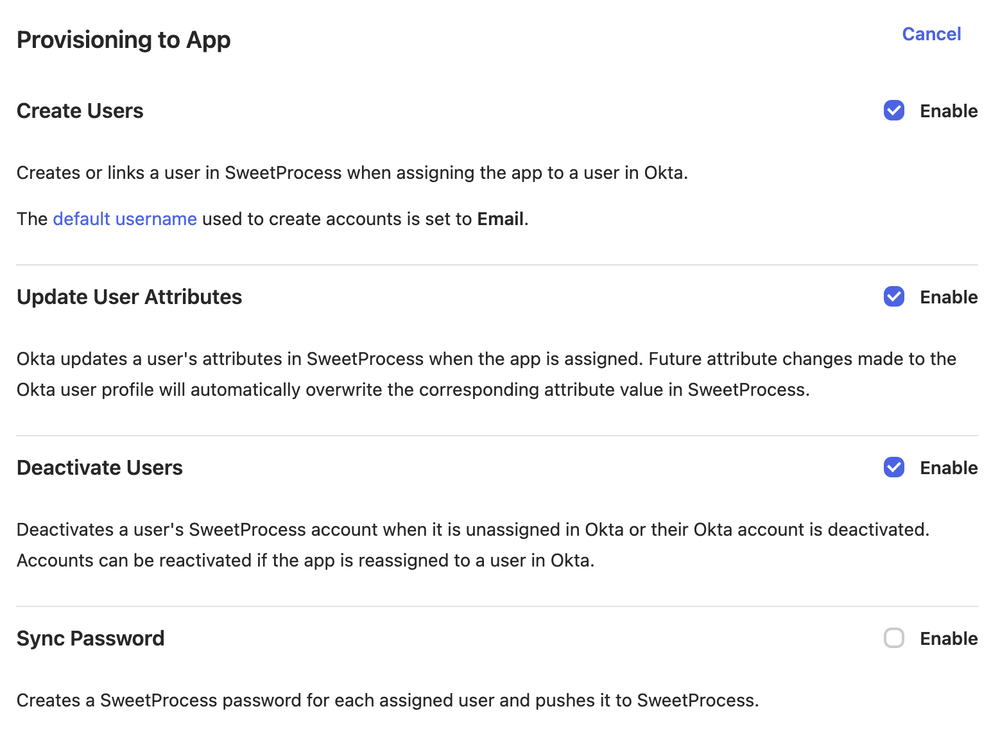
- Navigate to the 'Provisioning' tab in your application settings.
- Ensure user provisioning is configured correctly (see below).
- Activate the app to start synchronizing users and groups with SweetProcess.
- Monitor sync logs in Okta to verify successful provisioning operations.
-
5Essential Parameters TableHere's a table of the essential parameters you'll need:
Parameter Description Value SCIM Endpoint The endpoint URL for SCIM requests. https://www.sweetprocess.com/scim/v2/ API Token Token for authenticating SCIM requests. Generated in Step 1 -
6Understanding the Synchronization Process and Final Notes
- Okta syncs with SweetProcess regularly, based on your Okta settings.
- The sync process might not transfer all data at once. This is normal and ensures the stability and reliability of the process.
- If immediate sync is needed, manual sync options are available in your Okta admin portal.
Final Notes
After completing these steps, your Okta instance and SweetProcess should be successfully integrated. Users and groups (teams) from Okta will be automatically updated in SweetProcess according to the sync schedule.
Did this answer your question?
If you still have a question, we’re here to help. Contact us