Adding SweetProcess as Service Provider in JumpCloud
This is a procedure allowing you to set up Single Sign-On (SSO) access to SweetProcess for JumpCloud.
Note: if you need to upload a logo for SweetProcess during your setup feel free to use the image in the link below:
SweetProcess Logo
Note: if you need to upload a logo for SweetProcess during your setup feel free to use the image in the link below:
SweetProcess Logo
-
1Contact usWrite us an email asking about the possibility of turning SAML SSO on for JumpCloud! (support@sweetprocess.com)
We will write you back with the configuration data that is needed to finish the following instructions properly.
After we write you back you can go to the next step of this instruction. -
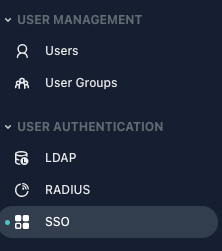
2Login to JumpCloud admin pageLogin to JumpCloud admin page and select User Authentication -> SSO
-
3Add a custom SSO appClick on the plus (+) button to add a new app

And select "Custom SAML App" button at the bottom of the page:
-
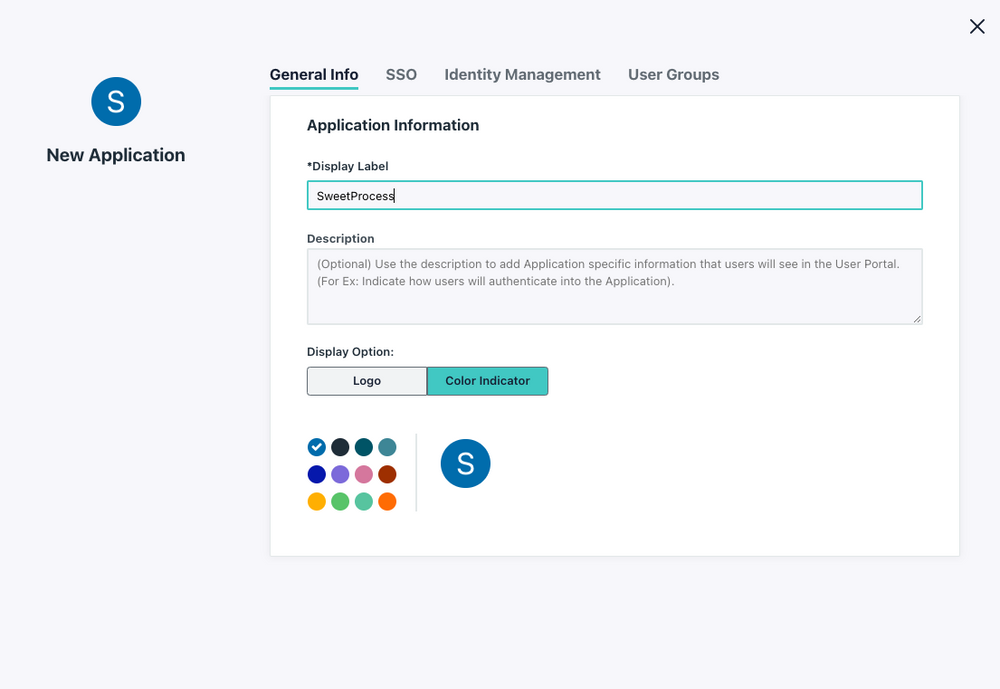
4Give your application a name like 'SweetProcess'
-
5Configure the SAML ApplicationSwitch to SSO tab and start filling up the form based on the data we gave you earlier once you had contacted us to set up SAML.
ACS URL The value that we provide you when you contact our support each account gets a unique URL
SP Entity ID - That should be set up to provided by us Entity id (It's probably https://sweetprocess.com)
IdP Entity ID - We recommend putting https://sweetprocess.com here as well, but you can choose another Entity ID for your IdP (it's not related to any settings on our side)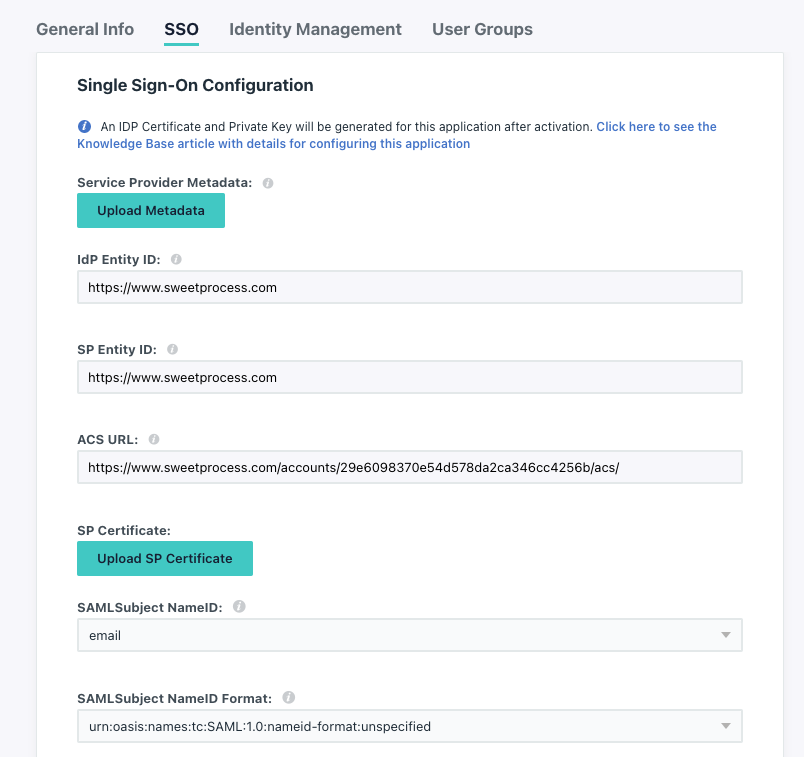
-
6Specify custom IDP URLGo to the bottom of the SSO tab and set IDP URL section to: sweetprocess (or other custom name that you prefer):

-
7Configure attribute mappingIn order for us to know who is logging in, we'll need first name, last name, and email.
Go to the bottom of the SSO tab and configure these as shown below: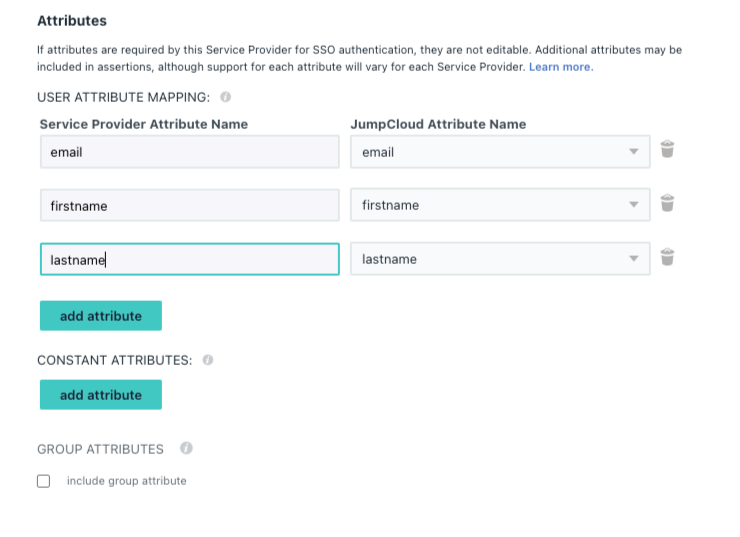
-
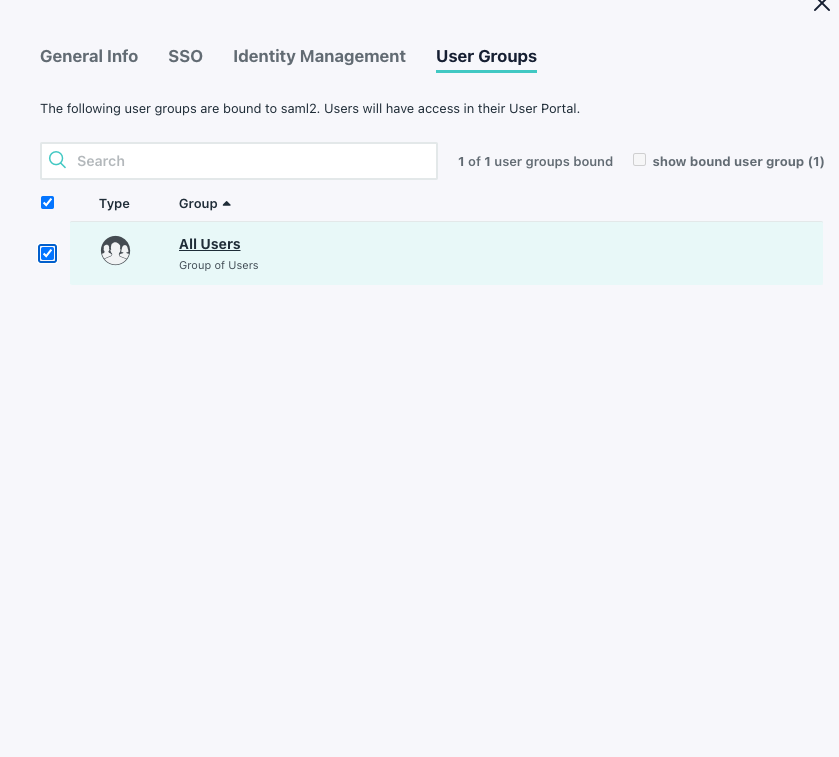
8Select the appropriate User Group that can use the SSO appSwitch to the User Groups tab and select the user group which should have access to SweetProcess SSO app:
-
9Confirm the settingsPress the activate button and confirm button when asked about confirmation.
-
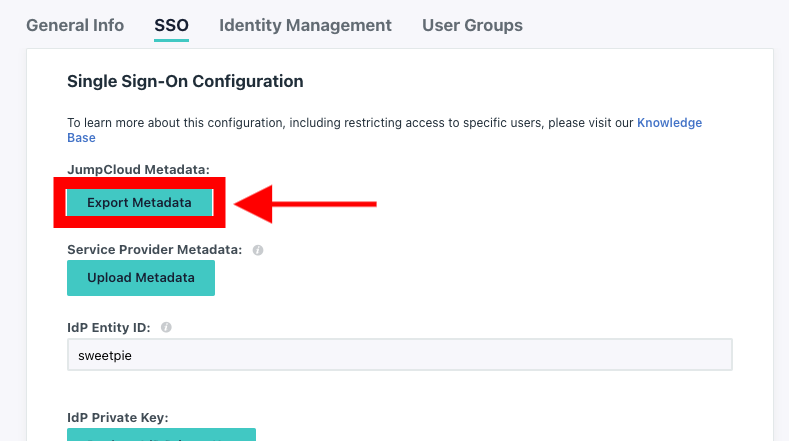
10Export Metadata fileWhen the configuration is successfully activated, select the newly created SweetProcess app once again, go to the SSO tab and press the Export Metadata button:
-
11Send the metadata file to us!In the previous step, you have downloaded an XML file and kept it safe. Now is the time to send that to our support team who will add it to your account and finish your SAML setup and send the welcome emails to your team.
-
12Try to login!After you receive an email from us, saying that we enabled Single Sign On (SSO) login, click the provided link and try to log in!
-
13Let us know if anything goes wrong!Contact us in case you have any problem! We'll be happy to help you out!
Especially for previous point, if for some reason signup fails - we may be able to help you determine why it failed and fix it.
Did this answer your question?
If you still have a question, we’re here to help. Contact us