Adding SweetProcess as Service Provider in Microsoft Azure
This is a procedure allowing you to setup Single Sign On (SSO) access to SweetProcess in Microsoft Azure
Note: if you need to upload a logo for SweetProcess during your setup feel free to use the image in the link below:
SweetProcess Logo
The instructions were based on the Microsoft instruction:
docs.microsoft.com/en-us/azure/active-directory/...
Note: if you need to upload a logo for SweetProcess during your setup feel free to use the image in the link below:
SweetProcess Logo
The instructions were based on the Microsoft instruction:
docs.microsoft.com/en-us/azure/active-directory/...
-
1Contact usWrite us an email asking about a possibility of turning SAML SSO on for Azure! (support@sweetprocess.com)
We will write you back with configuration data that is needed to finish the following instructions properly.
After we write you back you can go to the next step of this instruction. -
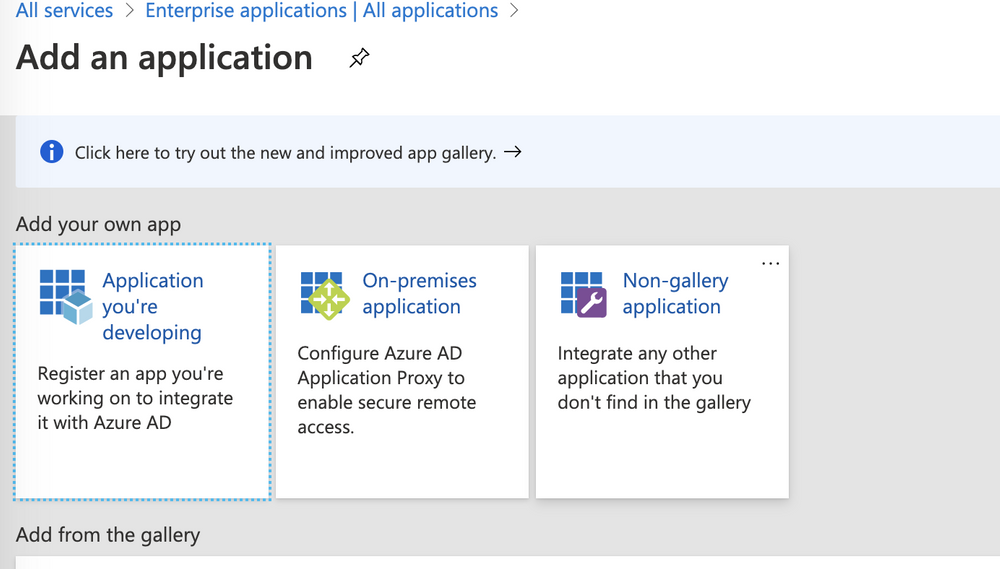
2Add new applicationNavigate to Azure Active Directory > Enterprise applications and click on "+ New application" button to add a new application

-
3Add a Non-gallery application
-
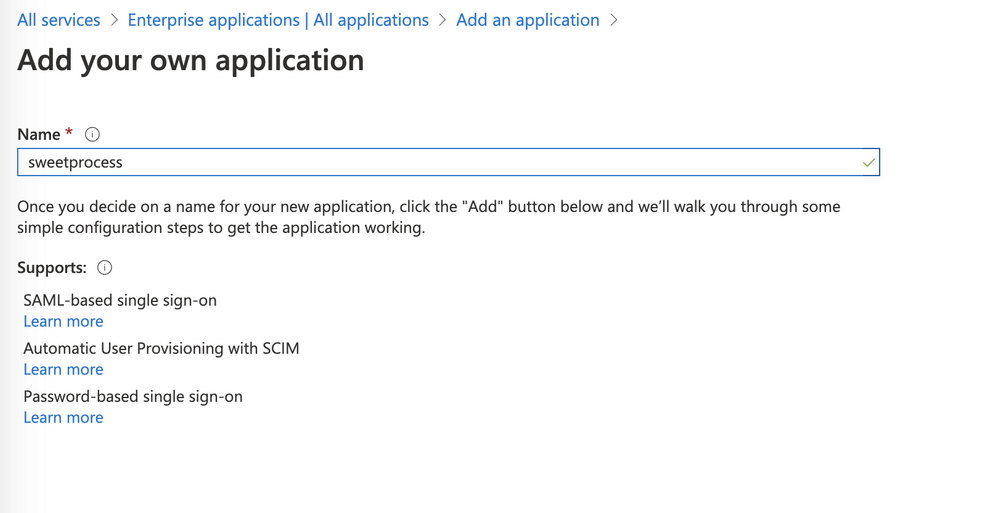
4Name the new application
-
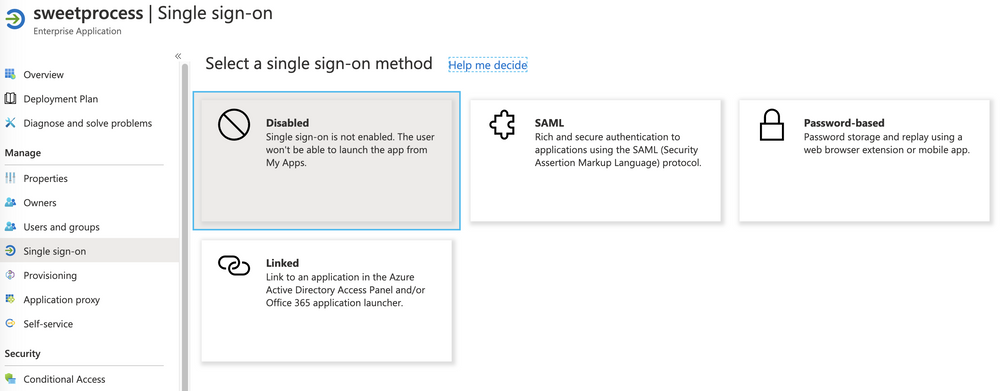
5Go to Single Sign-on settingsNow that the application is ready, you can navigate to Single Sign-on settings and click on SAML option to setup integration with sweetprocess
-
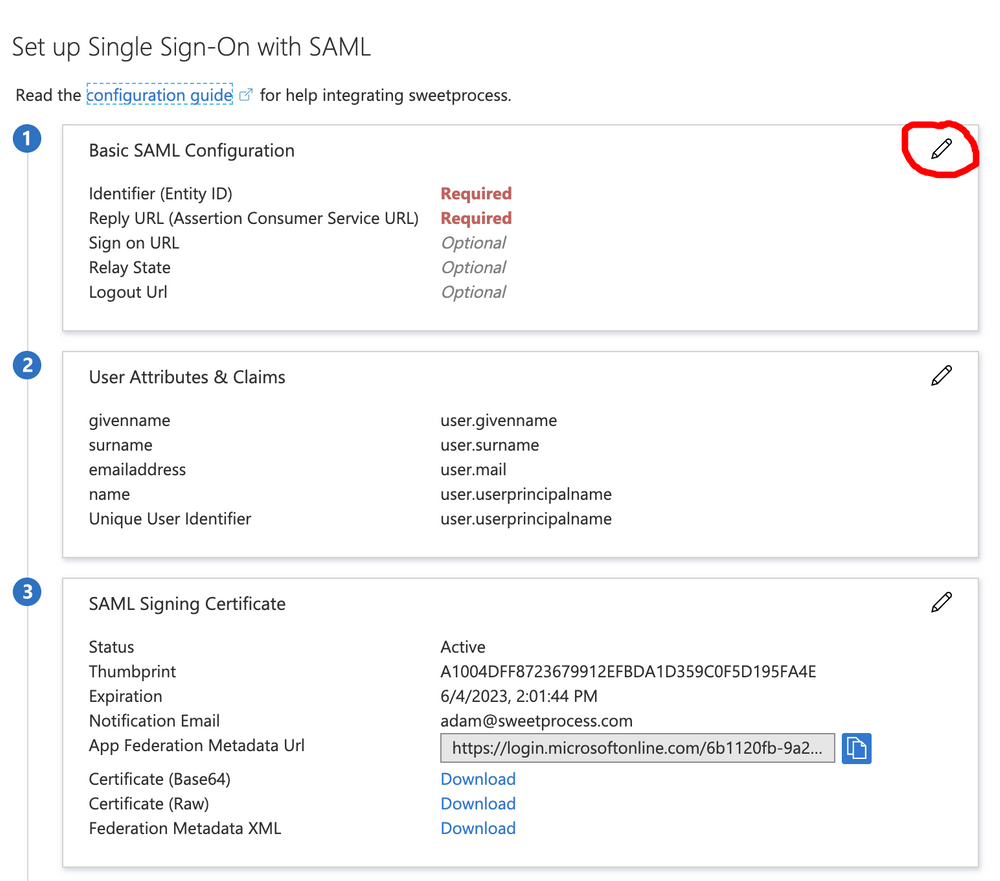
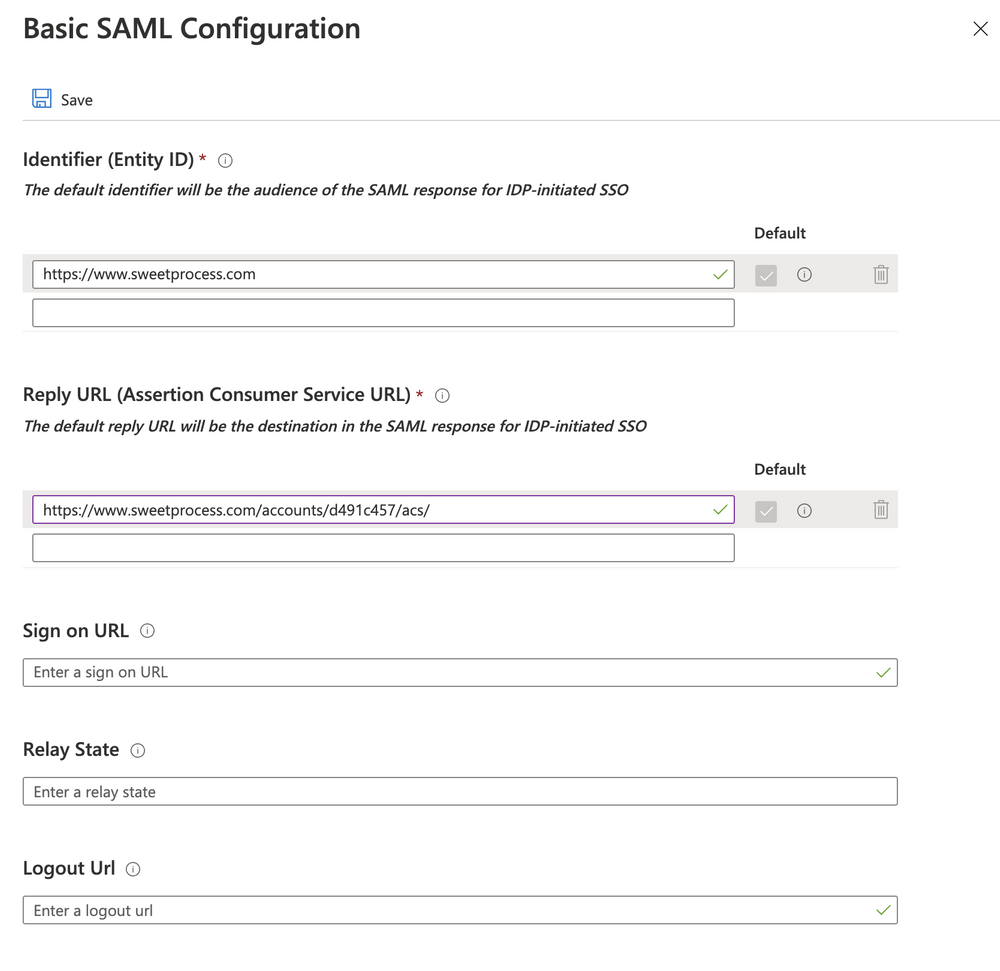
6Edit Basic SAML ConfigurationYou will be taken to the configuration site for SAML. From there - you should edit the basic settings first:
-
7Fill in Entity ID and ACS URLFill in the identifier (Entity ID) and Assertion Consumer Service (ACS) URL we gave you earlier once you had contacted us to set up SAML.
-
8Change User Attributes & ClaimsThis is optional - you can leave that configuration point unchanged unless there are some attributes you want to hide from us.
Minimal property we require for SAML to work properly with sweetprocess is the email address of the user that is logging in (user.email field).
Make sure that the property you are sending us doesn't have a namespace or, that the namespace is: schemas.xmlsoap.org/ws/2005/05/identity/claims
It is important that we know exactly how the property is sent from your system. For example, Azure will in the default configuration send givenName and emailAddress. Note that the capital N and A are important here, we need to match 100% with how your system is configured. -
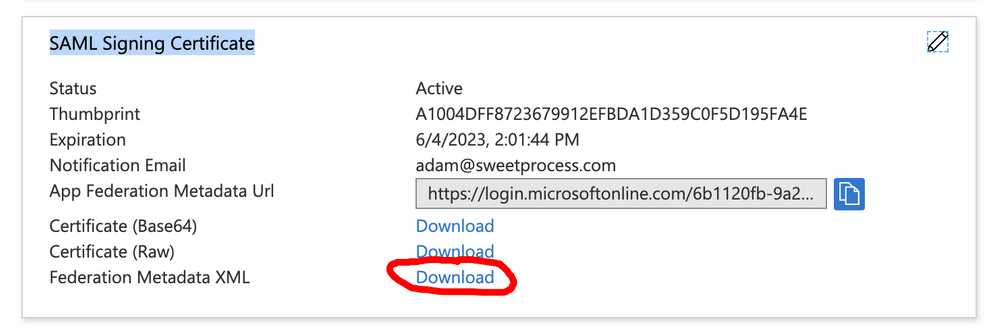
9Download the federation Metadata.xmlDownload and send us your Federation Metadata XML file - this is a file that we will need in order to finish the setup.
-
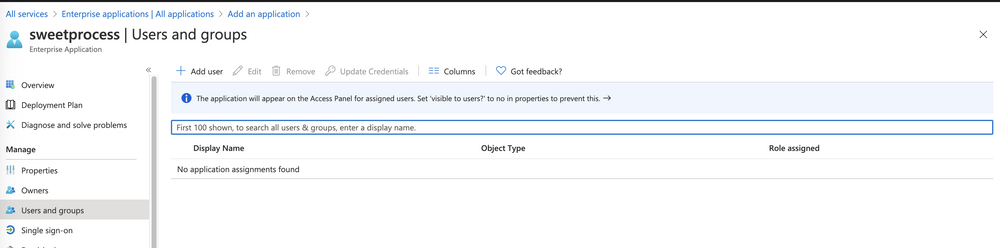
10Add users to the newly created appMake sure that you've added users and/or groups of people you want using sweetprocess application via SSO.
-
11Try to login!After you receive an email from us, saying that we enabled Single Sign On (SSO) login, click the provided link and try to log in!
You can also test out if you can log in by clicking Test button in SAML configuration page:
-
12Let us know if anything goes wrong!Contact us in case you have any problem! We'll be happy to help you out!
Especially for previous point, if for some reason signup fails - we may be able to help you determine why it failed and fix it.
Did this answer your question?
If you still have a question, we’re here to help. Contact us