How do I add a decision to a procedure?
The instructions below will show you how to add conditional logic to a procedure. This is also known as branching, "yes-no", and so on.Essentially when someone reaches the decision point of the procedure they get to choose from the options you created and based on the option they choose they will go down a different path/branch.Please note You can also add multiple decisions to a procedure.
-
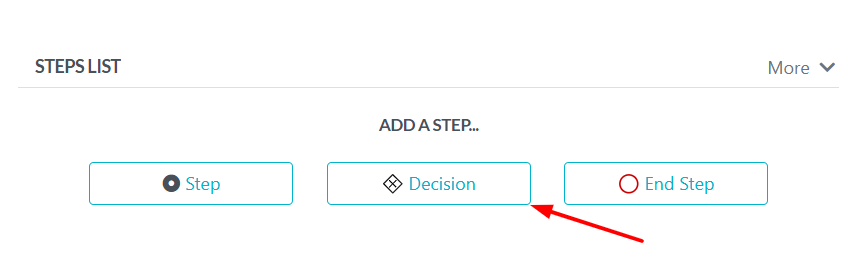
1Adding the Step
In the editing mode of a procedure, there's an option called "ADD A STEP". You need to select it. Among the options that appear, click on the one labeled as "Decision". Doing so will add a decision step to the Procedure Step.
-
2Configuring the Step
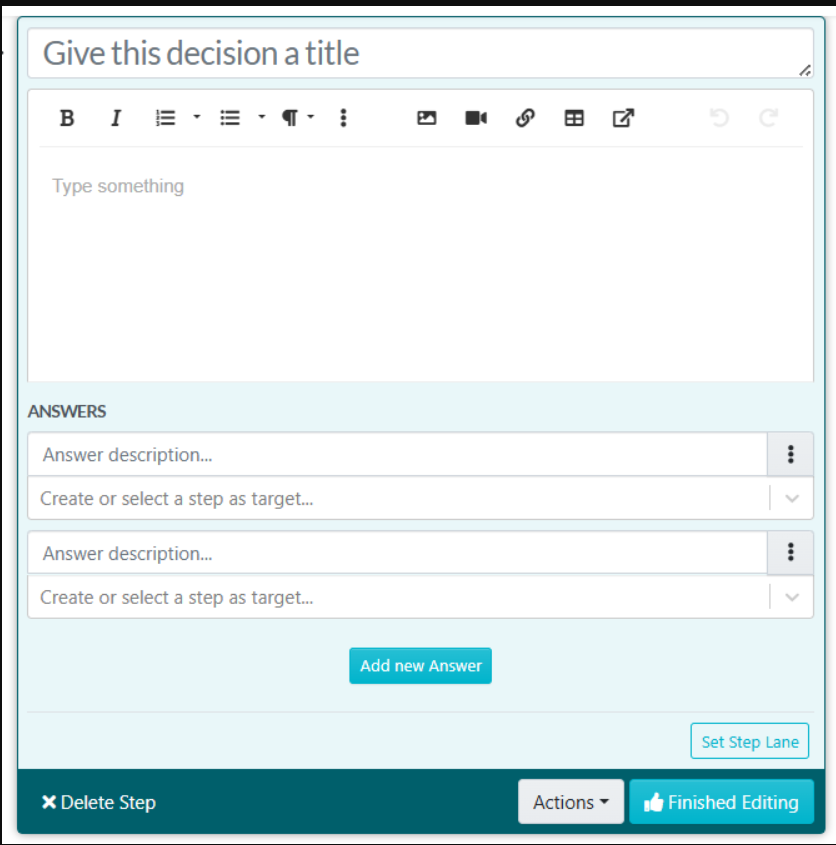
1. Setting Up the Decision Question
Start off by entering the 'Decision Step'. You'll see a workspace specifically designed for shaping your team's crucial question.- Name your decision: Ask a clear and direct question (e.g., "Is the client's payment overdue?").
- Use the Description Box: Add extra information or instructions to help the user make the decision.
2. Building Your Decision Tree (Options)
In the 'Answers' section, state the possible responses and their resulting actions.- Respond: Give a clear response option (e.g., "Yes" or "No").
- Choose the next step: Use the dropdown menu to select the next step based on each option.
- Add more options: If you need more response choices, click on 'Add new Answer'.
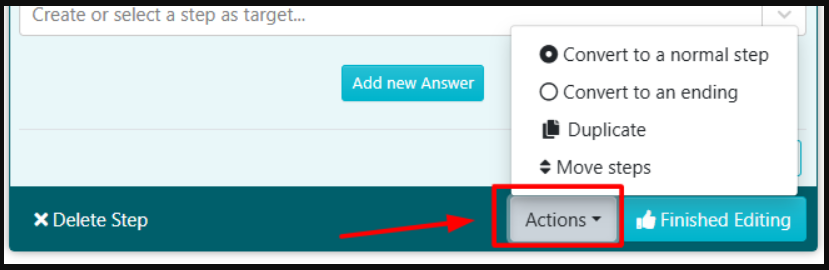
3. Adding Advanced Customization
If you need to change or rearrange your procedure, use the 'Actions' menu.- Change to a regular step: This turns the Decision Step into a normal step.
- Change to an ending: This concludes the procedure after this step.
- Copy: Use this to duplicate the decision for use in another location.
- Rearrange steps: This allows you to change the order of decisions in the procedure.
4. Save Your Changes
- Assign Step Lane: If needed, allocate a specific decision to a department or role.
- Finish Editing: Click this to save the decision-making process and go back to the main procedure view.
-
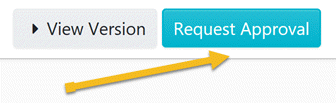
3Approve the Procedure
As soon as you are done with documenting all the steps of the procedure, click on “Approve”, which’s on the top right-hand corner of the page to approve the procedure and make it live.

Note: if you do not have the ability to approve the procedure, you will be able to request approval by clicking on the "Request Approval" button as shown below.