Deggy Control Standard Solution: Install & Register Deggy Control - Company/Site Setup
Deggy Control is a Management Software for Tour Data. It is used to collect and store the Steel Pen's data within a Microsoft Access database file. The raw data can then be used within the reports section of the software to create various reports with user specified parameters.
Note: PRO Online Clients Do Not Download Deggy Control.
 Register Software
Registering your software is a way to authenticate the installation.
Steps
Enter the company name which will be associated to the site(s) that will be registered in the next step.
Steps
Enter the site(s) name(s) where the Buttons will be located.
Steps
Note: PRO Online Clients Do Not Download Deggy Control.
Sections Below:
- Review Before Installation: Compatibility & Permissions
- Instructions: Installation (link included)
- Instructions: Register Company & Sites
Deggy Control: Review Compatibility & Permissions
Deggy Control AI Software: Data Management Software- Windows - 7/8/10/11
- Server - 2008 R2/Server 2012 or above (32-bit or 64-bit version)
- Microsoft Office 32-bit version only!
- Important Note: Microsoft Office 64-bit version is NOT COMPATIBLE click here for solution
- Install under Full Administrative Rights
- Limit Administrative Rights after installation & registration
- Full Administrative Rights over Deggy Control program files and Database (.MDB) must be maintained
- Firewalls on computer/network - allow outside connections to Internet ports 49150 and 9090
- Email servers that require TLS protocol are NOT COMPATIBLE, e.g., Gmail & Office 365
- Solution: Create 3rd Party Password
Instructions: Data Management Software Installation (link included)
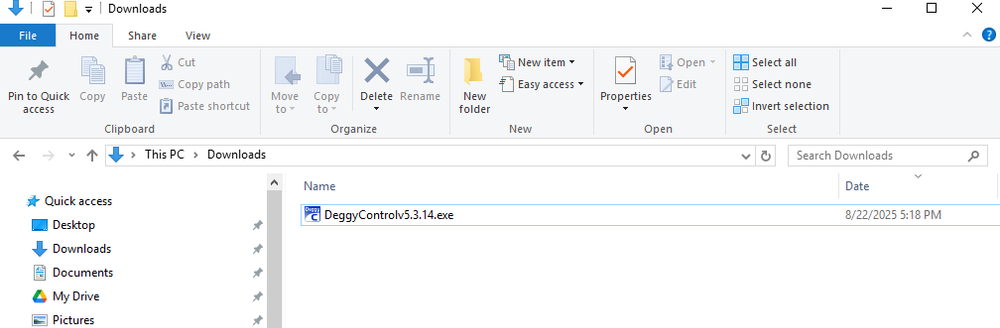
Deggy Control is the tour management software where data is registered and managed.- Click Link to Download Deggy Control 5.3.14
- The installer will be downloaded to your ‘Downloads’ folder on your computer. Double click the installer to Run Installation.
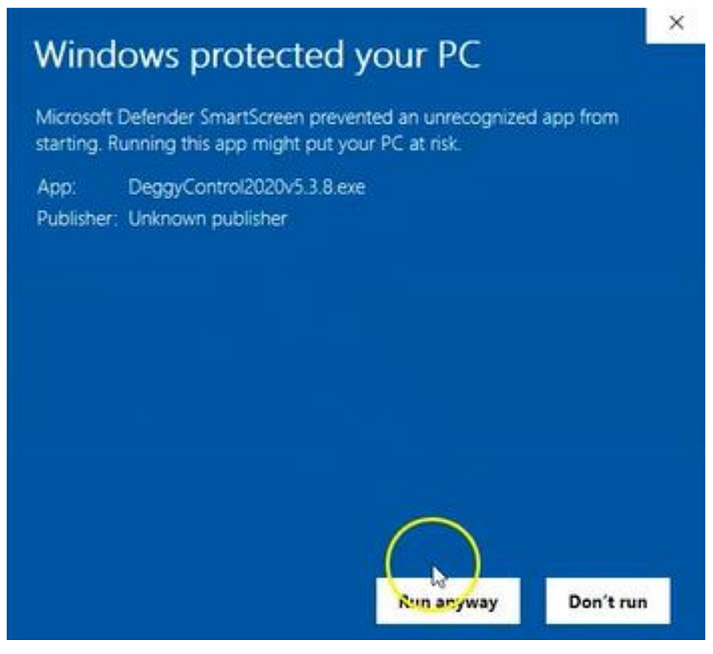
- A Windows licensing/publisher unrecognized alert may appear. To bypass and allow installation click on ‘more’ or ‘details’ under the alert message and the option to ‘Run Anyway’ will appear. Click on ‘Run Anyway’ to continue with installation.
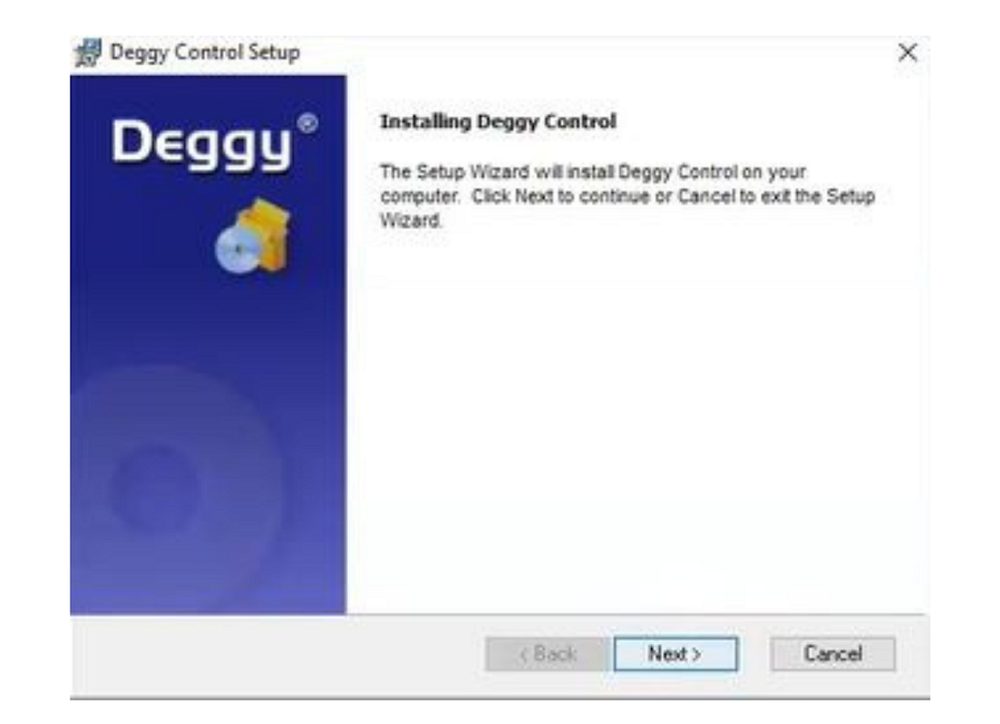
- Deggy Control ‘Setup Wizard’ will appear to verify that you would like to continue with the installation setup. Click ‘Next” to accept installation and continue.
- Note: A black pop-up box may appear with text indicating the hardware driver installation.
- Deggy Control ‘Setup Wizard’ will appear to verify that you would like to continue with the installation setup. Click ‘Next” to accept installation and continue.
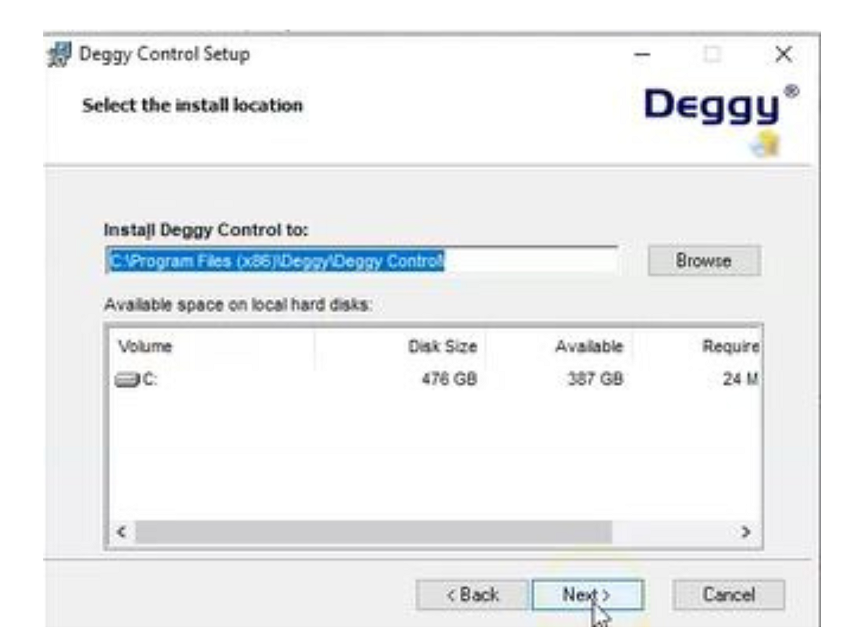
- Deggy Control Setup Install Location will appear which allows to you to choose the location of where the installation will be installed. It is highly recommended that you maintain the default location and click ‘Next.’
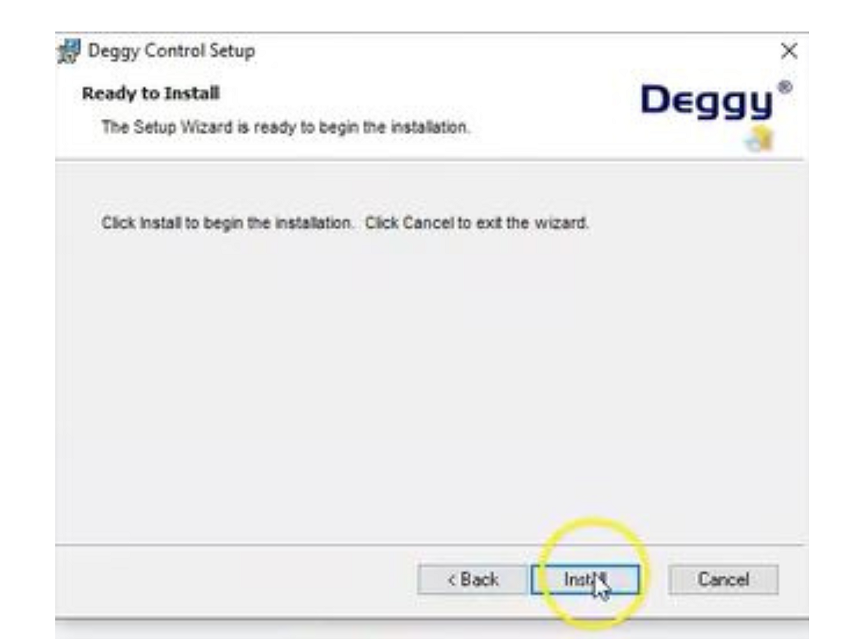
- Deggy Control ‘Setup Wizard’ will appear to verify that you would like to continue with the installation. Click ‘Next” to accept installation and continue.
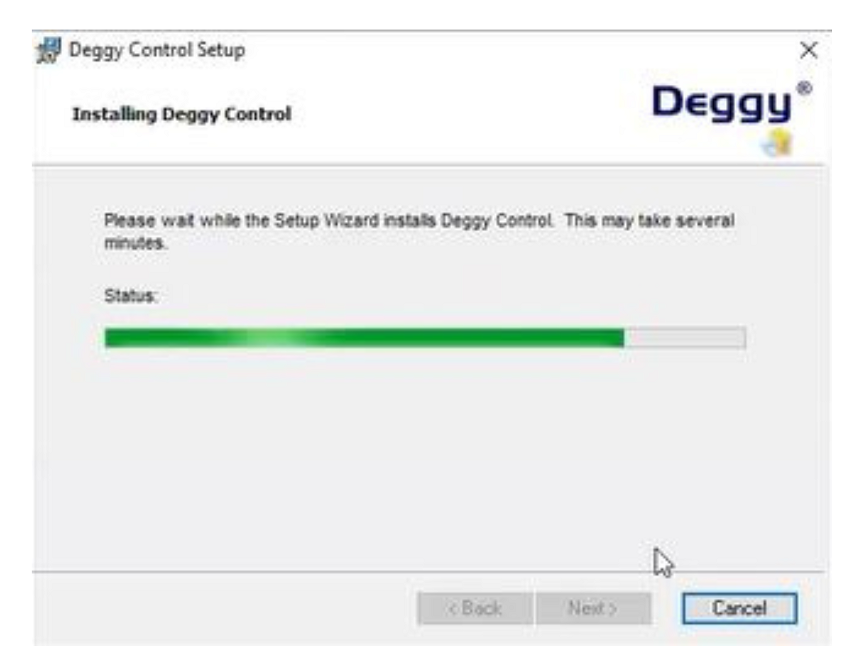
- Installation will begin.
- Microsoft Access Runtime will also install.
- Once Deggy installer is complete click Finish.
- Deggy Control may open automatically.
- If Deggy Control does not open automatically, select Deggy Control from Desktop or Start Menu.
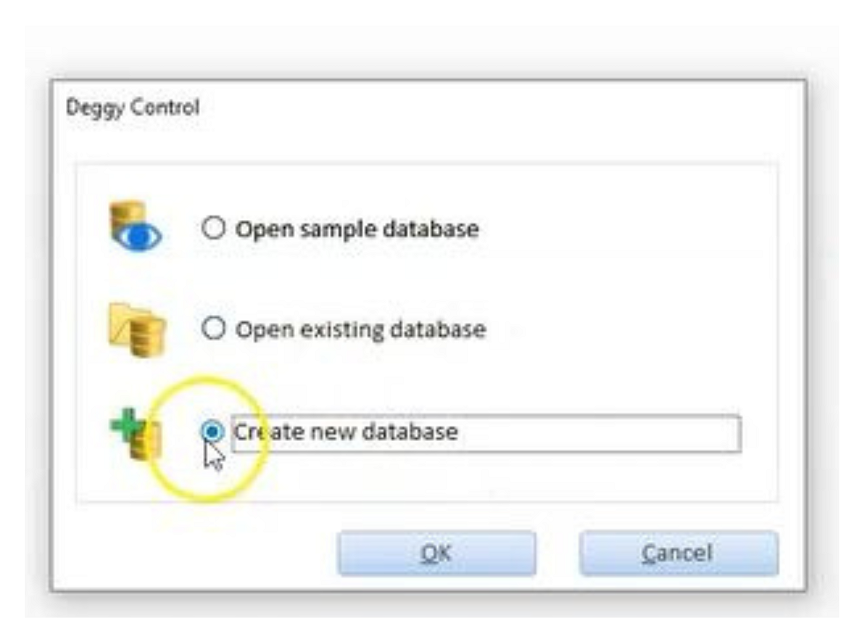
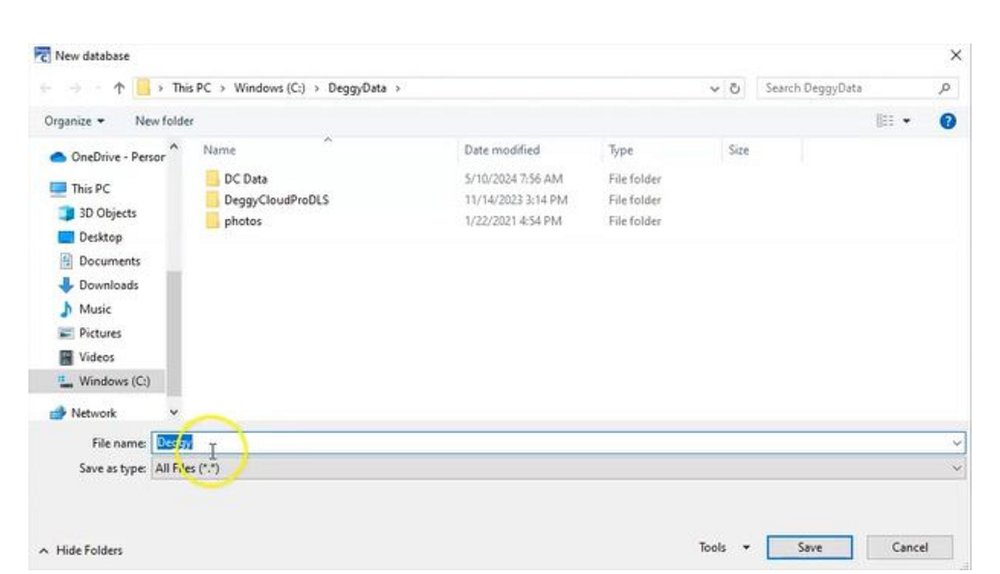
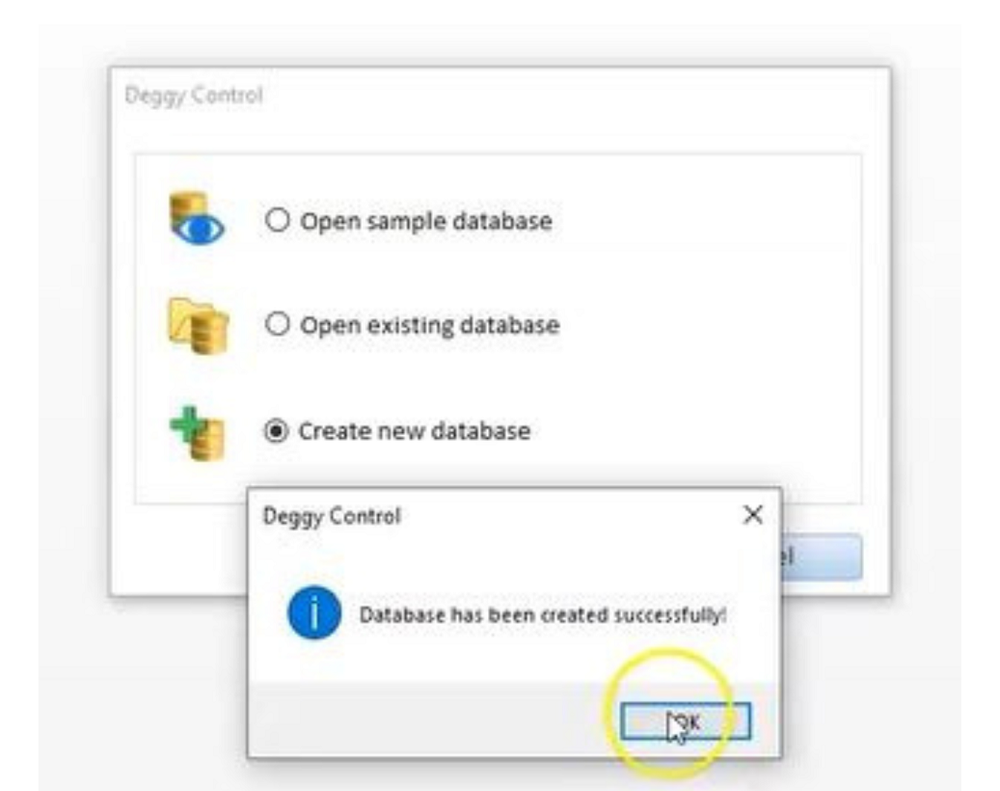
- Deggy Control database selection pop-up will appear
- New installations should choose 'Create New Database'
ATTENTION: Clients who have an existing system will already have a database. Make sure to select 'Open Existing Database' after the software is installed and if it asks which database to open. ---- If Deggy Control opens to the dashboard (main menu) without asking for the database, make sure your data and registers are present before downloading data. Check Downloads menu and Registers/Buttons menu.
- Save the database location on your computer. It is recommended to maintain the default location, which is in the C Drive under a folder named "DeggyData".
- Once the database file is created and saved click 'OK'
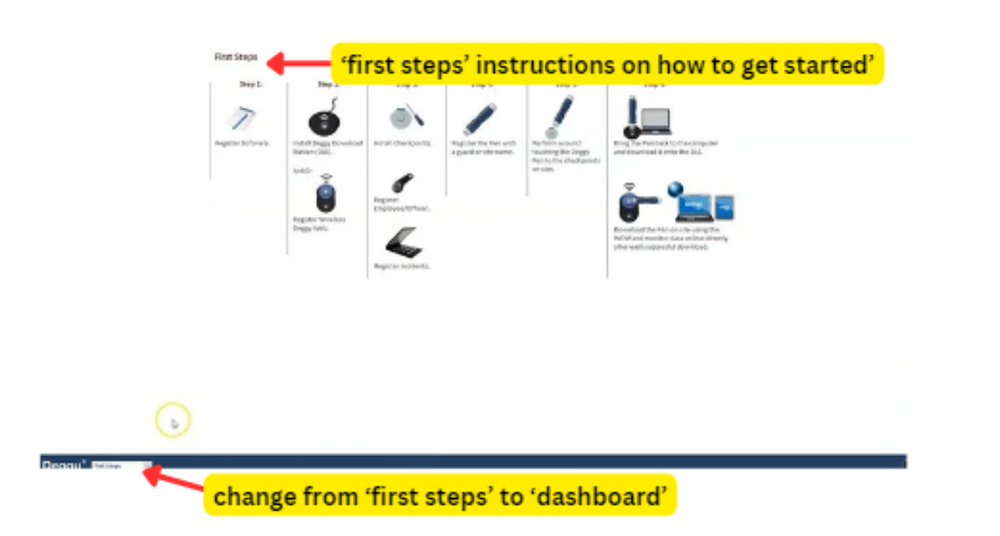
- The software will open to the 'First Steps' view which gives instructions on how to setup and register the system. These instructions are limited and it is recommended to use the Help Center for full detailed instructions.
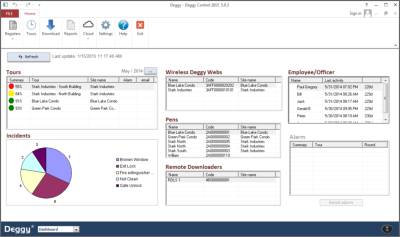
- At the bottom of the screen you may switch the 'First Steps' view to the 'Dashboard' view.
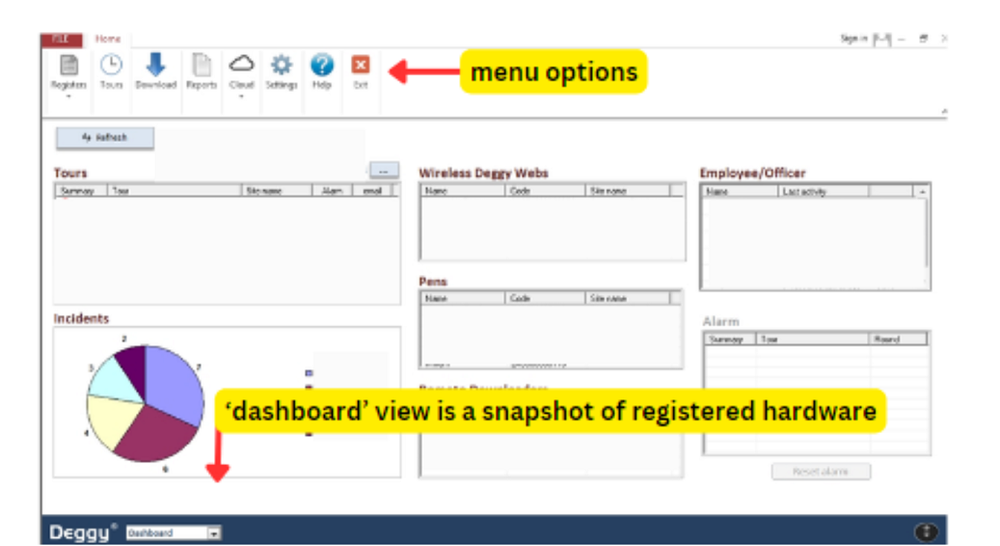
- The 'Dashboard' view is a snapshot of the registered hardware and tour schedules. This is not a menu, do not click on the sections.
- Menu Options are located at the top under the 'Home' tab. If the tab is not open and does not stay open, click on Home to open options, go to the far right and click on the small thumbtack icon to lock menu. Locking the menu options is recommended.
Instructions: Register Company & Sites
Register company and site(s) on Deggy Control software for full accessibility to software and reporting options.Register SoftwareRegistering your software is a way to authenticate the installation.
Steps
- Open Deggy Control
- Go to 'Home’ tab (if the Home tab isn't visible, select it, go to far right and click on the push pin icon to lock it in place)
- Click ‘Settings’ - Select ‘Account’
- Enter your company information - Click ‘Save’
Enter the company name which will be associated to the site(s) that will be registered in the next step.
Steps
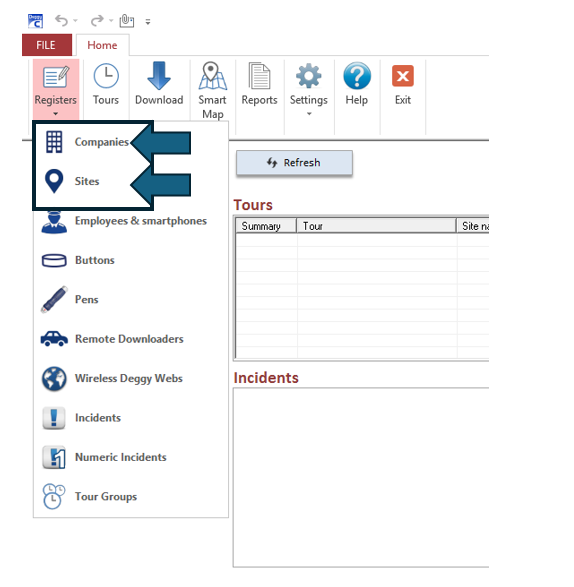
- Click 'Registers' - Select 'Companies' - registered companies listed
- Click 'New' enter company information - Click 'Save'
- To add additional companies to list - Click 'New'
- To change existing company - Click 'Edit'
Enter the site(s) name(s) where the Buttons will be located.
Steps
- Click 'Registers' menu - Select 'Sites' - registered site locations (addresses) listed
- Click 'New' to add Site, enter name
- Click drop-down to select 'Company'
- Enter phone, contact, email (optional)
- and address; Click 'Get Time Zone' for accurate Smart Map function, Click 'Save' (Smart Map Online Only)